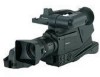
Panasonic AG DVC20 Dv Camcorder
Panasonic AG DVC20 - Camcorder - 10 x Optical Zoom Manual
 |
UPC - 791871302958
View all Panasonic AG DVC20 manuals
Add to My Manuals
Save this manual to your list of manuals |
Panasonic AG DVC20 manual content summary:
- Panasonic AG DVC20 | Dv Camcorder - Page 1
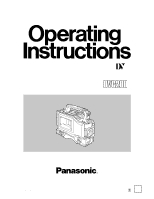
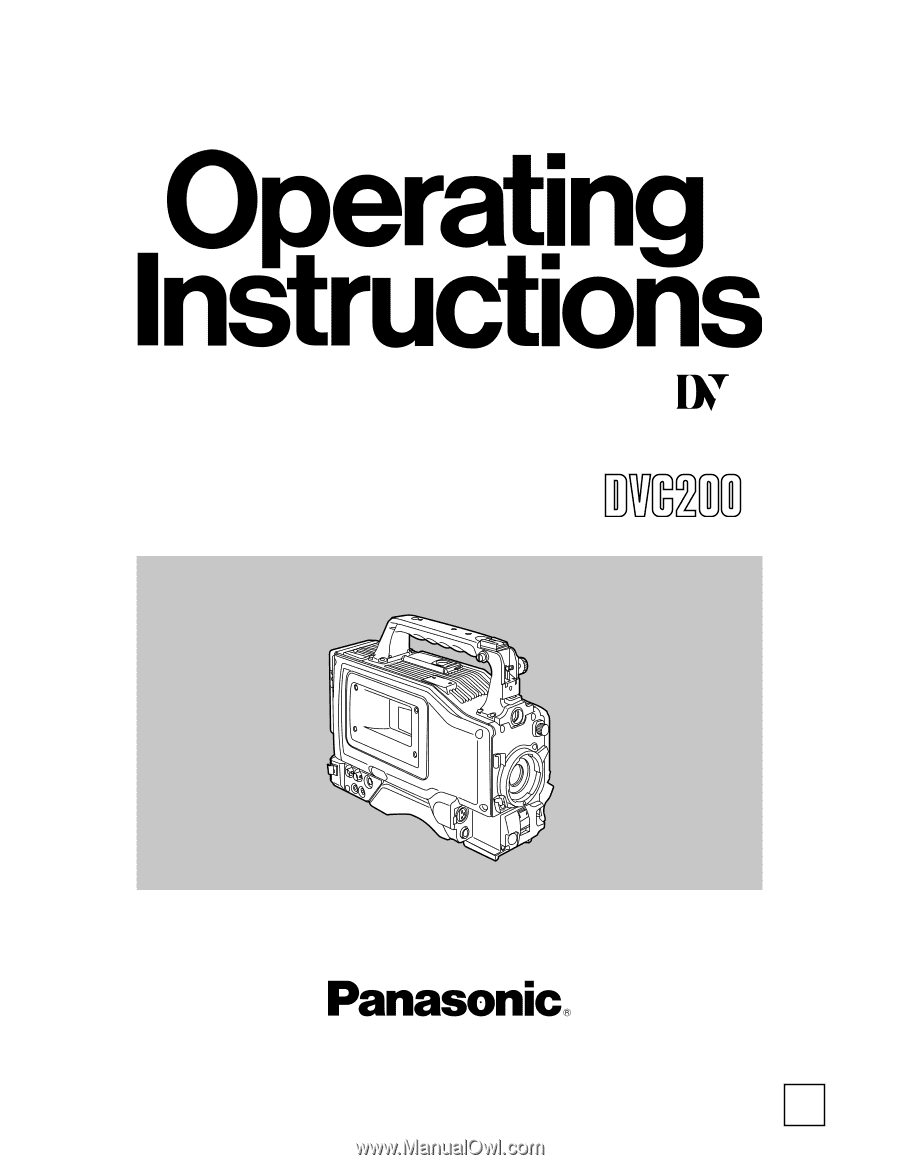
NTSC Digital Video Camera Recorder AG- P Before attempting to connect, operate or adjust this product, please read these instructions completely. Printed in Japan VQT9277-2 P F0301T2051 @ - Panasonic AG DVC20 | Dv Camcorder - Page 2
with the instruction manual, may cause harmful interference to radio communications. Operation of this equipment in a residential area is likely to cause harmful interference in which case the user will be required to correct the interference at his own expense. Replace battery with part No. CR2032 - Panasonic AG DVC20 | Dv Camcorder - Page 3
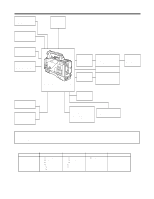
supply (with the AJ-B75 AC adapter 12 Attaching the lens 12 Mounting the unit on a tripod 13 Detaching the unit from the tripod attachment ......13 Attaching the viewfinder and microphone 13 Attaching the shoulder belt (optional accessory) ..13 Setting the camera ID 14 Setting the date and - Panasonic AG DVC20 | Dv Camcorder - Page 4
standard accessory. These enable hookup with other DV components and DV nonlinear devices. The battery packs made by Anton Bauer and battery systems made by other companies are all supported. ≥ Other features Frame-to-frame continuity Simply by pressing the VTR START button or VTR button on the lens - Panasonic AG DVC20 | Dv Camcorder - Page 5
Mic holder: AJ-MH700 Lens (bayonet type): FUJINON/CANON Rain cover: SHAN-RC700 Soft carrying case: AJ-SC900 Battery case: AU-M402H Battery case/holder Digital Video Camera Recorder AG-DVC200 AC adapter: AJ-B75 Panasonic batteries: AU-BP402 AJ-BP490 Anton Bauer batteries Sony batteries: BP-90 BP - Panasonic AG DVC20 | Dv Camcorder - Page 6
Parts so that the battery will supply the viewfinder lights up. - Panasonic AG DVC20 | Dv Camcorder - Page 7
OFF. ON or OFF can be set for supplying the phantom power of the front microphone using "FRONT MIC POWER" on the sub-menu screen. @ FULL AUTO lamp This lights up when FULL AUTO shooting is being performed. I Backup battery compartment For further details on replacing the backup - Panasonic AG DVC20 | Dv Camcorder - Page 8
or stops the video recording. 7 LENS jack (12-pin) The connecting cord of the lens is connected to this jack. For further details on the lenses that can be used, refer to the operating instructions of the lenses concerned. 8 MIC IN (mic input) jack (XLR, 3-pin) The accessory microphone is connected - Panasonic AG DVC20 | Dv Camcorder - Page 9
AC adapter is connected here, power is automatically supplied from the external source. 3 AUDIO IN CH1, CH2 (audio input channel 1, 2) jacks (XLR, 3-pin) An external microphone or line input signals are connected to these jacks. 4 DV I/F connector (complying with IEEE 1394 standard) A digital video - Panasonic AG DVC20 | Dv Camcorder - Page 10
or AJ-BP490 battery pack made by Panasonic Recharge the battery pack using the battery charger specifically designed for each individual battery pack. For the charging time and other details, refer to the operating instructions of the battery charger used. 1 Remove the battery holder. Disconnect - Panasonic AG DVC20 | Dv Camcorder - Page 11
and other details, refer to the operating instructions of the battery charger used. 1 Remove the battery holder. Refer to step 1 on page 10. 2 Attach the battery made by Sony to the unit. Battery case 2 Lighting control switch 4 Cover A battery holder made by Anton Bauer is equipped - Panasonic AG DVC20 | Dv Camcorder - Page 12
DC input socket 2 Fit the center mark on the lens into the center cutout on the top of the lens mount, and attach the lens. Mark AC adapter ≥AJ-B75 (optional accessory) 2 Turn on the AC adapter's power. 3 Set the unit's POWER switch to ON. When an AC adapter other than the AJ-B75 is to be used - Panasonic AG DVC20 | Dv Camcorder - Page 13
the viewfinder and microphone, refer to the operating instructions of the viewfinder. Attaching the shoulder belt (optional accessory) Shoulder belt is pressed. To disengage the shoulder belt, open the tabs of the attachment parts, and disengage. The tab opens when it is pressed. Check that - Panasonic AG DVC20 | Dv Camcorder - Page 14
, and the unit's current status is displayed. To change the ; back to >, press the JOG dial button when the ; is above the colon (:). The camera ID input above will be recorded at the same time as the color bar signals. 3 Turn the JOG dial button to change the setting, and - Panasonic AG DVC20 | Dv Camcorder - Page 15
" to USER. 2 Proceed with the image settings. 1 Shoot a piece of paper with no color unevenness. 2 Set the lens iris to manual, and adjust it so that a zebra pattern fills the whole screen. Check that the lens iris is between f/4 and f/11. ≥Flicker tends to occur under fluorescent lights - Panasonic AG DVC20 | Dv Camcorder - Page 16
instructions of the viewfinder available as an optional accessory.) 1 REC (record) lamp This lights battery) lamp This starts flashing several minutes before the battery voltage drops to the level where the battery can no longer be used, and it remains lighted when the battery user MANUAL - Panasonic AG DVC20 | Dv Camcorder - Page 17
display to appear Displayed when the lens extender is being used. 2 INTERVAL SHUTTER 1/¢¢¢¢ IRIS MODE ¢¢¢¢ FULL AUTO ON FULL AUTO OFF SCENE FILE USER SCENE FILE 1 SCENE FILE 2 SCENE FILE 3 SCENE FILE 4 temp LOW color temp HIGH LEVEL OVER LOW LIGHT UNSTABLE CONDITION TIME OVER 6 IRIS MODE switch - Panasonic AG DVC20 | Dv Camcorder - Page 18
LIGHT warning display : AUDIO sampling frequency display 1/¢¢.¢ 1/100 - 1/2000 SUPER V LOW LIGHT lens cable has not been connected. Displayed when the lens iris has been opened. Indicates the lens iris value. Displayed when the lens how much battery charge remains. When the battery still has - Panasonic AG DVC20 | Dv Camcorder - Page 19
when a VF DISPLAY setting has been selected. This is to enable the user to differentiate between the screen displays when "TIME+DATE" (see page 36 When the tape reaches the end, "= END" lights. When recording is inhibited, "= INH" lights. This lights during an INDEX search. A positive number denotes - Panasonic AG DVC20 | Dv Camcorder - Page 20
vertical sync frequency (approx. 60 Hz) and the lighting frequency (50 Hz) will be subject to mutual /AUTO KNEE switch GAIN selector switch 3 Adjust the lens iris. 4 Push the AUTO W/B BAL switch to adjustment, consult your dealer or a Panasonic Service Center representative. If there - Panasonic AG DVC20 | Dv Camcorder - Page 21
shallower the depth of focus. ≥When SUPER V has been selected, the camera's sensitivity will be halved. Setting the shutter mode and speed ≥In the setting appears in the area of the viewfinder screen where messages notifying the user of changes made to settings appear. 2 Press the SHUTTER switch to - Panasonic AG DVC20 | Dv Camcorder - Page 22
setting the user's bit, memos (date, time) and other information consisting of up to 8 hexadecimal digits can be recorded on the sub-code track. 1 Set the COUNTER/TC/UB switch to UB. 2 Set the TCG switch to SET. "UBG now appears in the viewfinder. Select a number for the flashing part by rotating - Panasonic AG DVC20 | Dv Camcorder - Page 23
file function Editing scene filenames The values of the camera setup tailored to different shooting conditions can be stored the memory before the unit was shipped from the factory. USER: FACTORY (user file) F1 : FLUO. (fluorescent light file) This file's settings establish the mode which is best - Panasonic AG DVC20 | Dv Camcorder - Page 24
JOG dial button is pressed, the following message is displayed. 3< SCENE FILE > NAME EDIT USER:TARO -------- FILE NAME USER:FACTORY F1:FLUO. F2:SPARKLNG F3:COOL F4:RETRO STD:FACTORY # WRITE(USER) :NO INIT (USER) :READY 11 Rotate the JOG dial button to select YES, and press the JOG dial - Panasonic AG DVC20 | Dv Camcorder - Page 25
when making changes to a USER file. Setting item - Panasonic AG DVC20 | Dv Camcorder - Page 26
to CAM. Set the GAIN selector switch to the setting that supports the subject brightness. Select the desired shutter speed as required. ( on the above switches, refer to "Parts and their functions" (pages 6 to 8). 4 Point the camera at the subject, and adjust the lens iris, focus and zoom. 5 Press - Panasonic AG DVC20 | Dv Camcorder - Page 27
supported. (See page 35) ≥When the exterior microphone is selected and phantom mic (+48 V) needs to be supported levels of the CH1 and CH2 sound manually, proceed as follows: 1 Set the 2 ATW F5.6 0dB SPOT QUICK FOCUS FL1 1/100 LOW LIGHT DJan-01-01 23:59:00 48K CH1 CH2 ========= ¢¢¢min - Panasonic AG DVC20 | Dv Camcorder - Page 28
be monitored from the VIDEO OUT connector. Rec review When recording is temporarily stopped and the RET button on the lens is pressed, the last pressed, interval shooting starts, and the flashing " i " changes to a lighted "i REC." When the first interval shooting is completed and the rec pause mode - Panasonic AG DVC20 | Dv Camcorder - Page 29
IN/OUT screen. (See page 34) The pictures and sound of the external video component with the DV connector can now be recorded on the unit. AG-DVC200 Video component with DV connector DV/IF connector DV cable To DV connector Connection to a PC capable of non-linear editing By connecting the unit - Panasonic AG DVC20 | Dv Camcorder - Page 30
appears at the submenu title. I Example: Rotate the JOG dial button. NEXT¢¢¢¢ MAIN 2/2 ¢¢¢¢ #MARKER/ZEBRA.. VF DISPLAY 1/2.. VF DISPLAY 2/2.. ! LED.. GENLOCK.. CAMERA ID.. TIME/DATE.. DIAGNOSTIC.. 3 Rotate the JOG dial button to move the cursor to the sub-menu item to be changed, and press - Panasonic AG DVC20 | Dv Camcorder - Page 31
/WRITE SW MODE VIDEO IN/OUT VTR FUNCTION VTR OPTION BATTERY MIC/AUDIO SAFETY ZONE CENTER MARK ZEBRA1 DETECT ZEBRA2 DETECT ZEBRA2 VF DTL SHUTTER SPEED IRIS (SPOT, BACK) AUTO/SCENE NAME LOW LIGHT TIME/DATE EXTENDER AUDIO SAMPLING H PHASE SC PHASE COARSE SC PHASE FINE CAMERA ID ID LENS SHADING FILTER - Panasonic AG DVC20 | Dv Camcorder - Page 32
SCENE ¢¢¢¢ F1:FLUO. SCENE FILE.. IRIS GAMMA.. COLOR/SKIN TONE.. PROCESS.. ADDTIONAL PROCESS.. SCENE FILE Item NAME EDIT WRITE INIT Setting options USER F1 - F4 STD Remarks For editing scene filenames. For further details, refer to "Editing scene filenames" (page 23). For writing a scene filename - Panasonic AG DVC20 | Dv Camcorder - Page 33
. A: Standard setting B: For shooting under fluorescent lighting. ADJ:Changes to the MATRIX value set for ¢¢¢¢ DATA READ/WRITE.. SW MODE.. VIDEO IN/OUT.. VTR FUNCTION.. VTR OPTION.. BATTERY.. MIC/AUDIO.. LENS SHADING.. DATA READ/WRITE Item FILE user files. " " indicates the factory setting. 33 - Panasonic AG DVC20 | Dv Camcorder - Page 34
the date and time onto the camera's video recording. REC: For superimposed NO- BATTERY For selecting what is to be recorded in the user's bit area. Item Setting options Remarks USER: User back tally lamp is to light. ON: The lamp lights. OFF:The lamp does not light. TYPE A NEAR END TYPE - Panasonic AG DVC20 | Dv Camcorder - Page 35
is supplied to the front microphone. OFF:Phantom power is not supplied to the front microphone. For selecting the camera mic input level. For k 6.6BRM4 C: S14 k 7.3BRM (For AG-DVC200L) USER:Lens other than A, B or C For performing shading compensation for the USER lens. MAIN menu 2 of 2 (main menu) - Panasonic AG DVC20 | Dv Camcorder - Page 36
(F Number) ZOOM TCG LEVEL METER TAPE REMAIN BATTERY Setting options Remarks ON For setting the filter position ON OFF AUTO/SCENE ON NAME OFF LOW LIGHT ON OFF TIME/DATE TIME DATE TIME+ for this item will be superimposed on the camera's video recording. For setting the EXT display ON or - Panasonic AG DVC20 | Dv Camcorder - Page 37
. ON: Displayed OFF: Not displayed For setting the !LED display ON or OFF when SUPER V is ON. ON: Displayed OFF: Not displayed GENLOCK CAMERA ID Item CAMERA ID Setting options ID ID+ (TIME+ DATE) OFF Remarks For displaying and recording the ID data when color bar signals are supplied. ID - Panasonic AG DVC20 | Dv Camcorder - Page 38
trouble has been detected, the power is turned off. Check the error code (see page 40) shown in the viewfinder and consult your nearest service recording). The RF display flashes (during recording). The video heads are clogged. This problem occurs in the recording system. The cleaning roller is - Panasonic AG DVC20 | Dv Camcorder - Page 39
END WARNING lamp Tally lamp Viewfinder Description of warning VTR unit operation Remedial action Lights. Flashes once per second. The BATT END display flashes. The battery is flat. All operations are stopped, and the tape is unloaded. Only the cassette tape eject operation is acknowledged. Replace - Panasonic AG DVC20 | Dv Camcorder - Page 40
firmly into place until a click is heard. For details on the battery position, refer to "Parts and their functions" (pages 6 and 7). Cleaning the heads Use the AY-DVCL cleaning cassette as necessary to clean the heads. Since the video heads may be damaged if the proper directions for using cleaning - Panasonic AG DVC20 | Dv Camcorder - Page 41
kg) (main unit only) [CAMERA UNIT] Pickup device: System: Digital signal processing: Horizontal drive frequency: Programmable gain: Shutter speed Lens mount: Sensitivity: Minimum subject brightness: Video S/N ratio: Horizontal resolution: Registration: Geometric distortion: 1/2-inch IT type CCD - Panasonic AG DVC20 | Dv Camcorder - Page 42
CAMERA OUT (BNC): VIDEO OUT (BNC): S-VIDEO OUT (S connector) AUDIO OUT CH1/CH2 (RCA k 2): PHONE OUT (stereo mini jack): Other DV 1394 (4 pins): DC IN (XLR, 4 pins, male): DC OUT (4 pins): LENS , -60 dBu menu-selectable MIC+48V: Phantom +48V supported (menu-selectable) 1.0 VP-P, 75 ≠ 1.0 V[p-p], 75 - Panasonic AG DVC20 | Dv Camcorder - Page 43
products Battery packs: Battery chargers: Battery case: AC adapter: AU-BP402, AJ-BP490 AJ-B425 (for charging the AU-BP402 battery pack) AJ-B450 (for charging the AU-BP402 and the AJ-BP490 battery pack) AU-M402H AJ-B75 Audio products Microphone kit: Microphone holder: Wireless mic receiver: Camera - Panasonic AG DVC20 | Dv Camcorder - Page 44
800) 334-4881/24 Hr. Fax (800) 334-4880 Emergency after hour parts orders (800) 334-4881 TECHNICAL SUPPORT: Emergency 24 Hour Service (800) 222-0741 Panasonic Canada Inc. 5770 Ambler Drive, Mississauga, Ontario L4W 2T3 (905) 624-5010 Panasonic de Mexico S.A. de C.V. Av angel Urraza Num. 1209 Col. de
-
 1
1 -
 2
2 -
 3
3 -
 4
4 -
 5
5 -
 6
6 -
 7
7 -
8
-
9
-
10
-
11
-
12
-
13
-
14
-
15
-
16
-
17
-
18
-
19
-
20
-
21
-
22
-
23
-
24
-
25
-
26
-
27
-
28
-
29
-
30
-
31
-
32
-
33
-
34
-
35
-
36
-
37
-
38
-
39
-
40
-
41
-
42
-
43
-
44
 |
 |
Before attempting to connect, operate or adjust this product, please read these instructions completely.
AG-
P
F0301T2051
@
Printed in Japan
VQT9277-2
P
Digital Video Camera Recorder
NTSC