Panasonic AG DVC20 Dv Camcorder - Page 15
Lens adjustments and checks - instruction manual
 |
UPC - 791871302958
View all Panasonic AG DVC20 manuals
Add to My Manuals
Save this manual to your list of manuals |
Page 15 highlights
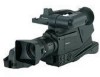
Lens adjustments and checks Flange back adjustment The flange back (distance from the lens mounting surface to the image formation surface) is adjusted when a subject cannot be brought into focus precisely using either the telephoto or the wide angle positions when performing zoom operations. Once the flange back has been adjusted, it need not be re-adjusted unless the lens is replaced. For details on the adjustment method and lens positions, refer to the operating instructions of the lens concerned. White shading check This unit enables the fixed data supporting three types of lens and the data supporting any desired adjustments to be used for white shading compensation. This data can be selected using LENS SHADING on the sub-menu (see page 35). First, check that the type of lens used and the settings match. The fixed data settings are as follows: Type A: Data for S18 k 6.7BERM4 (etc.) lenses. Type B: Data for YH18 k 6.7KRS (etc.) lenses. Type C: Data for S14 k 7.3BRM lens. If the lens to be used does not correspond to any of these types, proceed to adjust the white shading described below by performing menu operations. White shading adjustment Coloring may occur in the vertical direction near the open setting of the lens iris even when the white shading has been adjusted. This phenomenon is a characteristic inherent to lenses and optical systems, and it is not indicative of a failure. 1 Proceed with the camera settings for the adjustment. 1 Mount the lens on the camera. Do not forget to attach the lens cable. 2 Set the electronic shutter to OFF and the gain to L (0 dB). 3 If the lens comes with an extender, disengage the extender function. 4 Proceed with the menu operation (page 30) to open the sub- menu screen, and set "LENS SELECT" to USER. 2 Proceed with the image settings. 1 Shoot a piece of paper with no color unevenness. 2 Set the lens iris to manual, and adjust it so that a zebra pattern fills the whole screen. Check that the lens iris is between f/4 and f/11. ≥Flicker tends to occur under fluorescent lights, mercury lamps and other such lighting conditions. Use sunlight, halogen lamps or a light source which rarely give rises to flicker. ≥If there is unevenness in the lighting, the zebra pattern will no longer appear on some parts of the screen. In this situation, adjust the lighting position, etc. ≥Adjust the lighting position, etc. also when the lens iris is not between f/4 and f/11. ≥The electronic shutter must be left at the OFF setting. 3 Adjust the white balance and black balance. 1 Set the WHITE BAL selector switch to A or B, and use the AUTO W/B BAL switch to execute the automatic white balance adjustment (AWB). 2 Use the AUTO W/B BAL switch to execute the automatic black balance adjustment (ABB). 3 Once again, use the AUTO W/B BAL switch to execute the automatic white balance adjustment (AWB). 4 Repeat the operation in step 2-2. 5 Proceed with the white shading adjustment. 1 Proceed with the menu operation (page 30), and open the sub-menu LENS SHADING screen. 2 Turn the JOG dial button to align the cursor with LENS SELECT, and press the button. Then turn the JOG dial button further to align the cursor with USER, and press the button to select this item. 3 Use the JOG dial button to align the cursor with SHADING (USER), and select this item. ACTIVE appears on the screen to indicate that the white shading is being automatically adjusted. The adjustment is completed when the ACTIVE display is cleared and OK appears. 4 Press the MENU button to close the menu screen. SHUTTER switch AWB memory selector switch GAIN: L (0 dB) AUTO W/B BAL MENU button switch JOG dial button 6 If the lens comes with an extender, engage the extender function, and repeat steps 2 through 5. 15
-
 1
1 -
2
-
3
-
4
-
5
-
6
-
7
-
8
-
9
-
 10
10 -
 11
11 -
 12
12 -
 13
13 -
 14
14 -
 15
15 -
 16
16 -
 17
17 -
 18
18 -
 19
19 -
 20
20 -
21
-
22
-
23
-
24
-
25
-
26
-
27
-
28
-
29
-
30
-
31
-
32
-
33
-
34
-
35
-
36
-
37
-
38
-
39
-
40
-
41
-
42
-
43
-
44
 |
 |
