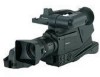
Panasonic AG DVC20 Dv Camcorder - Page 14
Setting the camera ID, Setting the date and time
 |
UPC - 791871302958
View all Panasonic AG DVC20 manuals
Add to My Manuals
Save this manual to your list of manuals |
Page 14 highlights
Preparation Setting the camera ID The camera ID is set on the screen. Up to 12 alphanumerics, symbols and spaces can be used. The camera ID does not appear while the setting menu is displayed even when color bar signals are output. 1 Proceed with the sub-menu operation (page 30), and open the screen. #3< CAMERA ID > CAMERA ID:ID ID 2 Turn the JOG dial button to move the arrow (cursor) to the ID item. 3< CAMERA ID > CAMERA ID:ID v # ID 3 When the JOG dial button is pressed, the arrow (cursor) flashes to signal that the input mode has been established. Setting the date and time 1 Proceed with the sub-menu operation (page 37) to open the screen. #3 < TIME/DATE > YEAR MONTH DAY HOUR MINUTE :01 :01 :01 :00 :00 TIME/DATE SET:READY 2 Turn the JOG dial button to select the item to be changed, and press the JOG dial button. 3< TIME/DATE > YEAR MONTH DAY HOUR # MINUTE :01 :01 :01 :00 :00 TIME/DATE SET:READY 4 Keep turning the JOG dial button until the character to be set appears. When the button is turned, the character display is switched in the following sequence: Space: ∏ 7 Letters of the alphabet: A through Z 7 Numbers: 0 through 9 7 Symbols 5 Press the JOG dial button to enter the character. 6 Turn the JOG dial button to move the arrow (cursor) to the next position (on the right), and repeat steps 3, 4 and 5 to enter the remaining characters. 7 Press the MENU button to end the menu operation. The setting menu is cleared, and the unit's current status is displayed. To change the ; back to >, press the JOG dial button when the ; is above the colon (:). The camera ID input above will be recorded at the same time as the color bar signals. 3 Turn the JOG dial button to change the setting, and then press the button to enter it. 4 When the setting is completed, turn the JOG dial button to select TIME/DATE SET, and press the button. The READY display changes from ACTIVE to OK, and the clock function starts operating. 3< TIME/DATE > YEAR MONTH DAY HOUR MINUTE :01 :01 :01 :00 :00 # TIME/DATE SET:OK 5 Press the MENU button to end the menu operation. The setting menu is cleared, and the unit's current status is displayed. ≥The seconds cannot be set. The time always starts from zero seconds. ≥At normal temperature with the power off, the clock will have an accuracy of ±30 seconds/month. When accurate time is necessary, check the time with the power on and reset to the correct time. 14
-
 1
1 -
2
-
3
-
4
-
5
-
6
-
7
-
8
-
 9
9 -
 10
10 -
 11
11 -
 12
12 -
 13
13 -
 14
14 -
 15
15 -
 16
16 -
 17
17 -
 18
18 -
 19
19 -
20
-
21
-
22
-
23
-
24
-
25
-
26
-
27
-
28
-
29
-
30
-
31
-
32
-
33
-
34
-
35
-
36
-
37
-
38
-
39
-
40
-
41
-
42
-
43
-
44
 |
 |
