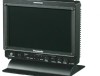
Panasonic BT-LH910G Operating Instructions - Page 15
Using an external DC power supply, DC IN socket
 |
View all Panasonic BT-LH910G manuals
Add to My Manuals
Save this manual to your list of manuals |
Page 15 highlights
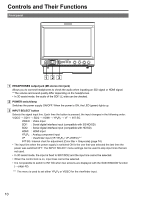
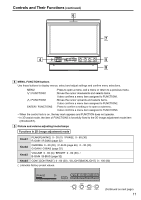
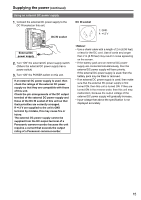
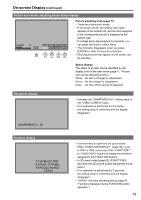
Supplying the power (continued) Using an external DC power supply 111Connect the external DC power supply to the DC IN socket on this unit. DC IN socket DC IN socket 1 4 23 1: GND 4: +12 V External DC power supply 222Turn "ON" the external DC power supply switch. (Where the external DC power supply has a power switch) 333Turn "ON" the POWER switch on this unit. If an external DC power supply is used, then check the ratings of the external DC power supply so that they are compatible with those of this unit. Check the pin arrangements of the DC output terminal of the external DC power supply and those of the DC IN socket of this unit so that their polarities are correctly arranged. If +12 V are supplied to the unit's GND terminal by mistake, this may cause fire or injury. The external DC power supply cannot be supplied from the DC output terminal of a Panasonic camera-recorder because the unit requires a current that exceeds the output rating of a Panasonic camera-recorder. •• Use a shield cable with a length of 2 m (6.56 feet) or less for the DC cord. Use of cords any longer than 2 m (6.56 feet) may result in noise appearing on the screen. •• If the battery pack and an external DC power supply are connected simultaneously, then the external DC power supply will have priority. If the external DC power supply is used, then the battery pack may be fitted or removed. •• If an external DC power supply is used, then make sure that the external DC power supply is first turned ON, then this unit is turned ON. If they are turned ON in the reverse order, then this unit may malfunction, because the output voltage of the external DC power supply will gradually increase. •• Input voltage that above the specification is not displayed accurately. 15
-
 1
1 -
2
-
3
-
4
-
5
-
6
-
7
-
8
-
9
-
 10
10 -
 11
11 -
 12
12 -
 13
13 -
 14
14 -
 15
15 -
 16
16 -
 17
17 -
 18
18 -
 19
19 -
 20
20 -
21
-
22
-
23
-
24
-
25
-
26
-
27
-
28
-
29
-
30
-
31
-
32
-
33
-
34
-
35
-
36
-
37
-
38
-
39
-
40
-
41
-
42
-
43
-
44
-
45
-
46
-
47
-
48
-
49
-
50
-
51
-
52
-
53
-
54
-
55
-
56
-
57
-
58
-
59
-
60
-
61
-
62
-
63
-
64
-
65
-
66
-
67
-
68
-
69
-
70
-
71
-
72
-
73
-
74
-
75
-
76
 |
 |
