Panasonic KXFLM551 Operating Instructions - Page 49
SCANNING (PC), Using the fax machine as a scanner
 |
View all Panasonic KXFLM551 manuals
Add to My Manuals
Save this manual to your list of manuals |
Page 49 highlights
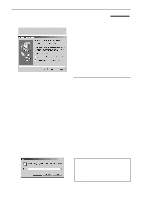
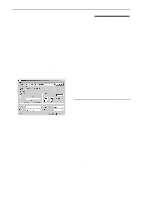
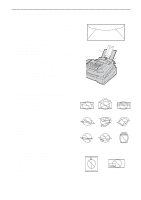
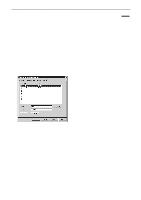
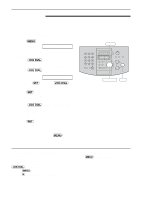
Scanning (PC) Using the fax machine as a scanner! Using Multi-Function Viewer 1 Insert the document (up to 15 pages) FACE DOWN in the fax machine. 2 Start Multi-Function Station. 3 Select [Viewer (Scan)]. q The [Multi-Function Viewer] window will appear. 4 Select [Scan...] from the [File] menu, or click the [Scan] icon in the tool bar. q The [Panasonic FLM551/FLB751 Series] dialog box will appear. 5 If necessary, change the setting of [Scan Configuration], [Custom Scan Settings], [Contrast] and [Paper]. 6 Click [Scan]. q The scanned image will be displayed in the [Multi-Function Viewer] window after scanning. q To save the scanned image, select [Save] from the [File] menu. q To cancel scanning while the document is being scanned, click [Cancel]. Note: q You can display the images which support TIFF, JPEG, PCX, DCX and BMP formats. q You can move, copy and delete a file or page. Readiris OCR software With OCR software, you can convert an image into text data that can be edited with word processor software. Readiris OCR software can be installed when installing Multi-Function Station software. To use this software, click the [OCR] icon in the [Multi-Function Viewer] window or select [Readiris (OCR)] from [Launcher]. For detailed instructions about OCR, select [Help]. Using other applications Multi-Function Station includes a TWAIN compliant scanner driver. You can also scan using other applications that support TWAIN scanning. For example, to scan from Imaging for Windows, proceed as follows. 1 Insert the document (up to 15 pages) FACE DOWN in the fax machine. 2 Start Imaging for Windows. 3 Select [Select Scanner...] (Windows 95/98/Me) / [Select Device...] (Windows 2000) from the [File] menu, then select the [Panasonic FLM551/ FLB751 Series] in the dialog box. 4 Select [Scan New...] (Windows 95/98/Me) / [Acquire Image...] (Windows 2000) from the [File] menu, or click the [Scan New] icon in the tool bar. q The [Panasonic FLM551/FLB751 Series] dialog box will appear. q If the dialog box will not appear, check the connection of the PC and the fax machine. 5 If necessary, change the setting of [Scan Configuration], [Custom Scan Settings], [Contrast] and [Paper]. 6 Click [Scan]. q The scanned image will be displayed in the [Imaging for Windows] window after scanning. q To cancel scanning while the document is being scanned, click [Cancel]. 49
-
 1
1 -
2
-
3
-
4
-
5
-
6
-
7
-
8
-
9
-
10
-
11
-
12
-
13
-
14
-
15
-
16
-
17
-
18
-
19
-
20
-
21
-
22
-
23
-
24
-
25
-
26
-
27
-
28
-
29
-
30
-
31
-
32
-
33
-
34
-
35
-
36
-
37
-
38
-
39
-
40
-
41
-
42
-
43
-
 44
44 -
 45
45 -
 46
46 -
 47
47 -
 48
48 -
 49
49 -
 50
50 -
 51
51 -
 52
52 -
 53
53 -
 54
54 -
55
-
56
-
57
-
58
-
59
-
60
-
61
-
62
-
63
-
64
-
65
-
66
-
67
-
68
-
69
-
70
-
71
-
72
-
73
-
74
-
75
-
76
-
77
-
78
-
79
-
80
 |
 |
