Panasonic KXFLM551 Operating Instructions - Page 53
Dialing Mode, Paper Size, Ringer Pattern, Pc Interface, Remote Tam Act.
 |
View all Panasonic KXFLM551 manuals
Add to My Manuals
Save this manual to your list of manuals |
Page 53 highlights
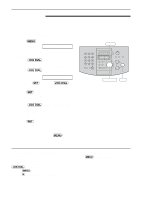
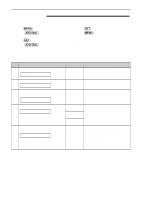
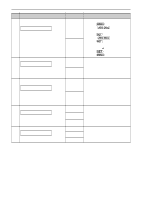
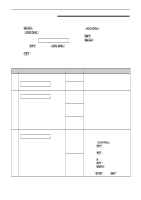
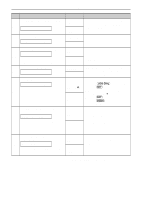
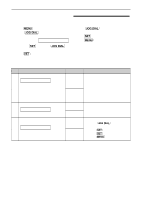
Features Summary Code Feature & Display Securing the remote operation for the answering machine REMOTE TAM ACT. If you are using the unit with an #12 answering machine, activate this feature, and set the remote activation ID to secure the remote operation for the answering machine. Setting the dialing mode DIALING MODE #13 If you cannot dial, change the setting depending on your telephone line service. Selecting the cable type to connect to the PC PC INTERFACE #15 If you use Multi-Function Station, change the setting depending on the cable connected to your computer. Setting the recording paper size PAPER SIZE #16 Settings ON / ID=11 OFF TONE PULSE PARALLEL USB LETTER LEGAL How the unit operates To select "ON" and enter ID: 1. Press p. 2. Rotate n and select this feature. 3. Press w. 4. Rotate n to select "ON". 5. Press w. 6. Enter your ID from 1 to 5 digits, using 0-9, : and #. 7. Press w. 8. Press p. "TONE": For tone dial service. "PULSE": For rotary pulse dial service. "PARALLEL": IEEE1284 compliant parallel cable "USB": USB cable q When the setting is changed, the fax machine adjusts to new setting. Please wait. "LETTER": Letter size paper "LEGAL": Legal size paper "A4": A4 size paper Setting the ringer pattern #17 RINGER PATTERN A4 A You can select the ringer pattern. The selected ringer pattern will sound B during setting. C (The default setting is in bold type.) 53
-
 1
1 -
2
-
3
-
4
-
5
-
6
-
7
-
8
-
9
-
10
-
11
-
12
-
13
-
14
-
15
-
16
-
17
-
18
-
19
-
20
-
21
-
22
-
23
-
24
-
25
-
26
-
27
-
28
-
29
-
30
-
31
-
32
-
33
-
34
-
35
-
36
-
37
-
38
-
39
-
40
-
41
-
42
-
43
-
44
-
45
-
46
-
47
-
 48
48 -
 49
49 -
 50
50 -
 51
51 -
 52
52 -
 53
53 -
 54
54 -
 55
55 -
 56
56 -
 57
57 -
 58
58 -
59
-
60
-
61
-
62
-
63
-
64
-
65
-
66
-
67
-
68
-
69
-
70
-
71
-
72
-
73
-
74
-
75
-
76
-
77
-
78
-
79
-
80
 |
 |
