Panasonic PTDZ8700U PTDS8500U User Guide - Page 82
RS-232C, Selecting items in [EMULATE], About [EMULATE SETTING]
 |
UPC - 885170010963
View all Panasonic PTDZ8700U manuals
Add to My Manuals
Save this manual to your list of manuals |
Page 82 highlights
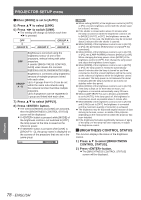
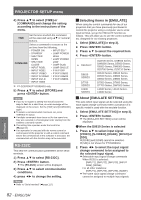
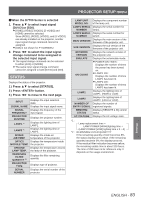
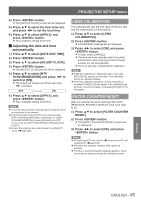
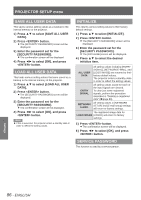
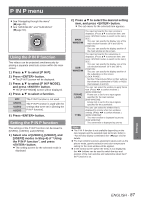
PROJECTOR SETUP menu 4444 Press ▲▼ to select [TIME] or [COMMAND] and change the setting according to the instructions of the menu. TIME Set the time at which the command will be executed using ▲▼ or numeral buttons. Select a command to execute at the set time from the following. •• POWER ON •• INPUT SDI Û •• STANDBY •• LAMP POWER •• SHUTTER HIGH OPEN •• LAMP POWER COMMAND •• SHUTTER CLOSE LOW •• LAMP DUAL •• INPUT RGB1 •• LAMP SINGLE •• INPUT RGB2 •• P IN P OFF •• INPUT VIDEO •• P IN P USER1 •• INPUT S-VIDEO •• P IN P USER2 •• INPUT DVI-D •• P IN P USER3 •• INPUT HDMI ½½½ PT-DZ8700U/PT-DS8500U only 5555 Press ▲▼ to select [STORE] and press button. Note zzIf you try to register a setting that would cause the lamp to flash for a short time, an error message will be displayed on the screen. Set the [TIME] and [COMMAND] again. zzTo delete a command which has been set, press button. zzIf multiple commands have been set for the same time, they are executed in chronological order starting from the smallest command number. zzThe setting time operates under the local time. (Æpage 84) zzIf an operation is executed with the remote control or control panel of the projector or with a control command before the command set in the schedule is executed, the command set with this function may not be executed. RS-232C This sets the communication parameters at the serial terminals. 1111 Press ▲▼ to select [RS-232C]. 2222 Press button. zzThe [RS-232C] screen will be displayed. 3333 Press ▲▼ to select communication conditions. 4444 press ◄► to change the setting. Note zzRefer to "Serial terminal" (Æpage 117). JJSelecting items in [EMULATE] When using the control commands for one of our projectors that you have previously purchased to control this projector using a computer via its serial input terminal, set up the EMULATE function as follows. This will allow you to use the control software etc. designed for our existing projectors. 111 Select [EMULATE] in step 3). 222 Press button. 333 Press ▲▼ to select the required item. 444 Press button. ● DEFAULT D9610 SERIES D7700 SERIES L6500 SERIES DZ8700 Series, DS8500 Series, DW8300 Series, D5000 Series, D6000 Series, DW6300 Series, DZ6700 Series, DZ6710 Series D9510 Series, D9610 Series, D9500 Series, D9600 Series, D8500 Series, D8600 Series D7500 Series, D7600 Series, D7700 Series, DW7000 Series L6500 Series, L6510 Series, L6600 Series JJAbout [EMULATE SETTING] This sets which input signal can be selected using the input signal change command when a projector of a specific model is used with the emulate function. 111 Select [EMULATE SETTING] in step 3). 222 Press button. zzThe [EMULATE SETTING] screen will be displayed. QQWhen the D9610 Series is selected 111 Press ▲▼ to select input signal [VIDEO], [S-VIDEO], [RGB1], [DVI-D] or [SDI]. zz[RGB2] and [HDMI] cannot be selected. zz[SDI] is not shown for PT-DW8300U. 222 Press ◄► to select the input signal change command to be assigned to the selected input signal. zzSelectable input signal change commands When RGB1 is selected: [INPUT1], [INPUT2], [INPUT3], [INPUT RGB], [NONE] For all other instances: [INPUT1], [INPUT2], [INPUT3], [NONE] zzThe same input signal change command cannot be assigned to multiple input signals. Settings 82 - ENGLISH
-
 1
1 -
2
-
3
-
4
-
5
-
6
-
7
-
8
-
9
-
10
-
11
-
12
-
13
-
14
-
15
-
16
-
17
-
18
-
19
-
20
-
21
-
22
-
23
-
24
-
25
-
26
-
27
-
28
-
29
-
30
-
31
-
32
-
33
-
34
-
35
-
36
-
37
-
38
-
39
-
40
-
41
-
42
-
43
-
44
-
45
-
46
-
47
-
48
-
49
-
50
-
51
-
52
-
53
-
54
-
55
-
56
-
57
-
58
-
59
-
60
-
61
-
62
-
63
-
64
-
65
-
66
-
67
-
68
-
69
-
70
-
71
-
72
-
73
-
74
-
75
-
76
-
 77
77 -
 78
78 -
 79
79 -
 80
80 -
 81
81 -
 82
82 -
 83
83 -
 84
84 -
 85
85 -
 86
86 -
 87
87 -
88
-
89
-
90
-
91
-
92
-
93
-
94
-
95
-
96
-
97
-
98
-
99
-
100
-
101
-
102
-
103
-
104
-
105
-
106
-
107
-
108
-
109
-
110
-
111
-
112
-
113
-
114
-
115
-
116
-
117
-
118
-
119
-
120
-
121
-
122
-
123
-
124
-
125
-
126
-
127
-
128
-
129
 |
 |