Pfaff creative 1.5 Manual - Page 46
Download Backup Designs, Connect the Embroidery Unit, creative™ 1.5, 8200creative
 |
View all Pfaff creative 1.5 manuals
Add to My Manuals
Save this manual to your list of manuals |
Page 46 highlights
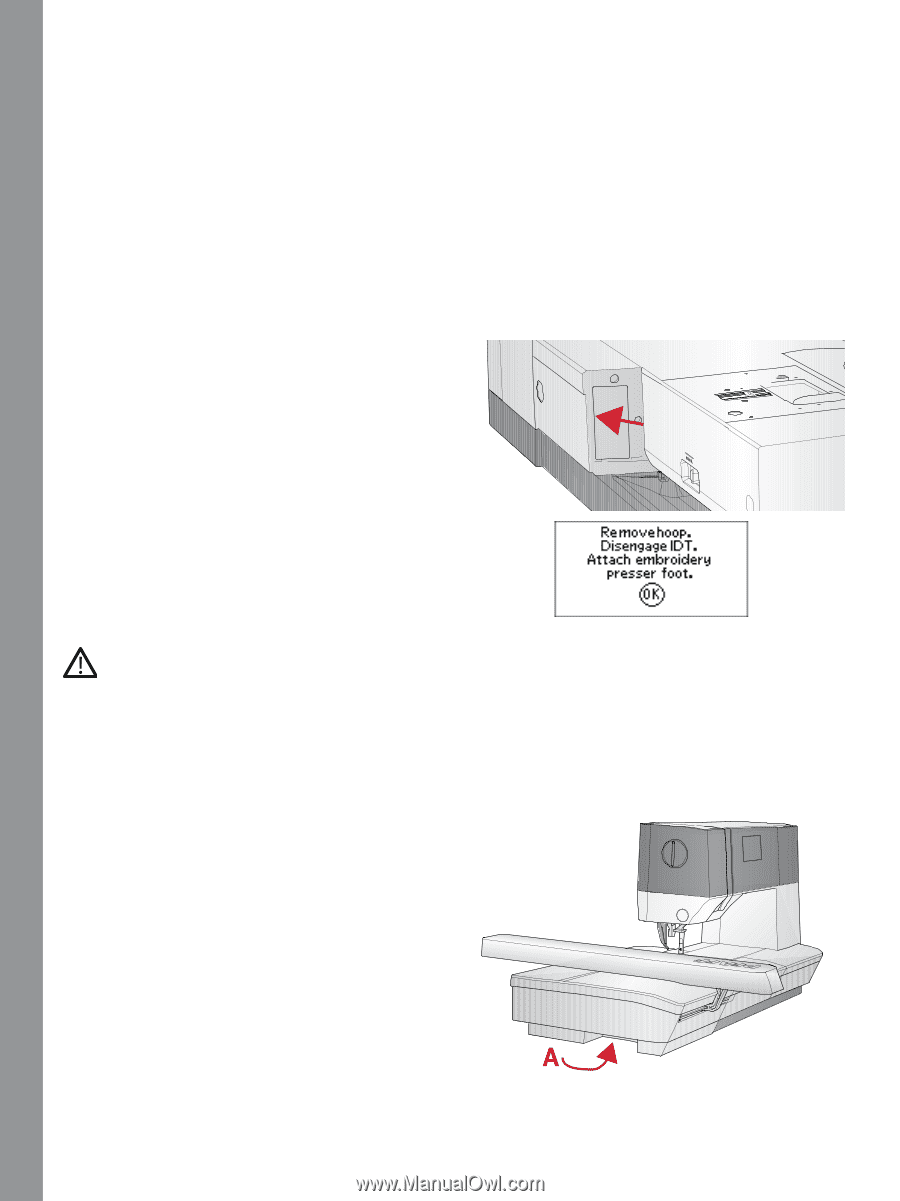
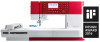
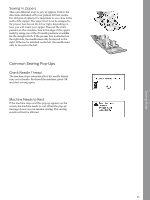
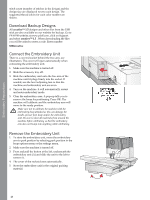
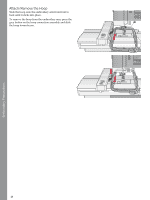
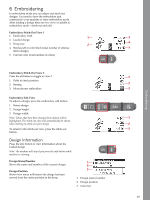
Embroidery Preparations stitch count (number of stitches in the design) and the design size are displayed next to each design. The suggested thread colors for each color number are shown. Download Backup Designs All creative™ 1.5 designs and other files from the USB stick are also available on our website for backup. Go to PFAFF® website at www.pfaff.com, click on Support and select creative™ 1.5 . When downloading the files you will be asked to enter a code. Enter number: 8200creative Connect the Embroidery Unit There is a covered socket behind the free-arm, see illustration. The cover will open automatically when connecting the embroidery unit. 1. Make sure the machine is turned off. 2. Slide the accessory tray off. 3. Slide the embroidery unit onto the free arm of the machine until it plugs firmly into the socket. If needed, use the level adjusting feet so that the machine and embroidery unit are even. 4. Turn on the machine. It will automatically restart and enter embroidery mode. 5. Clear the embroidery area. A pop-up tells you to remove the hoop for positioning. Press OK. The machine will calibrate and the embroidery arm will move to the ready position. Make sure not to calibrate the machine with the embroidery hoop attached as this can damage the needle, presser foot, hoop and/or the embroidery unit. Be sure to clear all materials from around the machine before calibrating so that the embroidery arm does not bump into anything while calibrating. Remove the Embroidery Unit 1. To store the embroidery unit, move the embroidery arm to park position by selecting park position in the hoop options menu or the settings menu. 2. Make sure the machine is turned off. 3. Press and pull the button at the left, underneath the embroidery unit (A) and slide the unit to the left to remove it. 4. The cover of the socket closes automatically. 5. Store the embroidery unit in the original packing material. 46
-
 1
1 -
2
-
3
-
4
-
5
-
6
-
7
-
8
-
9
-
10
-
11
-
12
-
13
-
14
-
15
-
16
-
17
-
18
-
19
-
20
-
21
-
22
-
23
-
24
-
25
-
26
-
27
-
28
-
29
-
30
-
31
-
32
-
33
-
34
-
35
-
36
-
37
-
38
-
39
-
40
-
 41
41 -
 42
42 -
 43
43 -
 44
44 -
 45
45 -
 46
46 -
 47
47 -
 48
48 -
 49
49 -
 50
50 -
 51
51 -
52
-
53
-
54
-
55
-
56
-
57
-
58
-
59
-
60
-
61
-
62
-
63
-
64
-
65
-
66
-
67
-
68
 |
 |