Philips DVDR520H User manual - Page 19
Record on DVD, Timer Record Date/Time Setting
 |
View all Philips DVDR520H manuals
Add to My Manuals
Save this manual to your list of manuals |
Page 19 highlights
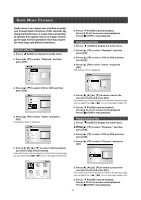
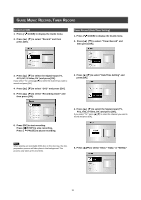
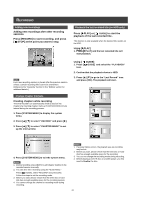
GUIDE MENU: RECORD, TIMER RECORD Record on DVD 1. Press [ GUIDE] to display the Guide menu. 2. Press [p] [q] to select "Record" and then press [OK]. Timer Record (Date/Time Setting) 1. Press [ GUIDE] to display the Guide menu. 2. Press [p] [q] to select "Timer Record" and then press [OK]. 3. Press [p] [q] to select the Signal-Input (TV, AV1,AV2, S-Video, DV ) and press [OK]. If you select "TV," press [p] [q] to select the channel you want to record and press [OK]. 4. Press [p] [q] to select "DVD" and press [OK]. 5. Press [p] [q] to select "Recording mode" and then press [OK]. 3. Press [p] [q] to select "Date/Time Setting" and press [OK]. 6. Press [OK] to start recording. Press [ STOP] to stop recording. Press [ PAUSE] to pause recording. 4. Press [p] [q] to select the Signal-Input (TV, AV1, AV2, S-Video, DV ) and press [OK]. If you select "TV," press [p] [q] to select the channel you want to record and press [OK]. Note: When placing an recordable DVD disc on the disc tray, the disc preparation process will take place in the background. This process only takes a few moments. 5. Press [p][q] to select "Once," "Daily," or "Weekly." 18
-
 1
1 -
2
-
3
-
4
-
5
-
6
-
7
-
8
-
9
-
10
-
11
-
12
-
13
-
 14
14 -
 15
15 -
 16
16 -
 17
17 -
 18
18 -
 19
19 -
 20
20 -
 21
21 -
 22
22 -
 23
23 -
 24
24 -
25
-
26
-
27
-
28
-
29
-
30
-
31
-
32
-
33
-
34
-
35
-
36
-
37
-
38
-
39
-
40
-
41
-
42
-
43
-
44
-
45
-
46
-
47
 |
 |
