Philips DVDR520H User manual - Page 22
Recording
 |
View all Philips DVDR520H manuals
Add to My Manuals
Save this manual to your list of manuals |
Page 22 highlights
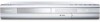
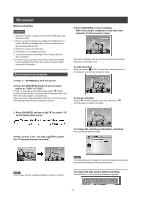
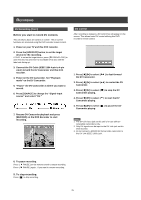
RECORDING Before recording Cautions: 1. This DVD recorder records on both DVD+R/+RW discs and the built-in HDD. 2. Please use recommended recordable DVD+R/RW discs to ensure the best recording quality. Check our Web site for the recommended disc list. 3. DVD+R is a write-once DVD disc. 4. DVD+RW is a re-writable DVD disc. 5. You cannot add new recording to DVD+R discs after the disc is finalized. 6. In some cases, you may not be able to add new recording to the recordable DVD discs that contain contents written on other DVD recorders. Recording televison programs 1. Press [ STANDBY] to turn the unit on. 2. Press the [HDD/DVD] button to set the target device as "HDD" or "DVD." If "DVD" is selected as the target device, press [ OPEN/ CLOSE] to open the disc tray and insert a recordable DVD disc. Press the button again to close the tray. When you insert a new recordable DVD disc, the DVD recorder automatically starts the disc preparation process. 5. Press [RECORD] to start recording. When recording is completed it may take a few moments for the session to close. Recording continues until you stop the recording or when the DVD disc or the HDD is full. To stop recording When you press [ STOP] , it may take a few moments for recording to stop and the session to close. To pause recording Press [ PAUSE] to pause recording, and press [ PAUSE] again to resume recording. 3. Press [SOURCE] and press [p] [q] to select "TV" as the signal-input source. 4. Press [ CH +] [ CH - ] or press [p] [q] to select the TV channel you want to record. To change the recording mode before recording: Press [SYSTEM MENU] button. Notes: You can also use the numbered buttons to select a channel. Notes: The new setting can't change the current recording mode but will be activated during the next recording session. To check the disc status while recording Press [DISPLAY] , the recording information appears. 21
-
 1
1 -
2
-
3
-
4
-
5
-
6
-
7
-
8
-
9
-
10
-
11
-
12
-
13
-
14
-
15
-
16
-
 17
17 -
 18
18 -
 19
19 -
 20
20 -
 21
21 -
 22
22 -
 23
23 -
 24
24 -
 25
25 -
 26
26 -
 27
27 -
28
-
29
-
30
-
31
-
32
-
33
-
34
-
35
-
36
-
37
-
38
-
39
-
40
-
41
-
42
-
43
-
44
-
45
-
46
-
47
 |
 |
