Philips DVDR520H User manual - Page 38
Splitting a title HDD and DVD+RW disc, Merging two titles into one HDD and DVD+RW disc, Setting
 |
View all Philips DVDR520H manuals
Add to My Manuals
Save this manual to your list of manuals |
Page 38 highlights
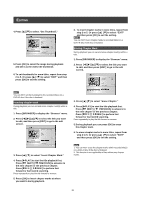
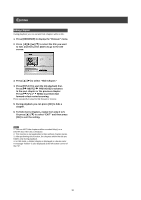
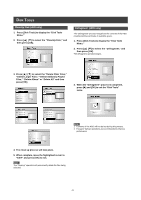
EDITING Splitting a title (HDD and DVD+RW disc) Use this function to divide a title into two distinct sessions on either a disc or the HDD. After splitted, the new title can still be merged again. 1. Press [BROWSER] to display the "Browser" menu. 2. Press [t] [u] [p] [q] to select the title you want to edit and then press [EDIT] to go to the edit screen. 3. Press [uPLAY] to start the title playback first. Press [ NEXT] or [ PREVIOUS] to advance to the next chapter or the previous chapter. Press [ F.F.] or [ REW ] to perform fast forward or fast rewind scanning. 4. Move the highlighted cursor to "split" and press [OK] for confirmation. The title is splitted into two titles at where you press [OK] during playback. 5. When complete, the browser menu will be displayed. 6. To split more titles, repeat from step 2 to 4. Or press [p] [q] to select "EXIT" and then press [OK] to exit the setting. Note: It's not possible to split a video title saved on a DVD+R disc. Merging two titles into one (HDD and DVD+RW disc) Use this function to merge two titles into one. After merged, the new title can still be splitted again. 1. Press [BROWSER] to display the "Browser" menu. 2. Press [t] [u] [p] [q] to select the title you want to edit and then press [EDIT] to go to the edit screen. 3. Press [p] [q] to select "Merge" and then press [OK]. A menu shows all the titles applicable to this function, which are titles with the same recording quality as the title selected, will display. 4. Press [t] [u] [p] [q] to select the title to merge and then press [OK]. Note: 1. It's not possible to merge a video title saved on a DVD+R disc. 2. For video titles saved on a DVD+RW disc, you can only merge the title with its previous/next title only. Erasing a title (HDD and DVD) Use this function to erase a title. Note that once erased, the title(s) cannot be retrieved. 1. Press [BROWSER] to display the "Browser" menu. 2. Use [t] [u] [p] [q] to select the title you want to edit and then press [EDIT] to go to the edit screen. 3. Press [p] [q] to select "Erase." 4. Press [OK] to confirm your setting. The title selected is erased. 5. To erase more titles, repeat from step 2 to 4. Or press [p] [q] to select "EXIT" and then press [OK] to exit the setting. Note: You can NOT erase recorded title(s) on a DVD+R disc if the disc is finalized. Setting a title thumbnail (HDD and DVD) Normally the first picture of a recording is used as the index picture. However, you can choose any picture from the recording as the index picture. 1. Press [BROWSER] to display the "Browser" menu. 2. Use [t] [u] [p] [q] to select the title you want to edit and then press [EDIT] to go to the edit screen. 3. Press [uPLAY] to start the title playback first. Press [ NEXT] or [ PREVIOUS] to advance to the next chapter or the previous chapter. Press [ F.F.] or [ REW ] to perform fast forward or fast rewind scanning. Press repeatedly to play the title forward or reverse. 5. To merge more titles, repeat from step 2 to 4. Or press [p] [q] to select "EXIT" and then press [OK] to exit the setting. 37
-
 1
1 -
2
-
3
-
4
-
5
-
6
-
7
-
8
-
9
-
10
-
11
-
12
-
13
-
14
-
15
-
16
-
17
-
18
-
19
-
20
-
21
-
22
-
23
-
24
-
25
-
26
-
27
-
28
-
29
-
30
-
31
-
32
-
 33
33 -
 34
34 -
 35
35 -
 36
36 -
 37
37 -
 38
38 -
 39
39 -
 40
40 -
 41
41 -
 42
42 -
 43
43 -
44
-
45
-
46
-
47
 |
 |
