Philips LC1241 User Guide - Page 24
Other Settings
 |
View all Philips LC1241 manuals
Add to My Manuals
Save this manual to your list of manuals |
Page 24 highlights
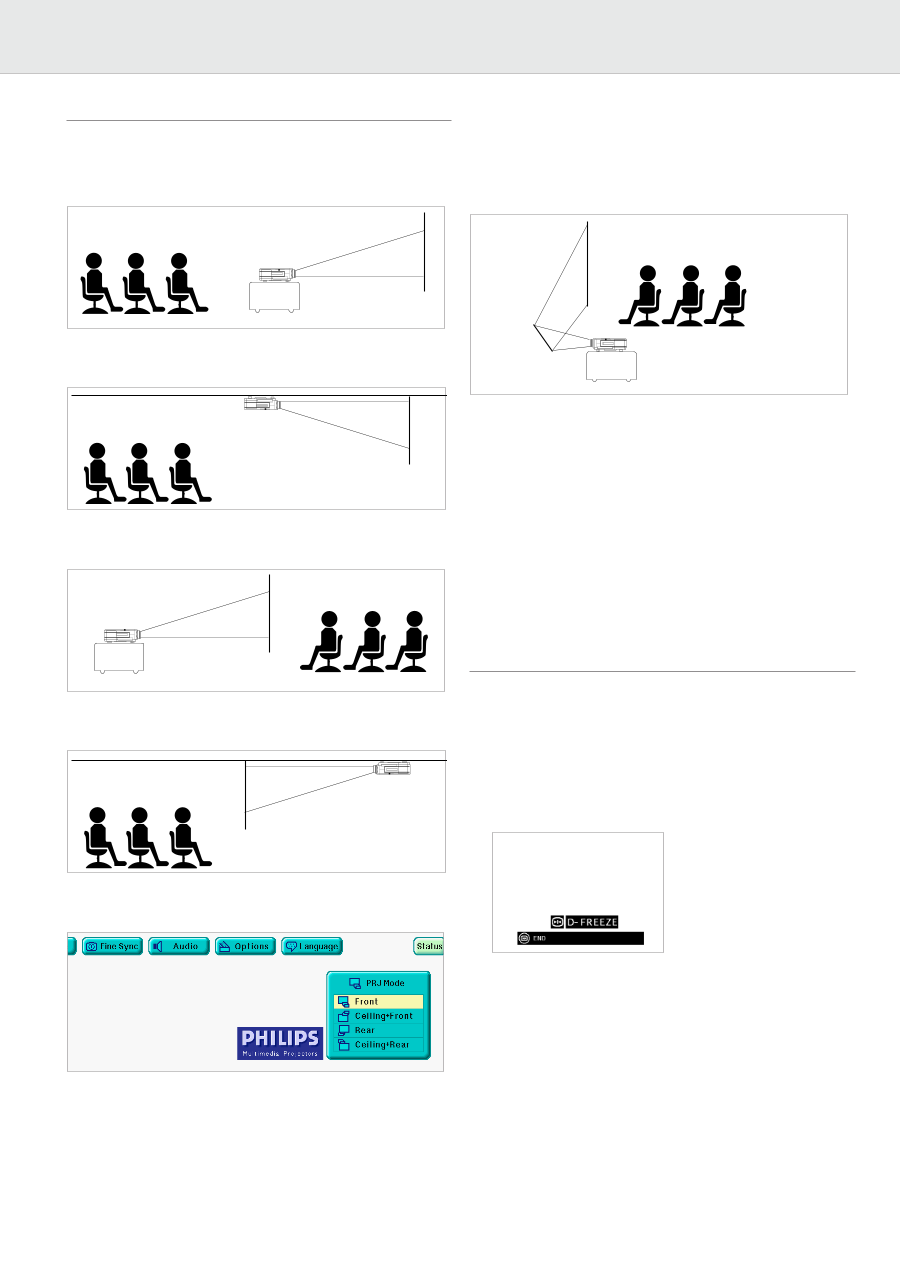
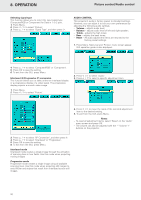
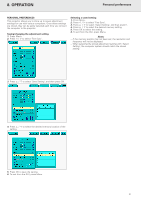
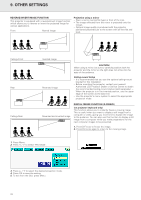
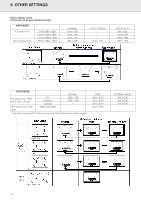
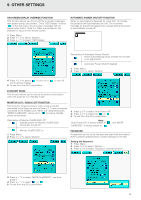
9. OTHER SETTINGS REVERSE/INVERT IMAGE FUNCTION This projector is equipped with a reverse/invert image function which allows you to reverse or invert the projected image for various applications. Front Normal image Projection using a mirror - Place a mirror (normal flat type) in front of the lens. - The image reflected from the mirror is projected onto the screen. - Optimal image quality is produced with the projector positioned perpendicular to the screen with all feet flat and level. Ceiling+Front Rear Ceiling+Rear Inverted image Reversed image CAUTION! When using a mirror, be sure to carefully position both the projector and the mirror so the light does not shine into the eyes of the audience. Ceiling-mount Setup - It is recommended that you use the optional ceiling-mount bracket for this installation. - Before mounting the projector, contact your nearest Authorised LCD Projector Dealer or Service Centre to obtain the recommended ceiling-mount bracket (sold separately). -. When the projector is in the inverted position, use the upper edge of the screen as the base line. - Use the projector's menu system to select the appropriate projection mode. Reversed and inverted image DIGITAL FREEZE FUNCTION (D-FREEZE) (on projector keyboard only) This function allows you to instantly freeze a moving image. This is useful when you want to display a still image from a computer or video, giving you more time to explain the image to the audience. You can also use this function to display a still image from a computer while you make preparations for the next computer images to be presented. 1. Press D-Freeze to freeze the image. 2. Press D-Freeze again to return to the moving image. 1. Press Menu. 2. Press 1 / 2 to select 'PRJ Mode'. 3. Press 3 / 4 to select the desired projection mode. 4. Press OK to save the setting. 5. To exit from the GUI, press Menu. 22
-
 1
1 -
2
-
3
-
4
-
5
-
6
-
7
-
8
-
9
-
10
-
11
-
12
-
13
-
14
-
15
-
16
-
17
-
18
-
 19
19 -
 20
20 -
 21
21 -
 22
22 -
 23
23 -
 24
24 -
 25
25 -
 26
26 -
 27
27 -
 28
28 -
 29
29 -
30
-
31
-
32
-
33
-
34
 |
 |