Philips LC1241 User Guide - Page 25
V-Effect Modes, Notes
 |
View all Philips LC1241 manuals
Add to My Manuals
Save this manual to your list of manuals |
Page 25 highlights
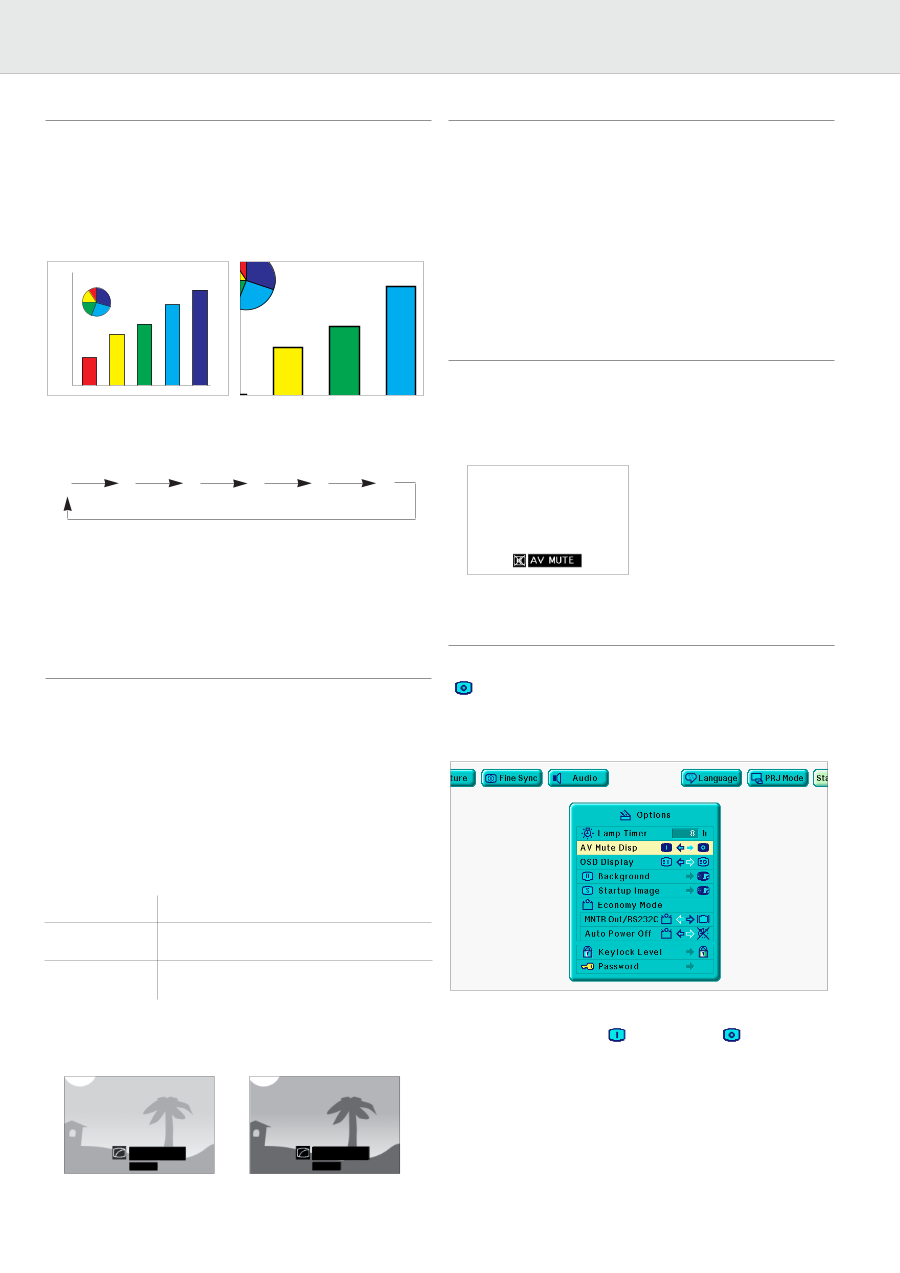
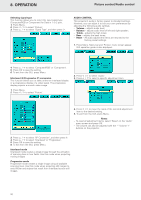
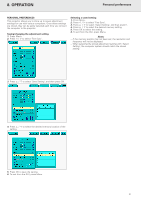
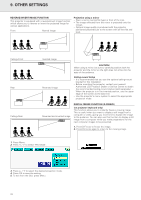
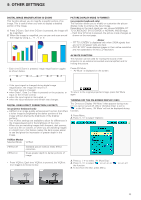
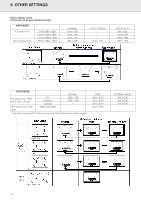
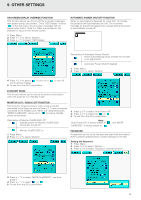
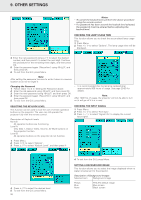
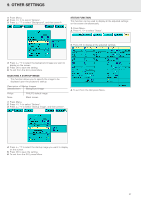
9. OTHER SETTINGS DIGITAL IMAGE MAGNIFICATION (D-ZOOM) This function allows you to magnify a specific portion of an image. This is useful when you want to display a detailed portion of the image. 1. Press D-Zoom. Each time D-Zoom is pressed, the image will be magnified. 2. When the image is magnified, you can pan and scan around the image by using 3 , 4 , 1 or 2. PICTURE DISPLAY MODE (V-FORMAT) (on projector keyboard only) This function allows you to modify or customise the picture display mode to enhance the input image. Depending on the input signal,you can choose NORMAL,FIT TO SCREEN,DOT BY DOT,WIDE or NORMAL (WIDE)image. - Each time V-Format is pressed, the picture mode changes as shown on the next page. Notes: - "FIT TO SCREEN" is displayed only when SXGA signals that are not in 4:3 aspect ratio are input. - DOT BY DOT mode displays images in their native resolution and not expanded to fit the LCD resolution. - Each time D-Zoom is pressed, image magnification toggles as shown below. x1 x2 x3 x4 x6 x8 AV MUTE FUNCTION This function can be used for muting the sound of the projector (or an external connected sound amplifier) and for muting the picture. Press A/V Mute. - 'AV Mute' is displayed on the screen. - If the input signal is changed during digital image magnification, the image will return to 1. The input signal is changed: • when Data 1, Data 2 or Video is pressed on the projector, or Input on the remote control, • when the input signal is interrupted, or • when the input resolution and refresh rate changes. DIGITAL VIDEO EFFECT CORRECTION (V-EFFECT) (on projector keyboard only) - V-Effect is an image quality enhancement function that offers a richer image by brightening the darker portions of the image without altering the brightness of the brighter portions. - Two V-Effect settings are available to allow for differences in the images played and in the brightness of the room. - When you are watching images with frequent, dark scenes, such as a film or concert, or when you are watching images in a bright room, this feature makes the dark scenes easier to see and gives the impression of greater depth in the image. To return to the original projected image, press A/V Mute again. TURNING OFF THE ON-SCREEN DISPLAY (OSD) The On-screen Display ('AV Mute') that appears during mute screen can be turned off. When 'AV Mute Disp' is set to ' ' in the GUI menu, 'AV Mute' will not be displayed during function. 1. Press Menu. 2. Press 1 / 2 to select 'Options'. V-Effect Modes Selected Mode V-Effect V-Effect off V-Effect on Standard picture without Video Effect correction. Gives greater depth to darker portions of image. • Press V-Effect. Each time V-Effect is pressed, the V-Effect level toggles as shown below. 3. Press 3 / 4 to select 'AV Mute Disp'. 4. Press 1 / 2 to select ' ' to turn on or ' the function. 5. To exit from the GUI, press Menu. ' to turn off V-EFFECT OFF V-EFFECT ON 23
-
 1
1 -
2
-
3
-
4
-
5
-
6
-
7
-
8
-
9
-
10
-
11
-
12
-
13
-
14
-
15
-
16
-
17
-
18
-
19
-
 20
20 -
 21
21 -
 22
22 -
 23
23 -
 24
24 -
 25
25 -
 26
26 -
 27
27 -
 28
28 -
 29
29 -
 30
30 -
31
-
32
-
33
-
34
 |
 |