Philips LC1241 User Guide - Page 31
Additional Information
 |
View all Philips LC1241 manuals
Add to My Manuals
Save this manual to your list of manuals |
Page 31 highlights
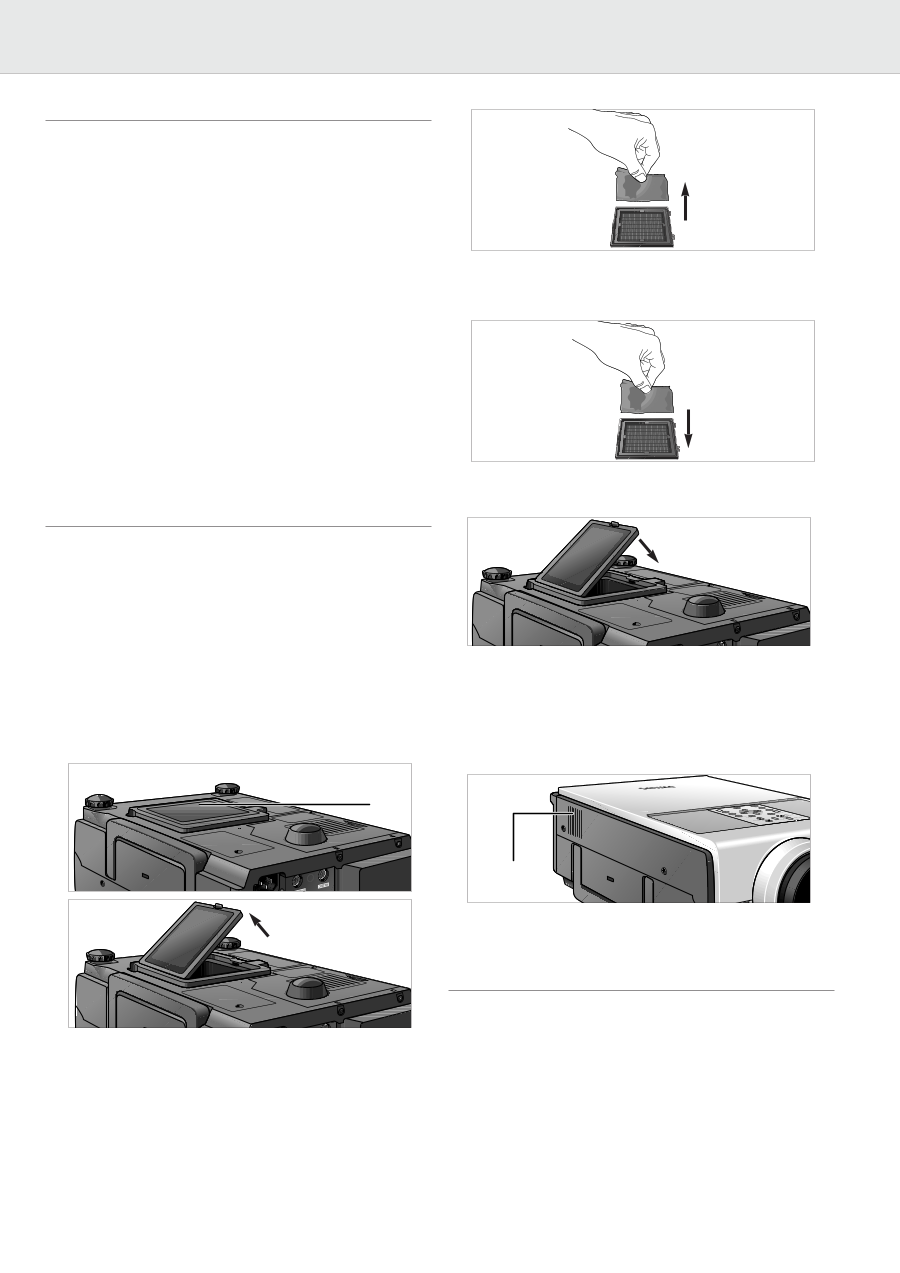
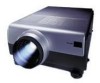
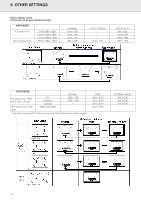
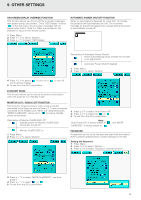
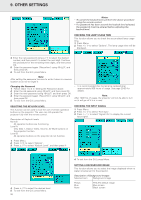
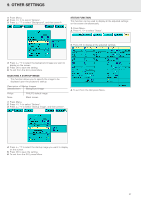
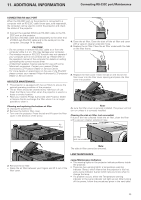
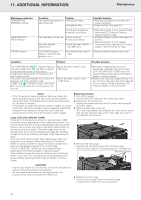
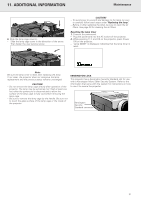
11. ADDITIONAL INFORMATION Connecting RS-232C port/Maintenance CONNECTING RS-232C PORT When the RS-232C port on the projector is connected to a computer with an RS-232C cable (cross type, sold separately), the computer can be used to control the projector and check the status of the projector. 1. Connect the supplied DIN-D-sub RS-232C cable to the RS232C port on the projector. 2. Connect a RS-232C cable (sold separately) to the other end of DIN-D-sub RS-232C cable and to the serial port on the computer. See page 14 for details. CAUTION! - Do not connect or remove RS-232C cable to or from the computer while it is on. This may damage your computer. - The wireless mouse or RS-232C function may not operate if your computer port is not correctly set up. Please refer to the operation manual of the computer for details on setting up/installing the correct mouse driver. - A Macintosh adapter may be required for use with some Macintosh computers. Contact your nearest Philips Authorised LCD Projector Dealer or Service Centre. - For more details on specification of the use of the RS-232C please contact your nearest Philips Authorised LCD projector Dealer or Service Centre. AIR FILTER MAINTENANCE • This projector is equipped with two air filters to ensure the optimal operating condition of the projector. • The air filters should be cleaned every 100 hours of use. Clean the filters more often when the projector is used in a dusty or smoky location. • Have your nearest Philips Authorised LCD Projector Dealer or Service Centre exchange the filter when it is no longer possible to clean it. Cleaning and replacing the bottom air filter 1. Unplug the powercord. 2. Remove the bottom filter cover. - Turn over the projector. Press the tab and lift open the filter cover in the direction of the arrow. 4. Clean the air filter. Clean the dust off the air filter and cover with a vacuum cleaner extension hose. 5. Replace the air filter. Place the air filter underneath the tabs on the filter frame. 6. Replace the filter cover. Insert the tab on the end of the filter cover into the filter cover opening and press the filter cover into position. Note: Be sure the filter cover is securely installed. The power will not turn on unless it is correctly installed. Cleaning the side air filter (not removable) If dust or dirt has collected inside the air filter, clean the filter with a vacuum cleaner extension hose. Air filter Air filter (not removable) ) Note: The side air filter cannot be removed. LAMP MAINTENANCE 3. Remove the air filter. - Grasp the air filter between your fingers and lift it out of the filter cover. Lamp/Maintenance Indicators • The warning lights on the projector indicate problems inside the projector. • There are two warning lights: a temperature warning indicator (Temp.) which warns that the projector is too hot, and a Lamp indicator (Lamp) which lets you know when to change the lamp. • If a problem occurs, either the Temperature warning indicator or the Lamp indicator will light up red. After turning off the power, follow the procedures given in the next table. 29
-
 1
1 -
2
-
3
-
4
-
5
-
6
-
7
-
8
-
9
-
10
-
11
-
12
-
13
-
14
-
15
-
16
-
17
-
18
-
19
-
20
-
21
-
22
-
23
-
24
-
25
-
 26
26 -
 27
27 -
 28
28 -
 29
29 -
 30
30 -
 31
31 -
 32
32 -
 33
33 -
 34
34
 |
 |