Philips LC1241 User Guide - Page 28
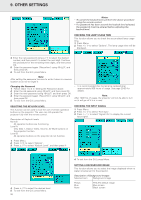
Changing the Password, Notes
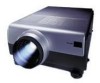 |
View all Philips LC1241 manuals
Add to My Manuals
Save this manual to your list of manuals |
Page 28 highlights
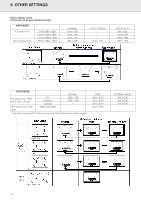
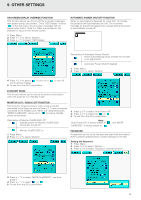
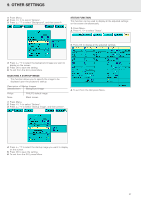
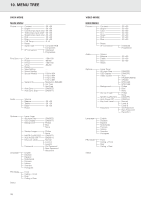
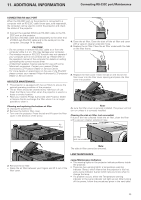
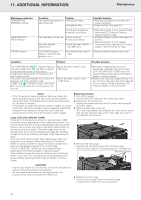
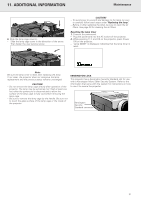
9. OTHER SETTINGS Notes: - To cancel the keylock level, perform the above procedure using the remote control. - If a password has been set and the keylock level selected, the password must be entered before adjusting the keylock level. CHECKING THE LAMP USAGE TIME This function allows you to check the accumulated lamp usage time. 1. Press Menu. 2. Press 1 / 2 to select 'Options'. The lamp usage time will be displayed. 4. Enter the new password using 3 / 4 to select the desired number, and then press 2 to select the next digit. Continue this procedure for the remaining three digits, and then press OK. 5. Enter the password again ('Reconfirm') using 1/2/3/4, and then press OK 6. To exit from the GUI, press Menu. Note: After setting the password, be sure to write it down in a secure location so as not to forget it. Changing the Password 1. Follow steps 1 to 3 in 'Setting the Password' above. 2. Enter the old password using 1/2/3/4, and then press OK. 3. Enter the new password using 1/2/3/4, and then press OK. 4. Enter the password again ('Reconfirm') using 1/2/3/4, and then press OK. 5. To exit from the GUI, press Menu. - It is recommended that the lamp be replaced after approximately 900 hours of usage. See page 29-30 for details. Note: After 1000 hrs of usage, the projector will not be able to turn on (it will go off if it is in use). SELECTING THE KEYLOCK LEVEL This function can be used to lock the use of certain operation buttons on the projector. The user can still operate the projector fully with the remote control. Description of Keylock Levels Normal: All operation buttons are functioning. Level A: Only Data 1, Data 2, Video, Volume, AV Mute buttons on the projector function. Level B: All operation buttons on the projector do not function. 1. Press Menu. 2. Press 1 / 2 to select 'Options'. 3. Press 3 / 4 to select 'Keylock Level', and then press 2 CHECKING THE INPUT SIGNAL 1. Press Menu. 2. Press 1 / 2 to select 'Fine Sync'. 3. Press 3 / 4 to select 'Signal Info' to display the current input signal. 4. Press 3 / 4 to select the desired level 5. To exit from the GUI, press Menu. 26 4. To exit from the GUI, press Menu. SETTING A BACKGROUND IMAGE This function allows you to select the image displayed when no signal is being sent to the projector. Description of Background Images Selected item Background image Philips Blue None PHILIPS default image Blue screen Black screen
-
 1
1 -
2
-
3
-
4
-
5
-
6
-
7
-
8
-
9
-
10
-
11
-
12
-
13
-
14
-
15
-
16
-
17
-
18
-
19
-
20
-
21
-
22
-
 23
23 -
 24
24 -
 25
25 -
 26
26 -
 27
27 -
 28
28 -
 29
29 -
 30
30 -
 31
31 -
 32
32 -
 33
33 -
34
 |
 |
