Pioneer PRO-810HD Owner's Manual - Page 31
Setting SR+MODE Mode
 |
View all Pioneer PRO-810HD manuals
Add to My Manuals
Save this manual to your list of manuals |
Page 31 highlights
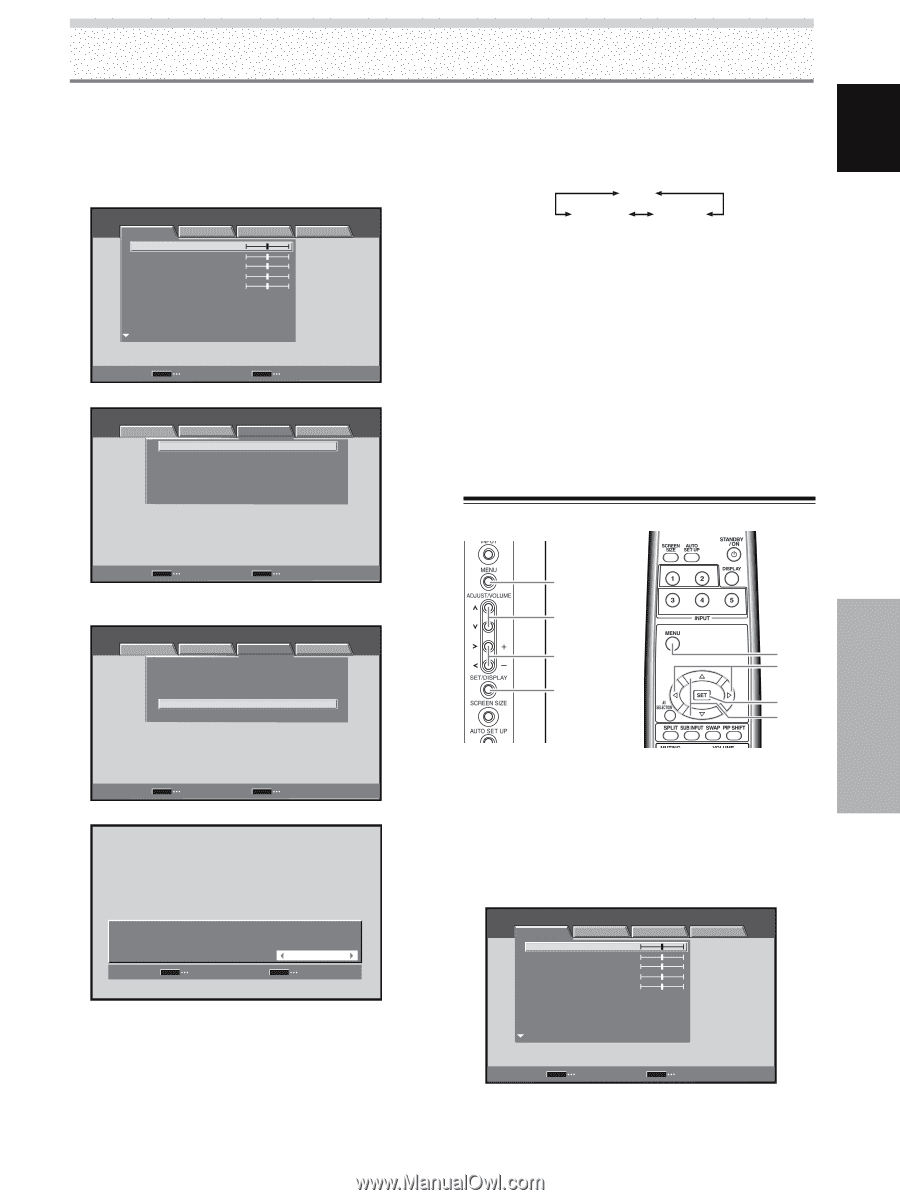
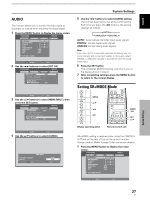
English AUDIO This function allows you to switch the audio signal to automatic or manual when inputting the digital signal. 1 Press the MENU button to display the menu screen. S TA N D A R D INPUT2 PICTURE SCREEN SETUP CONTRAST BRIGHTNESS COLOR TINT SHARPNESS MPEG NR DNR CTI :0 :0 :0 :0 :0 : MID : MID : ON OPTION PICTURE RESET SET ENTER MENU EXIT 2 Use the 2/3 buttons to select [SET UP]. S TA N D A R D INPUT2 PICTURE SCREEN SETUP PURECINEMA CLAMP POSITION SIGNAL FORMAT COLOR DECODING HDMI INPUT BRT. ENHANCE : OFF : : : : ON OPTION System Settings 5 Use the 2/3 buttons to select [AUDIO] setting. The unit has been factory set at the AUTO setting. Each time you press the 2/3 buttons, the setting changes as follows: AUTO ANALOG DIGITAL AUTO: Automatically identifies input audio signals. DIGITAL: Accept digital audio signals. ANALOG: Accept analog audio signals. Note Even when AUTO is selected, automatic switching may not occur properly with some input signals. In this event, select DIGITAL or ANALOG manually in accordance with the actual signal input. 6 Press the SET button. This completes [AUDIO] setting, and returns you to the display shown in step 3. 7 After completing settings, press the MENU button to return to the normal display. Setting SR+MODE Mode SET ENTER MENU EXIT 3 Use the 5/∞ buttons to select [HDMI INPUT], then press the SET button. S TA N D A R D INPUT2 PICTURE SCREEN SETUP PURECINEMA : OFF CLAMP POSITION : SIGNAL FORMAT : COLOR DECODING : HDMI INPUT BRT. ENHANCE : ON OPTION SET ENTER MENU EXIT 4 Use the 5/∞ buttons to select [AUDIO]. PICTURE SELECT AUDIO SET S E T HDMI INPUT : AUTO : AUTO MENU E X I T MENU 5/∞ 2/3 SET Display operating panel MENU 2/3 SET 5/∞ Remote control unit SR+MODE setting is required when using the CONTROL OUT jack on the rear of this unit to connect another Pioneer product (Refer to page 19 for connection details). 1 Press the MENU button to display the menu screen. S TA N D A R D INPUT1 PICTURE SCREEN SETUP CONTRAST BRIGHTNESS COLOR TINT SHARPNESS MPEG NR DNR CTI :0 :0 :0 :0 :0 : MID : MID : ON OPTION PICTURE RESET SET ENTER MENU EXIT System Settings 27 EN
-
 1
1 -
2
-
3
-
4
-
5
-
6
-
7
-
8
-
9
-
10
-
11
-
12
-
13
-
14
-
15
-
16
-
17
-
18
-
19
-
20
-
21
-
22
-
23
-
24
-
25
-
 26
26 -
 27
27 -
 28
28 -
 29
29 -
 30
30 -
 31
31 -
 32
32 -
 33
33 -
 34
34 -
 35
35 -
 36
36 -
37
-
38
-
39
-
40
-
41
-
42
-
43
-
44
-
45
-
46
-
47
-
48
-
49
-
50
-
51
-
52
-
53
-
54
-
55
-
56
-
57
-
58
-
59
-
60
-
61
-
62
-
63
-
64
-
65
-
66
-
67
-
68
-
69
-
70
-
71
-
72
-
73
-
74
-
75
-
76
-
77
-
78
-
79
-
80
-
81
-
82
-
83
-
84
-
85
-
86
-
87
-
88
-
89
-
90
-
91
-
92
-
93
-
94
-
95
-
96
-
97
-
98
-
99
-
100
-
101
-
102
-
103
-
104
-
105
-
106
-
107
-
108
-
109
-
110
-
111
-
112
-
113
-
114
-
115
-
116
-
117
-
118
-
119
-
120
-
121
-
122
-
123
-
124
-
125
-
126
-
127
-
128
-
129
-
130
-
131
-
132
-
133
-
134
-
135
-
136
-
137
-
138
-
139
-
140
-
141
-
142
-
143
-
144
-
145
-
146
-
147
-
148
-
149
-
150
-
151
-
152
-
153
-
154
-
155
-
156
-
157
-
158
-
159
-
160
-
161
-
162
-
163
-
164
-
165
-
166
-
167
-
168
-
169
-
170
-
171
-
172
-
173
-
174
 |
 |