Pioneer VSX-1122-K Owner's Manual - Page 20
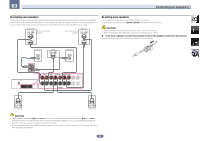
To bi-wire a speaker, connect two speaker cords to the speaker terminal on the receiver. - settings
 |
View all Pioneer VSX-1122-K manuals
Add to My Manuals
Save this manual to your list of manuals |
Page 20 highlights
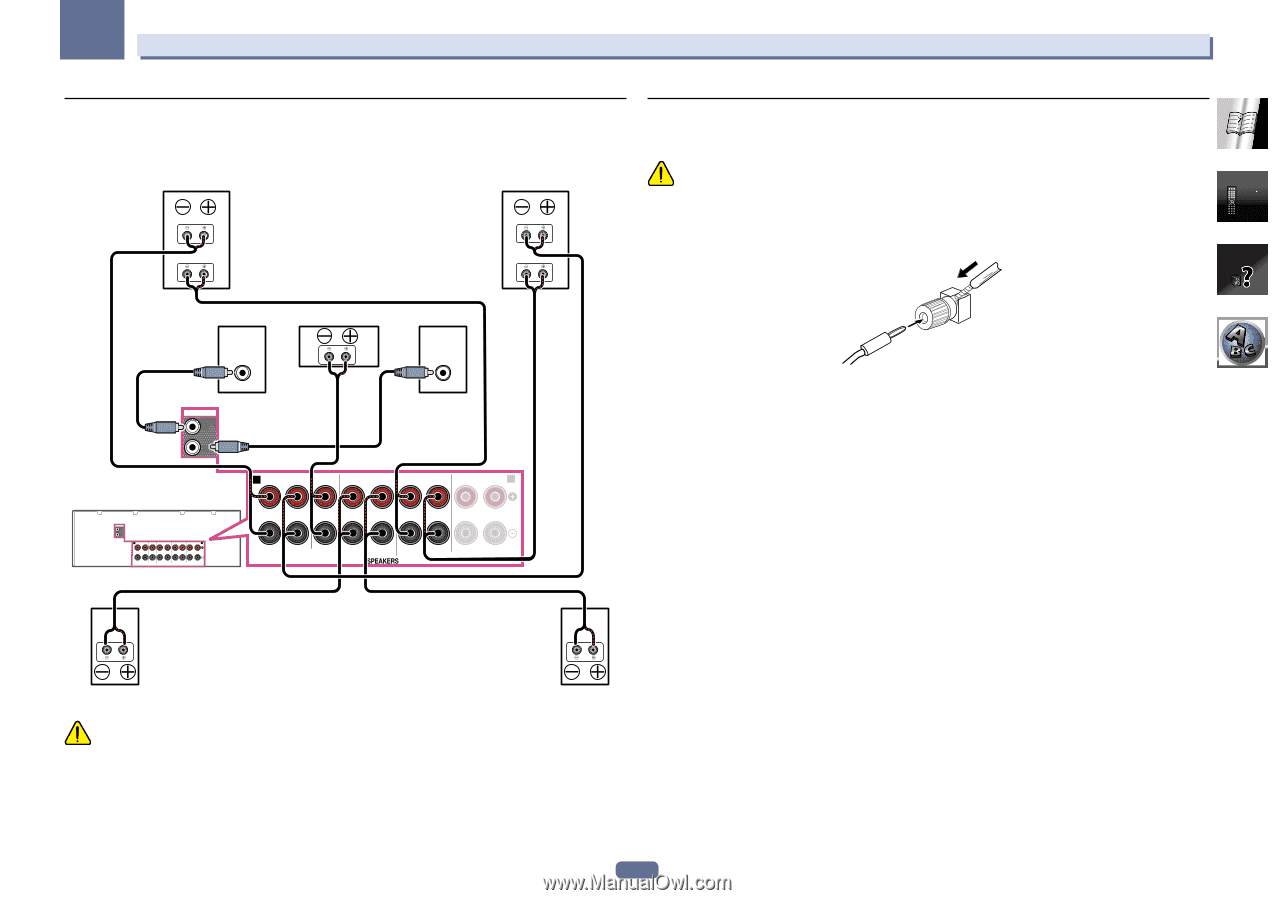
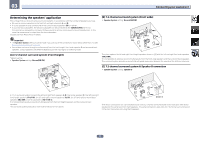
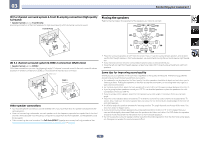
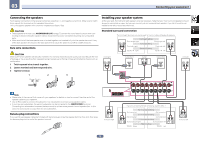
03 Connecting your equipment Bi-amping your speakers Bi-amping is when you connect the high frequency driver and low frequency driver of your speakers to different amplifiers for better crossover performance. Your speakers must be bi-ampable to do this (having separate terminals for high and low) and the sound improvement will depend on the kind of speakers you're using. Front right High Bi-amp compatible speaker Bi-amp compatible speaker Front left High Low Low Bi-wiring your speakers Your speakers can also be bi-wired if they support bi-amping. ! With these connections, the Speaker System setting makes no difference. CAUTION ! Don't connect different speakers from the same terminal in this way. ! When bi-wiring as well, heed the cautions for bi-amping shown above. % To bi-wire a speaker, connect two speaker cords to the speaker terminal on the receiver. Using a banana plug for the second connection is recommended. Subwoofer 1 LINE LEVEL INPUT Center Subwoofer 2 LINE LEVEL INPUT PRE OUT SUB WOOFER 1 2 A FRONT R L CENTER SURROUND R L SURROUND BACK / ZONE 2 R L (Single) FRONT HEIGHT / WIDE / R L B PRE OUT SUB WOOFER 1 2 A FRONT R L CENTER SURROUND R L SURROUND BACK / ZONE 2 R L (Single) FRONT HEIGHT / WIDE / R L B SPEAKERS Surround right Surround left CAUTION ! Most speakers with both High and Low terminals have two metal plates that connect the High to the Low terminals. These must be removed when you are bi-amping the speakers or you could severely damage the amplifier. See your speaker manual for more information. ! If your speakers have a removable crossover network, make sure you do not remove it for bi-amping. Doing so may damage your speakers. 20
-
 1
1 -
2
-
3
-
4
-
5
-
6
-
7
-
8
-
9
-
10
-
11
-
12
-
13
-
14
-
 15
15 -
 16
16 -
 17
17 -
 18
18 -
 19
19 -
 20
20 -
 21
21 -
 22
22 -
 23
23 -
 24
24 -
 25
25 -
26
-
27
-
28
-
29
-
30
-
31
-
32
-
33
-
34
-
35
-
36
-
37
-
38
-
39
-
40
-
41
-
42
-
43
-
44
-
45
-
46
-
47
-
48
-
49
-
50
-
51
-
52
-
53
-
54
-
55
-
56
-
57
-
58
-
59
-
60
-
61
-
62
-
63
-
64
-
65
-
66
-
67
-
68
-
69
-
70
-
71
-
72
-
73
-
74
-
75
-
76
-
77
-
78
-
79
-
80
-
81
-
82
-
83
-
84
-
85
-
86
-
87
-
88
-
89
-
90
-
91
-
92
-
93
-
94
-
95
-
96
-
97
-
98
-
99
-
100
-
101
-
102
-
103
-
104
-
105
-
106
-
107
 |
 |