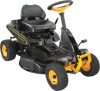
Poulan PP105G30 Rider Operation Manual - Page 16
Before Starting The Engine, To Start Engine
 |
View all Poulan PP105G30 Rider manuals
Add to My Manuals
Save this manual to your list of manuals |
Page 16 highlights
BEFORE STARTING THE ENGINE CHECK ENGINE OIL LEVEL The engine in your riding mower has been shipped, from the factory, already filled with summer weight oil. 1. Check engine oil with riding mower on level ground. 2. Remove oil fill cap/dipstick and wipe clean, reinsert the dipstick and screw cap tight, wait for a few seconds, remove and read oil level. If necessary, add oil until "FULL" mark on dipstick is reached. Do not overfill. • For cold weather operation you should change oil for easier starting (See the oil viscosity chart in the Maintenance section of this manual). • To change engine oil, see the Maintenance section in this manual. ADD GASOLINE • Fill fuel tank to bottom of filler neck. Do not overfill. Use fresh, clean, regular gasoline with a minimum of 87 octane. Do not mix oil with gasoline. Purchase fuel in quantities that can be used within 30 days to ensure fuel freshness. CAUTION: Wipe off any spilled oil or fuel. Do not store, spill or use gasoline near an open flame. IMPORTANT: When operating in temperatures below 32°F (0°C), use fresh, clean winter grade gasoline to help ensure good cold weather starting. CAUTION: Alcohol blended fuels (called gasohol or using ethanol or methanol) can attract moisture which leads to separation and formation of acids during storage. Acidic gas can damage the fuel system of an engine while in storage. To avoid engine problems, the fuel system should be emptied before storage of 30 days or longer. Drain the gas tank, start the engine and let it run until the fuel lines and carburetor are empty. Use fresh fuel next season. See Storage Instructions for additional information. Never use engine or carburetor cleaner products in the fuel tank or permanent damage may occur. Fuel stabilizer is an acceptable alternative in minimizing the formation of fuel gum deposits during storage. Add stabilizer to gasoline in fuel tank or storage container. Always follow the mix ratio found on stabilizer container. Run engine at least 10 minutes after adding stabilizer to allow the stabilizer to reach the carburetor. Do not empty the gas tank and carburetor if using fuel stabilizer. Fuel Cap TO START ENGINE When starting the engine for the first time or if the engine has run out of fuel, it will take extra cranking time to move fuel from the tank to the engine. • Sit on seat in operating position, depress clutch/brake pedal and set parking brake. • Place motion control lever in neutral position. • Move deck clutch lever to "DISEN- GAGED" position. • Move throttle control to choke position. NOTE: Before starting, read the warm and cold starting procedures below. • Insert key into ignition and turn key clock- wise to "START" position and release key as soon as engine starts. Do not run starter continuously for more than fifteen seconds per minute. If the engine does not start after several attempts, move throttle control to fast position, wait a few minutes and try again. If engine still does not start, move the throttle control back to the choke position and retry. WARM WEATHER STARTING (50°F/10°C AND ABOVE) • When engine starts, move the throttle control to the fast position. • The ground drive can now be used. If the engine does not accept the load, restart the engine and allow it to warm up for one minute using the choke as described above. COLD WEATHER STARTING (50°F/10°C AND BELOW) • When engine starts, allow engine to run with the throttle control in the choke position until the engine runs roughly, then move throttle control to fast position. This may require an engine warm-up period from several seconds to several minutes, depending on the temperature. 16 ARRANQUE CON TIEMPO TEMPLADO (50° F/10°C Y MÁS) • Cuando arranque el motor, mueva el control de la aceleración a la posición de rápido. • Ahora puede usar el mecanismo de desplazamiento. Si el motor no acepta la carga, vuelva a encender el motor y permítale que se caliente durante un minuto usando el ahogador conforme se describe arriba. ARRANQUE CON TIEMPO FRÍO (50° F/10°C Y MENOS) • Al hacer arrancar el motor, mantenga el control de la aceleración a la posición de estrangulación hasta que el motor se caliente y empieze funcionar mal. Una vez que empieze a funcionar mal, mueva inmediatamente el control de la aceleración a la posición rápida. • Cuando corte áreas grandes, comience girando hacia la derecha, de modo que los recortes se descarguen lejos de los arbustos, bardas, caminos, etc. Después de una o dos vueltas, corte en la dirección opuesta, dando vueltas hacia la izquierda hasta que termine. El calentamiento del motor puede tomar a • Si el césped está demasiado alto, se deberá partir de varios segundos a varios minutos cortar dos veces para reducir la carga y la (cuanto más fría es la temperatura, más largo posibilidad de un peligro de incendio por los es el calentamiento). recortes secos. Haga el primer corte relativa- mente alto; el segundo deberá ser a la altura CONSEJOS PARA CORTAR EL CÉSPED deseada. • La cortadora de césped debe estar bien • No corte el césped cuando esté húmedo. El nivelada para que su desempeño sea el césped húmedo taponará la cortadora de mejor. Consulte la parte de "NIVELACIÓN césped y dejará matas indeseables. Permita DE LA CARCASA DE LA CORTADORA DE que el césped se seque antes de podarlo. CÉSPED" en la sección de Servicio y Ajustes • Regule la velocidad terrestre al seleccionar un de este manual. avance lo suficientemente lento para ajustar • El lado izquierdo de la cortadora de césped el desempeño de corte de la cortadora de se debe usar para podar. césped así como la calidad del corte deseada. • Conduzca de manera que los recortes de des- • Cuando utilice accesorios, seleccione una carguen sobre el área que ya se ha cortado. velocidad terrestre que se adapte al terreno El área de corte debe estar del lado derecho y obtenga el mejor desempeño del accesorio de la cortadora de césped. Esto creará una que esté usando. distribución más uniforme de los recortes y un corte más uniforme. 45
-
 1
1 -
2
-
3
-
4
-
5
-
6
-
7
-
8
-
9
-
10
-
 11
11 -
 12
12 -
 13
13 -
 14
14 -
 15
15 -
 16
16 -
 17
17 -
 18
18 -
 19
19 -
 20
20 -
 21
21 -
22
-
23
-
24
-
25
-
26
-
27
-
28
-
29
-
30
 |
 |
