Ricoh Aficio SP C242SF User Manual - Page 21
Basic Operation for Scan to USB, white scanning mode.
 |
View all Ricoh Aficio SP C242SF manuals
Add to My Manuals
Save this manual to your list of manuals |
Page 21 highlights
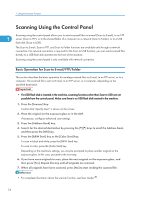
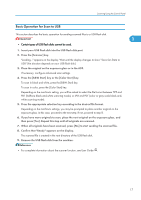
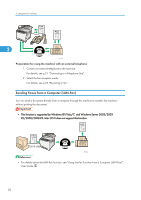
Scanning Using the Control Panel Basic Operation for Scan to USB This section describes the basic operation for sending scanned files to a USB flash disk. 1 • Certain types of USB flash disks cannot be used. 1. Insert your USB flash disk into the USB flash disk port. 2. Press the [Scanner] key. "Loading..." appears on the display. Wait until the display changes to show "Save Scn Data to USB" (the duration depends on your USB flash disk). 3. Place the original on the exposure glass or in the ADF. If necessary, configure advanced scan settings. 4. Press the [B&W Start] key or the [Color Start] key. To scan in black and white, press the [B&W Start] key. To scan in color, press the [Color Start] key. Depending on the machine's setting, you will be asked to select the file format between TIFF and PDF (halftone black-and-white scanning mode), or JPG and PDF (color or gray scale black-andwhite scanning mode). 5. Press the appropriate selection key according to the desired file format. Depending on the machine's settings, you may be prompted to place another original on the exposure glass. In this case, proceed to the next step. If not, proceed to step 8. 6. If you have more originals to scan, place the next original on the exposure glass, and then press [Yes]. Repeat this step until all originals are scanned. 7. When all originals have been scanned, press [No] to start sending the scanned file. 8. Confirm that "Ready" appears on the display. The scanned file is created in the root directory of the USB flash disk. 9. Remove the USB flash disk from the machine. • For complete information about the scanner function, see User Guide . 17
-
 1
1 -
2
-
3
-
4
-
5
-
6
-
7
-
8
-
9
-
10
-
11
-
12
-
13
-
14
-
15
-
 16
16 -
 17
17 -
 18
18 -
 19
19 -
 20
20 -
 21
21 -
 22
22 -
 23
23 -
 24
24 -
 25
25 -
 26
26 -
27
-
28
-
29
-
30
-
31
-
32
-
33
-
34
-
35
-
36
-
37
-
38
-
39
-
40
-
41
-
42
-
43
-
44
-
45
-
46
-
47
-
48
-
49
-
50
-
51
-
52
-
53
-
54
-
55
-
56
-
57
-
58
-
59
-
60
-
61
-
62
-
63
-
64
-
65
-
66
-
67
-
68
-
69
-
70
-
71
-
72
-
73
-
74
-
75
-
76
-
77
-
78
-
79
-
80
-
81
-
82
-
83
-
84
-
85
-
86
-
87
-
88
-
89
-
90
-
91
-
92
-
93
-
94
-
95
-
96
-
97
-
98
-
99
-
100
-
101
-
102
-
103
-
104
-
105
-
106
-
107
-
108
-
109
-
110
-
111
-
112
-
113
-
114
-
115
-
116
-
117
-
118
-
119
-
120
-
121
-
122
-
123
-
124
-
125
-
126
-
127
-
128
-
129
-
130
-
131
-
132
-
133
-
134
-
135
-
136
-
137
-
138
-
139
-
140
-
141
-
142
-
143
-
144
-
145
-
146
-
147
-
148
-
149
-
150
-
151
-
152
-
153
-
154
-
155
-
156
-
157
-
158
-
159
-
160
-
161
-
162
-
163
-
164
-
165
-
166
-
167
-
168
-
169
-
170
-
171
-
172
-
173
-
174
-
175
-
176
-
177
-
178
-
179
-
180
-
181
-
182
-
183
-
184
-
185
-
186
-
187
-
188
-
189
-
190
-
191
-
192
-
193
-
194
-
195
-
196
-
197
-
198
-
199
-
200
-
201
-
202
-
203
-
204
-
205
-
206
-
207
-
208
-
209
-
210
-
211
-
212
-
213
-
214
-
215
-
216
-
217
-
218
-
219
-
220
-
221
-
222
-
223
-
224
-
225
-
226
-
227
-
228
-
229
-
230
-
231
-
232
-
233
-
234
-
235
-
236
-
237
-
238
-
239
-
240
-
241
-
242
-
243
-
244
-
245
-
246
-
247
-
248
-
249
-
250
-
251
-
252
-
253
-
254
 |
 |
