Ricoh C220N Operating Instructions - Page 12
Specifying the printer's IP address, Smart Organizing Monitor for DDST Status - software
 |
UPC - 026649060052
View all Ricoh C220N manuals
Add to My Manuals
Save this manual to your list of manuals |
Page 12 highlights
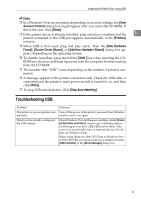
Preparing for Printing D Click [Smart Organizing Monitor]. E Select a language for Smart Organizing Monitor, and then click [OK]. The [Smart Organizing Monitor Setup] dialog box appears. 1 F Click [Next >]. The software license agreement appears. G After reading the agreement, click [Yes]. The [Select Destination Folder] dialog box appears. H Click [Next >]. Click [Browse...], if you want to change the destination folder. I In the [Select Program Folder] dialog box, click [Next >]. J When the [Setup Complete] dialog box appears, click [Finish]. To continue the installation, leave the [Printer Driver and Utilities] dialog box open. Note ❒ Smart Organizing Monitor will appear in the language selected in step 5, not the language selected in step 3. Specifying the printer's IP address Use the following procedure to specify the printer's IP address using Smart Organizing Monitor. Important ❒ To perform the following procedure, you must first return the printer's set- tings to its factory-set defaults. To do this: first turn the printer's power switch to off, wait a few seconds and then, while pressing down the {Job Reset} and {Stop/Start} keys, turn the printer's power switch back to on and keep both keys pressed down until the Alert and Ready indicators light up. A Connect the printer and computer using an Ethernet cable. B On the [Start] menu, point to [Programs], and then point to [Smart Organizing Monitor for DDST] > [Smart Organizing Monitor for DDST Status]. The [Smart Organizing Monitor] dialog box appears. In a Windows XP/Vista or Windows Server 2003/2003 R2 environment, point to [All Programs] on the [Start] menu, and then point to [Smart Organizing Monitor for DDST] > [Smart Organizing Monitor for DDST Status]. 4
-
 1
1 -
2
-
3
-
4
-
5
-
6
-
 7
7 -
 8
8 -
 9
9 -
 10
10 -
 11
11 -
 12
12 -
 13
13 -
 14
14 -
 15
15 -
 16
16 -
 17
17 -
18
-
19
-
20
-
21
-
22
-
23
-
24
-
25
-
26
-
27
-
28
-
29
-
30
-
31
-
32
-
33
-
34
-
35
-
36
-
37
-
38
-
39
-
40
-
41
-
42
-
43
-
44
-
45
-
46
-
47
-
48
-
49
-
50
-
51
-
52
-
53
-
54
-
55
-
56
-
57
-
58
-
59
-
60
-
61
-
62
-
63
-
64
-
65
-
66
-
67
-
68
-
69
-
70
-
71
-
72
-
73
-
74
-
75
-
76
-
77
-
78
-
79
-
80
-
81
-
82
-
83
-
84
 |
 |
