Ricoh CL3500N Setup Guide - Page 63
Secure the printer hard disk using the supplied screw.
 |
UPC - 026649024344
View all Ricoh CL3500N manuals
Add to My Manuals
Save this manual to your list of manuals |
Page 63 highlights
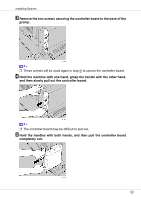
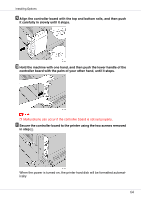
Installing Options The printer hard disk is to be installed to the position shown in the illustration. F Insert the printer hard disk by aligning it with the controller board slot. Slide it in the direction of the arrow, and then connect it to the connector on the controller board. G Secure the printer hard disk using the supplied screw. H When installing other options on the controller board, do not close the controller board, but go to the steps for installing the option. 63
-
 1
1 -
2
-
3
-
4
-
5
-
6
-
7
-
8
-
9
-
10
-
11
-
12
-
13
-
14
-
15
-
16
-
17
-
18
-
19
-
20
-
21
-
22
-
23
-
24
-
25
-
26
-
27
-
28
-
29
-
30
-
31
-
32
-
33
-
34
-
35
-
36
-
37
-
38
-
39
-
40
-
41
-
42
-
43
-
44
-
45
-
46
-
47
-
48
-
49
-
50
-
51
-
52
-
53
-
54
-
55
-
56
-
57
-
 58
58 -
 59
59 -
 60
60 -
 61
61 -
 62
62 -
 63
63 -
 64
64 -
 65
65 -
 66
66 -
 67
67 -
 68
68 -
69
-
70
-
71
-
72
-
73
-
74
-
75
-
76
-
77
-
78
-
79
-
80
-
81
-
82
-
83
-
84
-
85
-
86
-
87
-
88
-
89
-
90
-
91
-
92
-
93
-
94
-
95
-
96
-
97
-
98
-
99
-
100
-
101
-
102
-
103
-
104
-
105
-
106
-
107
-
108
 |
 |
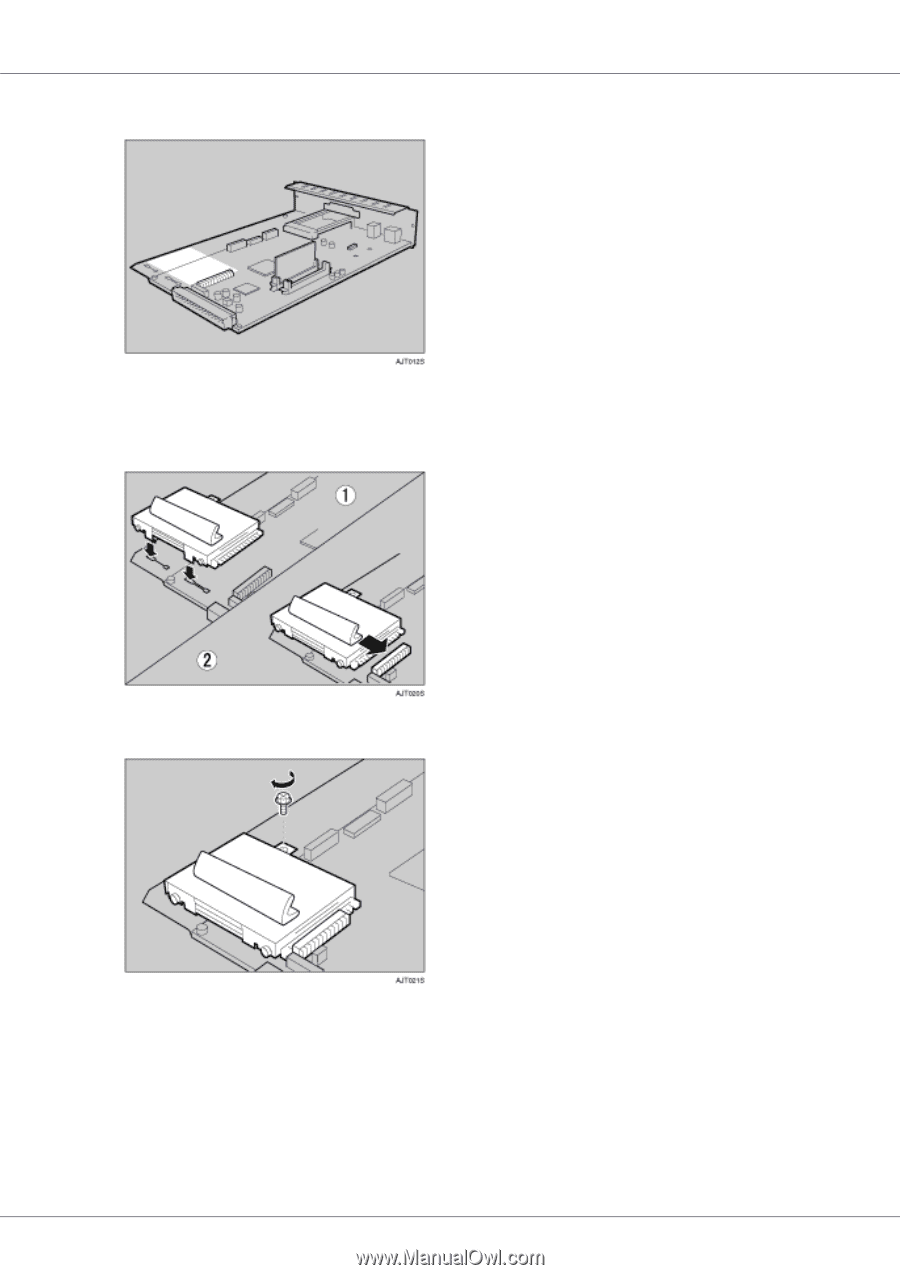
Installing Options
63
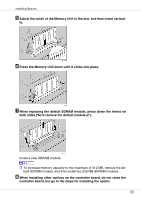
The printer hard disk is to be installed to the position shown in the illustration.
F
Insert the printer hard disk by aligning it with the controller board slot.
Slide it in the direction of the arrow, and then connect it to the connector
on the controller board.
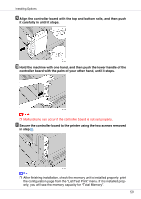
G
Secure the printer hard disk using the supplied screw.
H
When installing other options on the controller board, do not close the
controller board, but go to the steps for installing the option.