Samsung SCA30 Instruction Booklet - Page 22
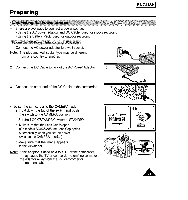
On models SCA35/A85 the Lens Cap opens
 |
View all Samsung SCA30 manuals
Add to My Manuals
Save this manual to your list of manuals |
Page 22 highlights
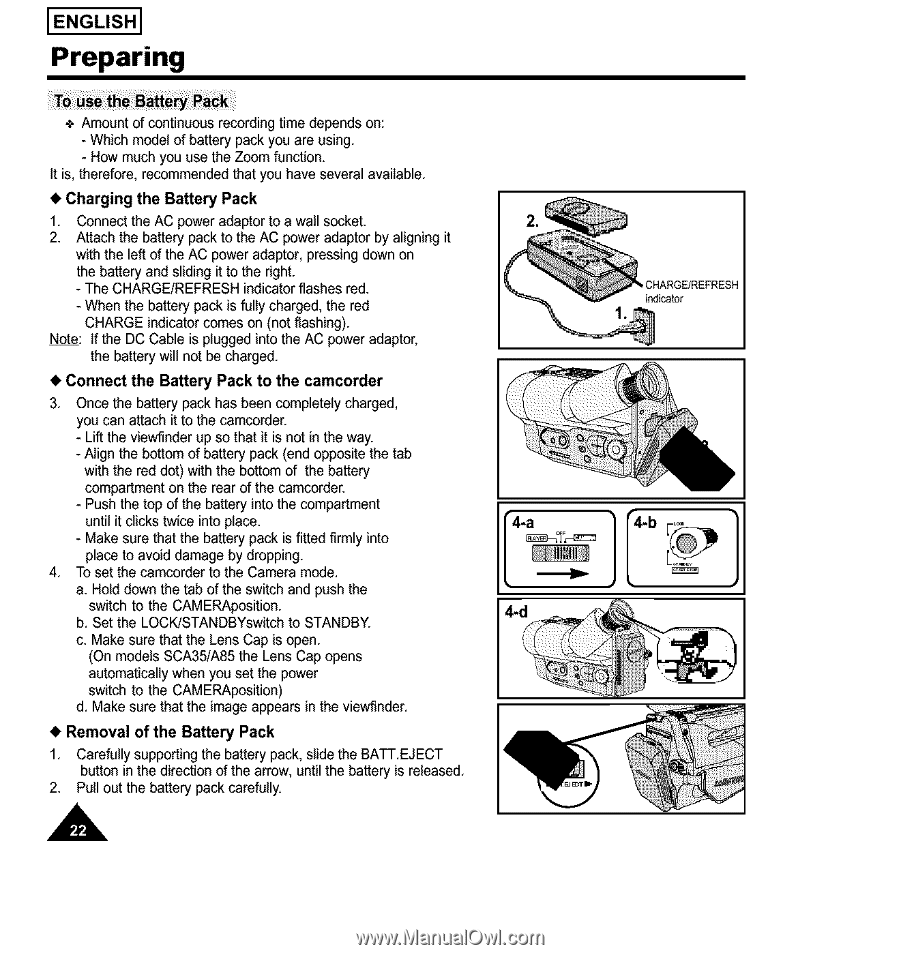
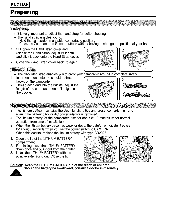
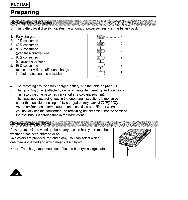
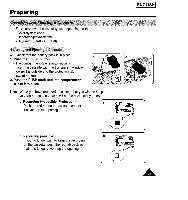
I ENGLISH] Preparing + Amount of continuous recording time depends on: - Which model of battery pack you are using. - How much you use the Zoom function, tt is, therefore, recommended that you have several available, • Charging the Battery Pack 1. Connect the AC power adaptor to a wall socket. 2. Attach the battery pack to the AC power adaptor by aligning it with the left of the AC power adaptor, pressing down on the battery and sliding it to the right. - The CHARGE/REFRESH indicator flashes red. - When the battery pack is fully charged, the red CHARGE indicator comes on (not flashing). Note: If the DC Cable is plugged into the AC power adaptor, the battery will not be charged. • Connect the Battery Pack to the camcorder 3, Once the battery pack has been completely charged, you can attach it to the camcorder. - Lift the viewfioder up so that it is not in the way. - Align the bottom of battery pack (end opposite the tab with the red dot) with the bottom of the battery compartment on the rear of the camcorder. - Push the top of the battery into the compartment until it clicks twice into place. 4-a 4-b - Make sure that the battery pack is fitted firmly into place to avoid damage by dropping. 4, To set the camcorder to the Camera mode, a. Hold down the tab of the switch and push the switch to the CAMERAposition. b, Set the LOCK/STANDBYswitch to STANDBY. c. Make sure that the Lens Cap is open. (On models SCA35/A85 the Lens Cap opens automatically when you set the power switch to the CAMERAposition) d, Make sure that the image appears in the viewfinder, • Removal of the Battery Pack 1, Carefully supporting the battery pack, slide the BATT,EJECT button in the direction of the arrow, until the battery is released, 2. Pull out the battery pack carefully, A
-
 1
1 -
2
-
3
-
4
-
5
-
6
-
7
-
8
-
9
-
10
-
11
-
12
-
13
-
14
-
15
-
16
-
 17
17 -
 18
18 -
 19
19 -
 20
20 -
 21
21 -
 22
22 -
 23
23 -
 24
24 -
 25
25 -
 26
26 -
 27
27 -
28
-
29
-
30
-
31
-
32
-
33
-
34
-
35
-
36
-
37
-
38
-
39
-
40
-
41
-
42
-
43
-
44
-
45
-
46
-
47
-
48
-
49
-
50
-
51
-
52
-
53
-
54
-
55
-
56
-
57
 |
 |