Samsung SGH-T539 User Manual (user Manual) (ver.f3) (English) - Page 110
Send to My Album online?
 |
View all Samsung SGH-T539 manuals
Add to My Manuals
Save this manual to your list of manuals |
Page 110 highlights
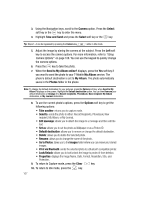
3. Using the Navigation keys, scroll to the Camera option. Press the Select soft key or the key to enter the menu. 4. Highlight Take and Send and press the Select soft key or the key. Tip: Steps 1-4 can be bypassed by pressing the Camera key while in Idle mode. 5. Adjust the image by aiming the camera at the subject. Press the Left soft key to access the camera options. For more information, refer to "Using Camera Options" on page 108. You can use the keypad to quickly change the camera options. 6. Press the key to take the photo. 7. When the Send to My Album online? displays, press the Yes soft key if you want to send the photo to your T-Mobile My Album service. The phone's default destination is set to My Album. The photo automatically saves in the Photos folder in the phone. Note: To change the default destination for your pictures, press the Options soft key when Send to My Album? displays on the screen. Highlight the Default destination option. You can then Remove your default destination or Change it to Recent recipients, Phonebook, New recipient, My Album destination, or My Journal destination. 8. To use the current photo's options, press the Options soft key to get the following options: • Take another: returns you to capture mode. • Send to: sends the photo to either: Recent Recipients, Phonebook, New recipient, My Album, or My Journal. • Edit message: allows you to attach the image to a message and then edit the text. • Set as: allows you to set the photo as Wallpaper or as a Picture ID. • Default destination: allows you to remove or change the default destination. • Delete: allows you to delete the Selected photo. • Rename: allows you to change the name of the photo. • Go to Photos: takes you to the Images folder where you can review your stored images. • Print via Bluetooth: sends the selected photo to a Bluetooth compatible printer. • Lock/Unlock: allows you to lock/unlock the image to protect it from deletion. • Properties: displays the image Name, Date, Format, Resolution, Size, and Protection. 9. To return to Capture mode, press the Clear key. 10. To return to Idle mode, press the key. 107
-
 1
1 -
2
-
3
-
4
-
5
-
6
-
7
-
8
-
9
-
10
-
11
-
12
-
13
-
14
-
15
-
16
-
17
-
18
-
19
-
20
-
21
-
22
-
23
-
24
-
25
-
26
-
27
-
28
-
29
-
30
-
31
-
32
-
33
-
34
-
35
-
36
-
37
-
38
-
39
-
40
-
41
-
42
-
43
-
44
-
45
-
46
-
47
-
48
-
49
-
50
-
51
-
52
-
53
-
54
-
55
-
56
-
57
-
58
-
59
-
60
-
61
-
62
-
63
-
64
-
65
-
66
-
67
-
68
-
69
-
70
-
71
-
72
-
73
-
74
-
75
-
76
-
77
-
78
-
79
-
80
-
81
-
82
-
83
-
84
-
85
-
86
-
87
-
88
-
89
-
90
-
91
-
92
-
93
-
94
-
95
-
96
-
97
-
98
-
99
-
100
-
101
-
102
-
103
-
104
-
 105
105 -
 106
106 -
 107
107 -
 108
108 -
 109
109 -
 110
110 -
 111
111 -
 112
112 -
 113
113 -
 114
114 -
 115
115 -
116
-
117
-
118
-
119
-
120
-
121
-
122
-
123
-
124
-
125
-
126
-
127
-
128
-
129
-
130
-
131
-
132
-
133
-
134
-
135
-
136
-
137
-
138
-
139
-
140
-
141
-
142
-
143
-
144
-
145
-
146
-
147
-
148
-
149
-
150
-
151
-
152
-
153
-
154
-
155
-
156
-
157
-
158
-
159
-
160
-
161
-
162
-
163
-
164
-
165
-
166
-
167
-
168
-
169
-
170
-
171
-
172
-
173
-
174
-
175
-
176
-
177
 |
 |
