Samsung SPH-L300 User Manual Ver.1.0 (English(north America)) - Page 111
Assign a New Picture to a Contact, Take picture, Default, Ringtones, Go to My Files
 |
View all Samsung SPH-L300 manuals
Add to My Manuals
Save this manual to your list of manuals |
Page 111 highlights
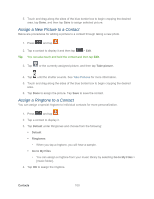
5. Touch and drag along the sides of the blue border box to begin cropping the desired area, tap Done, and then tap Save to assign selected picture. Assign a New Picture to a Contact Below are procedures for adding a picture to a contact through taking a new photo. 1. Press and tap . 2. Tap a contact to display it and then tap > Edit. Tip: You can also touch and hold the contact and then tap Edit. 3. Tap or the currently assigned picture, and then tap Take picture. 4. Tap until the shutter sounds. See Take Pictures for more information. 5. Touch and drag along the sides of the blue border box to begin cropping the desired area. 6. Tap Done to assign the picture. Tap Save to save the contact. Assign a Ringtone to a Contact You can assign a special ringtone to individual contacts for more personalization. 1. Press and tap . 2. Tap a contact to display it. 3. Tap Default under Ringtones and choose from the following: Default Ringtones • When you tap a ringtone, you will hear a sample. Go to My Files • You can assign a ringtone from your music library by selecting Go to My Files > [music folder]. 4. Tap OK to assign the ringtone. Contacts 100
-
 1
1 -
2
-
3
-
4
-
5
-
6
-
7
-
8
-
9
-
10
-
11
-
12
-
13
-
14
-
15
-
16
-
17
-
18
-
19
-
20
-
21
-
22
-
23
-
24
-
25
-
26
-
27
-
28
-
29
-
30
-
31
-
32
-
33
-
34
-
35
-
36
-
37
-
38
-
39
-
40
-
41
-
42
-
43
-
44
-
45
-
46
-
47
-
48
-
49
-
50
-
51
-
52
-
53
-
54
-
55
-
56
-
57
-
58
-
59
-
60
-
61
-
62
-
63
-
64
-
65
-
66
-
67
-
68
-
69
-
70
-
71
-
72
-
73
-
74
-
75
-
76
-
77
-
78
-
79
-
80
-
81
-
82
-
83
-
84
-
85
-
86
-
87
-
88
-
89
-
90
-
91
-
92
-
93
-
94
-
95
-
96
-
97
-
98
-
99
-
100
-
101
-
102
-
103
-
104
-
105
-
 106
106 -
 107
107 -
 108
108 -
 109
109 -
 110
110 -
 111
111 -
 112
112 -
 113
113 -
 114
114 -
 115
115 -
 116
116 -
117
-
118
-
119
-
120
-
121
-
122
-
123
-
124
-
125
-
126
-
127
-
128
-
129
-
130
-
131
-
132
-
133
-
134
-
135
-
136
-
137
-
138
-
139
-
140
-
141
-
142
-
143
-
144
-
145
-
146
-
147
-
148
-
149
-
150
-
151
-
152
-
153
-
154
-
155
-
156
-
157
-
158
-
159
-
160
-
161
-
162
-
163
-
164
-
165
-
166
-
167
-
168
-
169
-
170
-
171
-
172
-
173
-
174
-
175
-
176
-
177
-
178
-
179
-
180
-
181
-
182
-
183
-
184
-
185
-
186
-
187
-
188
-
189
-
190
-
191
-
192
-
193
-
194
-
195
-
196
-
197
-
198
-
199
-
200
-
201
-
202
-
203
-
204
-
205
-
206
-
207
-
208
-
209
-
210
-
211
-
212
-
213
-
214
-
215
-
216
-
217
 |
 |