Seagate BlackArmor WS 110 BlackArmor PS User Guide - Page 100
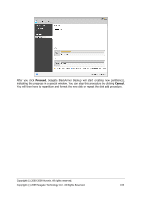
Cloning summary, Accept, Proceed, Cancel
 |
View all Seagate BlackArmor WS 110 manuals
Add to My Manuals
Save this manual to your list of manuals |
Page 100 highlights
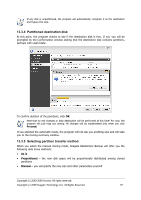
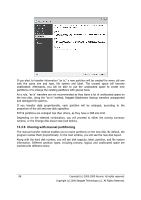
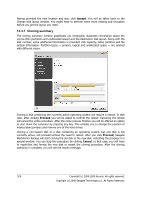
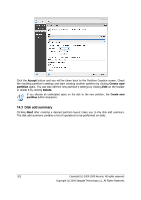
Having provided the new location and size, click Accept. You will be taken back to the Change disk layout window. You might have to perform some more resizing and relocation before you get the layout you need. 13.3.7 Cloning summary The cloning summary window graphically (as rectangles) illustrates information about the source disk (partitions and unallocated space) and the destination disk layout. Along with the disk number, some additional information is provided: disk capacity, label, partition and file system information. Partition types - primary, logical and unallocated space - are marked with different colors. Cloning a disk containing the currently active operating system will require a reboot. In that case, after clicking Proceed you will be asked to confirm the reboot. Canceling the reboot will cancel the entire procedure. After the clone process finishes you will be offered an option to shut down the computer by pressing any key. This enables you to change the position of master/slave jumpers and remove one of the hard drives. Cloning a non-system disk or a disk containing an operating system, but one that is not currently active, will proceed without the need to reboot. After you click Proceed, Seagate BlackArmor Backup will start cloning the old disk to the new disk, indicating the progress in a special window. You can stop this procedure by clicking Cancel. In that case, you will have to repartition and format the new disk or repeat the cloning procedure. After the cloning operation is complete, you will see the results message. 100 Copyright (c) 2000-2009 Acronis. All rights reserved. Copyright (c) 2009 Seagate Technology LLC. All Rights Reserved.
-
 1
1 -
2
-
3
-
4
-
5
-
6
-
7
-
8
-
9
-
10
-
11
-
12
-
13
-
14
-
15
-
16
-
17
-
18
-
19
-
20
-
21
-
22
-
23
-
24
-
25
-
26
-
27
-
28
-
29
-
30
-
31
-
32
-
33
-
34
-
35
-
36
-
37
-
38
-
39
-
40
-
41
-
42
-
43
-
44
-
45
-
46
-
47
-
48
-
49
-
50
-
51
-
52
-
53
-
54
-
55
-
56
-
57
-
58
-
59
-
60
-
61
-
62
-
63
-
64
-
65
-
66
-
67
-
68
-
69
-
70
-
71
-
72
-
73
-
74
-
75
-
76
-
77
-
78
-
79
-
80
-
81
-
82
-
83
-
84
-
85
-
86
-
87
-
88
-
89
-
90
-
91
-
92
-
93
-
94
-
 95
95 -
 96
96 -
 97
97 -
 98
98 -
 99
99 -
 100
100 -
 101
101 -
 102
102 -
 103
103 -
 104
104 -
 105
105 -
106
-
107
-
108
-
109
-
110
-
111
-
112
-
113
-
114
-
115
-
116
-
117
-
118
-
119
-
120
-
121
-
122
-
123
-
124
-
125
-
126
-
127
-
128
 |
 |
