Sharp AR M207 AR-M162 AR-M207 Operation Manual Suite - Page 250
Storing Destinations
 |
View all Sharp AR M207 manuals
Add to My Manuals
Save this manual to your list of manuals |
Page 250 highlights
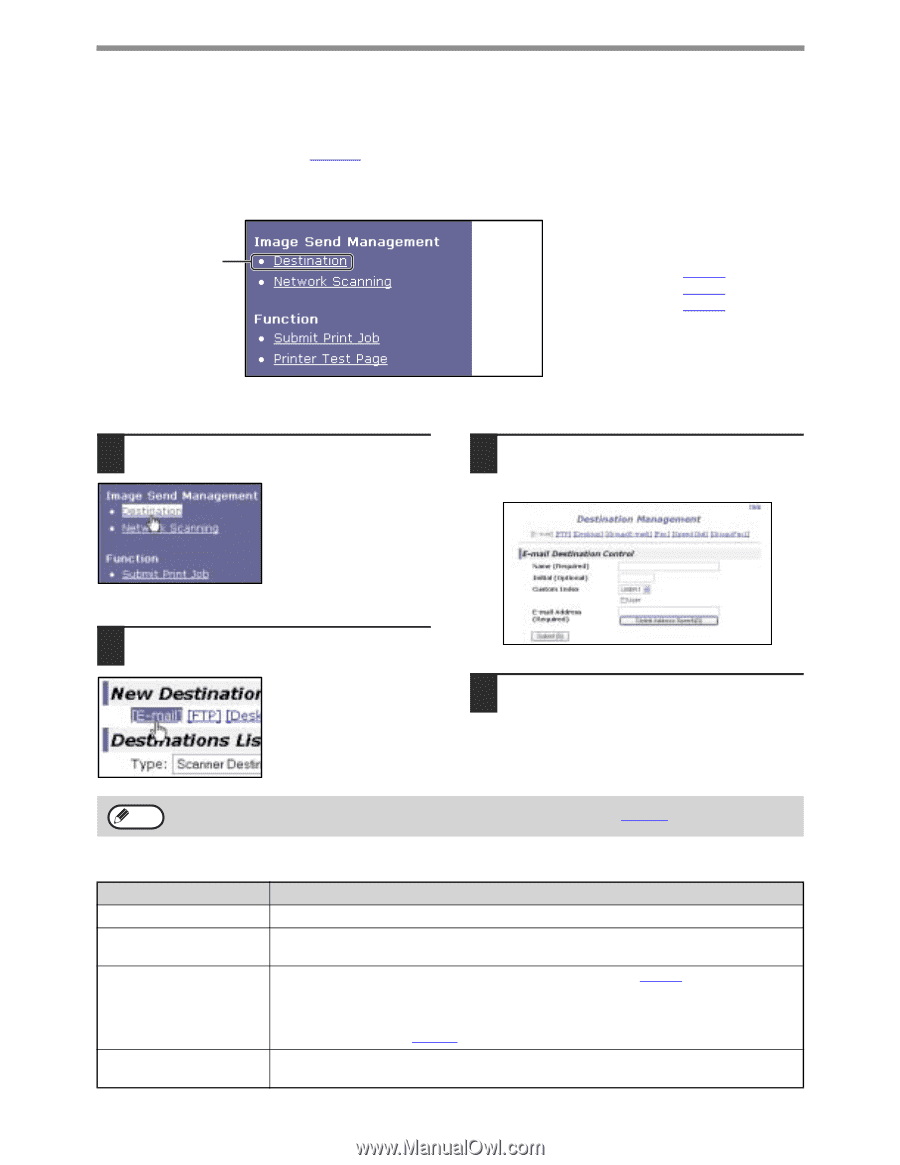
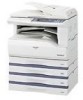
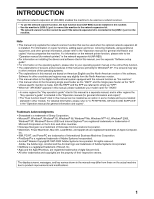
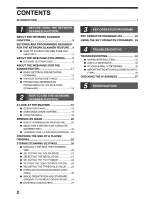
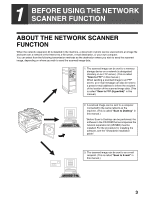
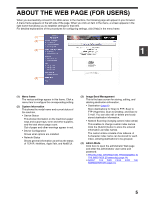
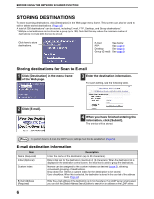
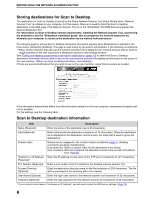
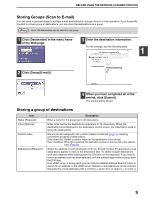
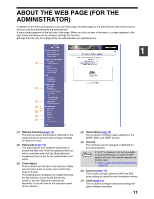
BEFORE USING THE NETWORK SCANNER FUNCTION STORING DESTINATIONS To store scanning destinations, click [Destination] in the Web page menu frame. This screen can also be used to edit or delete stored destinations. (Page 10) A total of 200 destinations* can be stored, including E-mail, FTP, Desktop, and Group destinations.* * Multiple e-mail addresses can be stored as a group (up to 100). Note that this may reduce the maximum number of destinations (normally 200) that can be stored. Click here to store destinations. E-mail: See below FTP: See page 7. Desktop: See page 8. Group (E-mail): See page 9. Storing destinations for Scan to E-mail 1 Click [Destination] in the menu frame of the Web page. 3 Enter the destination information. For each setting, see the following table. 2 Click [E-mail]. 4 When you have finished entering the information, click [Submit]. The entries will be stored. Note To perform Scan to E-mail, the SMTP server settings must first be established. (Page 13) E-mail destination information Item Name (Required) Initial (Optional) Custom Index E-mail Address (Required) Description Enter the name of the destination (up to 36 characters). Enter initial text for the destination (maximum of 10 characters). When the destination list is displayed in the destination control screen, the initial text is used to group the destinations. Names can be assigned to the custom indexes as desired (page 5), allowing convenient grouping of destinations. Drop down list: Select a custom index for the destination to be stored. User checkbox: When this is selected, the destination is stored in the user tab of the address book. (Page 22) Enter the e-mail address of the destination (up to 64 characters). If an LDAP server is being used, you can click the [Global Address Search] button to search for an address on the LDAP server. 6
-
 1
1 -
2
-
3
-
4
-
5
-
6
-
7
-
8
-
9
-
10
-
11
-
12
-
13
-
14
-
15
-
16
-
17
-
18
-
19
-
20
-
21
-
22
-
23
-
24
-
25
-
26
-
27
-
28
-
29
-
30
-
31
-
32
-
33
-
34
-
35
-
36
-
37
-
38
-
39
-
40
-
41
-
42
-
43
-
44
-
45
-
46
-
47
-
48
-
49
-
50
-
51
-
52
-
53
-
54
-
55
-
56
-
57
-
58
-
59
-
60
-
61
-
62
-
63
-
64
-
65
-
66
-
67
-
68
-
69
-
70
-
71
-
72
-
73
-
74
-
75
-
76
-
77
-
78
-
79
-
80
-
81
-
82
-
83
-
84
-
85
-
86
-
87
-
88
-
89
-
90
-
91
-
92
-
93
-
94
-
95
-
96
-
97
-
98
-
99
-
100
-
101
-
102
-
103
-
104
-
105
-
106
-
107
-
108
-
109
-
110
-
111
-
112
-
113
-
114
-
115
-
116
-
117
-
118
-
119
-
120
-
121
-
122
-
123
-
124
-
125
-
126
-
127
-
128
-
129
-
130
-
131
-
132
-
133
-
134
-
135
-
136
-
137
-
138
-
139
-
140
-
141
-
142
-
143
-
144
-
145
-
146
-
147
-
148
-
149
-
150
-
151
-
152
-
153
-
154
-
155
-
156
-
157
-
158
-
159
-
160
-
161
-
162
-
163
-
164
-
165
-
166
-
167
-
168
-
169
-
170
-
171
-
172
-
173
-
174
-
175
-
176
-
177
-
178
-
179
-
180
-
181
-
182
-
183
-
184
-
185
-
186
-
187
-
188
-
189
-
190
-
191
-
192
-
193
-
194
-
195
-
196
-
197
-
198
-
199
-
200
-
201
-
202
-
203
-
204
-
205
-
206
-
207
-
208
-
209
-
210
-
211
-
212
-
213
-
214
-
215
-
216
-
217
-
218
-
219
-
220
-
221
-
222
-
223
-
224
-
225
-
226
-
227
-
228
-
229
-
230
-
231
-
232
-
233
-
234
-
235
-
236
-
237
-
238
-
239
-
240
-
241
-
242
-
243
-
244
-
 245
245 -
 246
246 -
 247
247 -
 248
248 -
 249
249 -
 250
250 -
 251
251 -
 252
252 -
 253
253 -
 254
254 -
 255
255 -
256
-
257
-
258
-
259
-
260
-
261
-
262
-
263
-
264
-
265
-
266
-
267
-
268
-
269
-
270
-
271
-
272
-
273
-
274
-
275
-
276
-
277
-
278
-
279
-
280
-
281
-
282
-
283
-
284
-
285
-
286
-
287
-
288
-
289
-
290
-
291
-
292
-
293
-
294
-
295
-
296
-
297
-
298
-
299
-
300
-
301
-
302
-
303
-
304
-
305
-
306
-
307
-
308
-
309
-
310
-
311
-
312
-
313
-
314
-
315
-
316
-
317
-
318
-
319
-
320
-
321
-
322
-
323
-
324
-
325
-
326
-
327
-
328
-
329
-
330
-
331
-
332
-
333
-
334
-
335
-
336
-
337
-
338
-
339
-
340
-
341
-
342
-
343
-
344
-
345
-
346
-
347
-
348
-
349
-
350
-
351
-
352
-
353
-
354
-
355
-
356
-
357
-
358
-
359
-
360
-
361
-
362
-
363
-
364
-
365
-
366
-
367
-
368
-
369
-
370
-
371
-
372
 |
 |