Sharp PN-Y556 PN-Y326 PN-Y436 PN-Y496 PN-Y556 Operation Manual - Page 20
Basic Operation
 |
View all Sharp PN-Y556 manuals
Add to My Manuals
Save this manual to your list of manuals |
Page 20 highlights
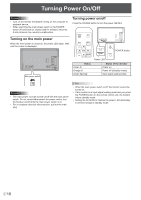
Basic Operation 4. VOL +/- (Volume adjustment) Pressing or displays the VOLUME menu when the 1 menu screen is not displayed. 2 15 3 5 4 Press or to adjust the volume of the sound. * If you do not press any buttons for about 5 seconds, the VOLUME menu automatically disappears. * When the input mode is "Media Player", the volume can be adjusted during auto play and schedule play. During any 6 7 other type of playback, use "Settings during playback" to change the volume. (See page 25.) 9 8 5. BRIGHT +/- (Brightness adjustment) Pressing or displays the BRIGHT menu when the 10 menu screen is not displayed. 1. INPUT (Input mode selection) The menu is displayed. Press or to select the input mode, and press ENTER to enter. * You can select the input terminal by pressing the input button of the monitor. Input mode DVI-D HDMI[PC] HDMI[AV] D-SUB[RGB] D-SUB[COMPONENT] D-SUB[VIDEO] Media Player Video DVI-D input terminal HDMI input terminal D-sub input terminal USB port / SD card slot Audio PC audio input terminal HDMI input terminal / PC audio input terminal* PC audio input terminal AV audio input terminal USB port / SD card slot * DVI mode in which the HDMI signal does not include an audio signal. In the following cases, the input mode automatically changes to "Media player". • When a USB flash drive or SD memory card is connected in the power ON state. • When the power is turned on (the power ON state is entered) with a USB flash drive or SD memory card connected. 2. MUTE Turns off the volume temporarily. Press the MUTE button again to turn the sound back to the previous level. 3. MENU Displays and turns off the menu screen. (see page 27.) 31 Press or to adjust the brightness. * If you do not press any buttons for about 30 seconds, the BRIGHT menu automatically disappears. 6. ENTER Confirms the setting. 7. RETURN Returns to the previous screen. 8. SIZE (Screen size selection)/Yellow Each time you press this button, the screen size changes in the following order: (See page 21.) NORMAL → WIDE → Dot by Dot →NORMAL... 9. DISPLAY/Red Displays monitor information (Input mode, LAN Setup, etc.). The display disappears automatically after about 15 seconds. E 20
-
 1
1 -
2
-
3
-
4
-
5
-
6
-
7
-
8
-
9
-
10
-
11
-
12
-
13
-
14
-
 15
15 -
 16
16 -
 17
17 -
 18
18 -
 19
19 -
 20
20 -
 21
21 -
 22
22 -
 23
23 -
 24
24 -
 25
25 -
26
-
27
-
28
-
29
-
30
-
31
-
32
-
33
-
34
-
35
-
36
-
37
-
38
-
39
-
40
-
41
-
42
-
43
-
44
-
45
-
46
-
47
-
48
-
49
-
50
-
51
-
52
-
53
 |
 |
