Sharp PN-Y556 PN-Y326 PN-Y436 PN-Y496 PN-Y556 Operation Manual - Page 29
AUDIO, SETUP, Menu Items, SCHEDULE See
 |
View all Sharp PN-Y556 manuals
Add to My Manuals
Save this manual to your list of manuals |
Page 29 highlights
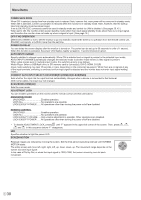
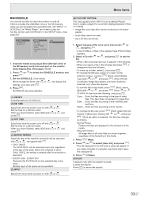
Menu Items nAUDIO BASS Adjusts the volume of bass-level sound. TREBLE Adjusts the volume of treble-level sound. RESET Resets the values of the AUDIO menu items to the factory preset values. Select "ON" and then press . ENTER nSETUP DATE/TIME SETTING Set the date and time. Press or to select the date and time, and press or to change the numerical values. Set the time on a 24-hour basis. SCHEDULE (See page 33.) You can turn the power on/off at a specified time. Files in a USB flash drive or an SD memory card can also be played at a specified time. LANGUAGE Sets the display language for the menu screen. INPUT SELECT HDMI Select the input mode to be used in HDMI input terminals. D-SUB Select the input mode to be used in D-Sub input terminal. Select SET after selecting the input mode, and then press . ENTER AUDIO OPTION AUDIO OUTPUT Sets the volume of sound output from the audio output terminals. SPEAKER Select whether or not speakers are used. LAN Setup Configures the settings to control the monitor from the computer via LAN. (See page 42.) ID SETTING Assigns ID numbers to monitors connected in a daisy chain (see page 35), using the RS-232 cables. The numbers 0 to 25 are available for ID numbers. If "0" is set, the system regards this as the state where no ID number is set. MULTI ENLARGE (See page 32.) Sets whether or not to use the enlarge function. ADVANCED (ENLARGE) ENLARGE H / ENLARGE V Sets the number of screen splits (number of monitors) in the horizontal/vertical direction used for the enlargement. ENLARGE-POS Specify the split screen to be displayed when the enlargement function is used. (See page 32.) BEZEL ADJUST When ENLARGE is set to ON, sets whether or not to use the frame correction function. THERMAL SENSOR SETTING Select the installation direction of the monitor. LANDSCAPE Landscape orientation PORTRAIT Portrait orientation FACE UP Screen faces up FACE DOWN Screen faces down 29 E
-
 1
1 -
2
-
3
-
4
-
5
-
6
-
7
-
8
-
9
-
10
-
11
-
12
-
13
-
14
-
15
-
16
-
17
-
18
-
19
-
20
-
21
-
22
-
23
-
 24
24 -
 25
25 -
 26
26 -
 27
27 -
 28
28 -
 29
29 -
 30
30 -
 31
31 -
 32
32 -
 33
33 -
 34
34 -
35
-
36
-
37
-
38
-
39
-
40
-
41
-
42
-
43
-
44
-
45
-
46
-
47
-
48
-
49
-
50
-
51
-
52
-
53
 |
 |
