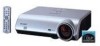
Sharp XG-MB70X Setup Guide - Page 9
Click Internet Protocol TCP/IP
 |
View all Sharp XG-MB70X manuals
Add to My Manuals
Save this manual to your list of manuals |
Page 9 highlights
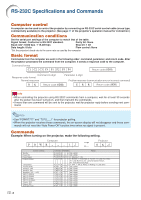
Setting up the Projector Network Environment 5 Click "Internet Protocol (TCP/IP)", and click the "Properties" button. 1 2 6 Confirm or change an IP address for the setup computer. 1 Confirm and note the current IP address and Subnet mask. Make sure to note the current IP address and Subnet mask as you will be required to reset it later. 2 The factory default setting for the projector IP address is "192.168.150.2". Set an IP address temporarily as follows : IP Address : 192.168.150.3 7 After setting, click the "OK" but- ton, and then restart the computer. After confirming or setting, proceed to "3. Setting up Network Environment for the Projector". -9
-
 1
1 -
2
-
3
-
 4
4 -
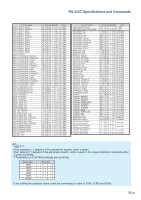 5
5 -
 6
6 -
 7
7 -
 8
8 -
 9
9 -
 10
10 -
 11
11 -
 12
12 -
 13
13 -
 14
14 -
15
-
16
-
17
-
18
-
19
-
20
-
21
-
22
-
23
-
24
-
25
-
26
-
27
-
28
-
29
-
30
 |
 |

-9
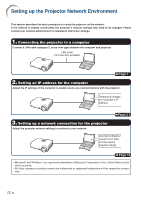
Setting up the Projector Network Environment
1
2
After confirming or setting, proceed to “3. Setting up Network Environment for the Projec-
tor”.
5
Click “Internet Protocol (TCP/IP)”,
and click the “Properties” button.
6
Confirm or change an IP address
for the setup computer.
1
Confirm and note the current IP ad-
dress and Subnet mask.
Make sure to note the current IP ad-
dress and Subnet mask as y
ou will be
required to reset it later
.
2
The factory default setting for the pro-
jector IP address is “192.168.150.2”.
Set an IP address temporarily as fol-
lows :
IP Address : 192.168.150.3
7
After setting, click the “OK” but-
ton, and then restart the com-
puter.