Sony DAV-DX255 Operating Instructions - Page 67
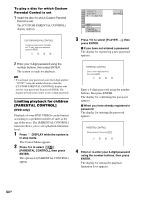
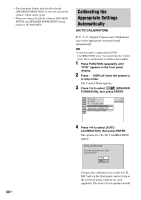
Press ENTER., Press, to select [YES] or [NO], then, Calibrating the Appropriate Settings
 |
View all Sony DAV-DX255 manuals
Add to My Manuals
Save this manual to your list of manuals |
Page 67 highlights
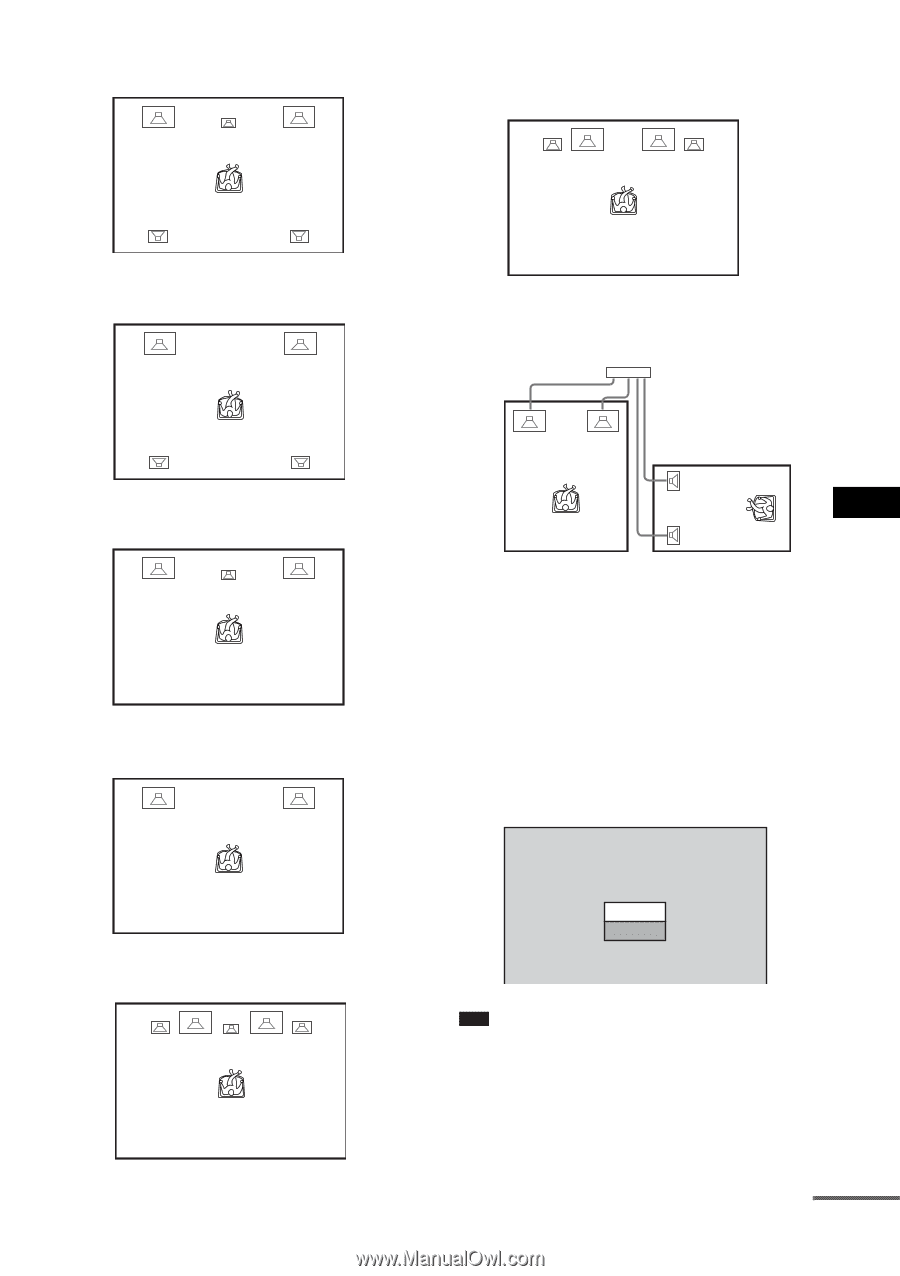
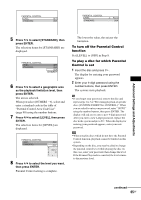
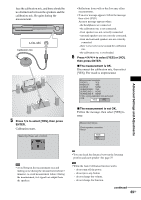
• [STANDARD]: when installing all the speakers normally. • [ALL FRONT - NO CENTER]: when installing the front and surround speakers in front of the listening position. • [NO CENTER]: when installing the front and surround speakers. • [SECOND ROOM]: when installing the front speakers in one room and surround speakers in another. • [NO SURROUND]: when installing the center and front speakers. Advanced Settings and Adjustments • [FRONT ONLY]: when installing the front speakers. • [ALL FRONT]: when installing all the speakers in front of the listening position. 6 Press ENTER. The selected setting takes effect. 7 Press X/x to select [YES] or [NO], then press ENTER. • [YES]: continue with [AUTO CALIBRATION], see Step 5 of "Calibrating the Appropriate Settings Automatically" (page 68). • [NO]: exit [SPEAKER FORMATION]. SPEAKER FORMATION Continue with AUTO CALIBRATION? YES NO Note • In order to enjoy the surround sound after you change the position of the speakers, it is recommended you set [SPEAKER FORMATION], and then set [AUTO CALIBRATION]. • To set [AUTO CALIBRATION], you need to connect the supplied calibration mic. continued 67GB
-
 1
1 -
2
-
3
-
4
-
5
-
6
-
7
-
8
-
9
-
10
-
11
-
12
-
13
-
14
-
15
-
16
-
17
-
18
-
19
-
20
-
21
-
22
-
23
-
24
-
25
-
26
-
27
-
28
-
29
-
30
-
31
-
32
-
33
-
34
-
35
-
36
-
37
-
38
-
39
-
40
-
41
-
42
-
43
-
44
-
45
-
46
-
47
-
48
-
49
-
50
-
51
-
52
-
53
-
54
-
55
-
56
-
57
-
58
-
59
-
60
-
61
-
 62
62 -
 63
63 -
 64
64 -
 65
65 -
 66
66 -
 67
67 -
 68
68 -
 69
69 -
 70
70 -
 71
71 -
 72
72 -
73
-
74
-
75
-
76
-
77
-
78
-
79
-
80
-
81
-
82
-
83
-
84
-
85
-
86
-
87
-
88
-
89
-
90
-
91
-
92
-
93
-
94
-
95
-
96
-
97
-
98
-
99
-
100
 |
 |