Sony DAV-FR10W Operating Instructions - Page 36
Playing Discs, is pulled in automatically. - remote
 |
View all Sony DAV-FR10W manuals
Add to My Manuals
Save this manual to your list of manuals |
Page 36 highlights
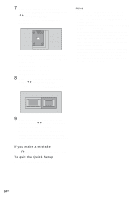
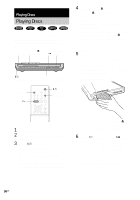
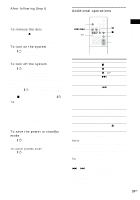
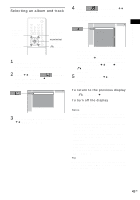
Playing Discs Playing Discs Depending on the DVD or VIDEO CD, some operations may be different or restricted. Refer to the operation details supplied with your disc. Disc1-5/Z/ Disc slot indicators Adjust the volume "/1 STANDBY indicator FUNCTION Connect headphones 4 Press DISC1-5 Z. Press the Z button of the disc number you want. "NO DISC" appears in the front panel display and the system is ready for loading the disc. Example: When you want to load the disc to the disc stocker 1, press DISC1 Z. If there is a disc in the stocker that you select, the disc is ejected, "NO DISC" appears in the front panel display, then the system is ready for loading the disc. 5 Load a disc. Push the disc into the disc slot until the disc is pulled in automatically. The disc is drawn into the system automatically and "READING" appears in the front panel display. With the playback side facing down DISC SKIP H "/1 FUNCTION 1 Turn on your TV. 2 Switch the input selector on the TV to this system. 3 Press "/1 on the system. The system turns on. Unless the mode of the system is set to "DVD," press FUNCTION to select "DVD." "NO DISC" appears in the front panel display and the system is ready for loading the disc. To load other discs, press DISC1-5 Z (that is not loaded a disc) and load the disc after "NO DISC" appears in the front panel display. 6 Press H on the remote or on the system. The system starts playback (continuous play) of the disc whose DISC indicator is green. To play back other discs, press DISC SKIP on the remote or DISC1-5 of the system. Adjust the volume on the system. 36US
-
 1
1 -
2
-
3
-
4
-
5
-
6
-
7
-
8
-
9
-
10
-
11
-
12
-
13
-
14
-
15
-
16
-
17
-
18
-
19
-
20
-
21
-
22
-
23
-
24
-
25
-
26
-
27
-
28
-
29
-
30
-
 31
31 -
 32
32 -
 33
33 -
 34
34 -
 35
35 -
 36
36 -
 37
37 -
 38
38 -
 39
39 -
 40
40 -
 41
41 -
42
-
43
-
44
-
45
-
46
-
47
-
48
-
49
-
50
-
51
-
52
-
53
-
54
-
55
-
56
-
57
-
58
-
59
-
60
-
61
-
62
-
63
-
64
-
65
-
66
-
67
-
68
-
69
-
70
-
71
-
72
-
73
-
74
-
75
-
76
-
77
-
78
-
79
-
80
-
81
-
82
-
83
-
84
-
85
-
86
-
87
-
88
-
89
-
90
-
91
-
92
-
93
-
94
-
95
-
96
-
97
-
98
-
99
-
100
-
101
-
102
-
103
-
104
-
105
-
106
-
107
-
108
-
109
-
110
-
111
-
112
-
113
-
114
-
115
-
116
-
117
-
118
-
119
-
120
-
121
-
122
-
123
-
124
-
125
-
126
-
127
-
128
-
129
-
130
-
131
-
132
-
133
-
134
-
135
-
136
-
137
-
138
-
139
-
140
-
141
-
142
-
143
-
144
-
145
-
146
-
147
-
148
-
149
-
150
-
151
-
152
-
153
-
154
-
155
-
156
-
157
-
158
-
159
-
160
-
161
-
162
-
163
-
164
-
165
-
166
-
167
-
168
-
169
-
170
-
171
-
172
-
173
-
174
-
175
-
176
-
177
-
178
-
179
-
180
-
181
-
182
-
183
-
184
-
185
-
186
-
187
-
188
-
189
-
190
-
191
-
192
-
193
-
194
-
195
-
196
-
197
-
198
-
199
-
200
-
201
-
202
-
203
-
204
-
205
-
206
-
207
-
208
-
209
-
210
-
211
-
212
-
213
-
214
-
215
-
216
-
217
-
218
-
219
-
220
-
221
-
222
-
223
-
224
-
225
-
226
-
227
-
228
-
229
-
230
-
231
-
232
-
233
-
234
-
235
-
236
 |
 |
