Sony DAV-FR10W Operating Instructions - Page 90
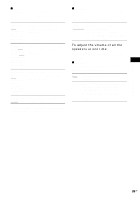
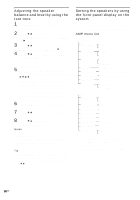
Adjusting the speaker balance and level by using the test tone
 |
View all Sony DAV-FR10W manuals
Add to My Manuals
Save this manual to your list of manuals |
Page 90 highlights
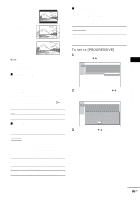
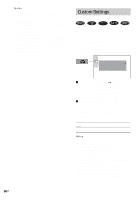
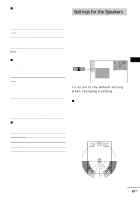
Adjusting the speaker balance and level by using the test tone 1 Press DVD SETUP in stop mode. The Setup Display appears. 2 Press X/x repeatedly to select [SPEAKER SETUP], then press ENTER or c. 3 Press X/x repeatedly to select [TEST TONE], then press ENTER or c. 4 Press X/x repeatedly to select [ON], then press ENTER. You will hear the test tone from each speaker in sequence. 5 From your listening position, adjust the value of [BALANCE] and [LEVEL] using C/X/x/c. When selecting [BALANCE], the test tone is emitted from both left and right speakers simultaneously. When selecting [LEVEL], the test tone is emitted from only the speaker which you are adjusting. 6 Press ENTER when you have finished making adjustments. 7 Press X/x repeatedly to select [TEST TONE], then press ENTER. 8 Press X/x repeatedly to select [OFF], then press ENTER. Notes • When you adjust the speaker settings, the sound cuts off for a moment. • The surround back speaker level can be also adjusted on the amplifier that is connected to the surround back speaker. Tip To adjust the balance or the level without listening to the test tone, select [BALANCE] or [LEVEL] in step 3 and press ENTER. Then adjust the balance or level using X/x and press ENTER. Setting the speakers by using the front panel display on the system You can set the speakers by using the AMP menu that is displayed in the front panel display. AMP menu list SP SETUP CENTER SP SURR SP SURR B SPa) CENTER Y CENTER N SURR Y SURR N SURR B N SURR B Y F DIST 1.0 m - 7.0 m/3 ft to 23 ft CEN DISTb) 1.0 m - 7.0 m/3 ft to 23 ft SURR DISTb) 1.0 m - 7.0 m/3 ft to 23 ft SB DISTb) 1.0 m - 7.0 m/3 ft to 23 ft SP POSb) SP BEHIND SP SIDE LEVEL TESTTONE T.TONE OFF T.TONE ON F BALANCE 6 steps left or right CEN LEVELb) -6 dB - +6 dB SL LEVELb) -6 dB - +6 dB SR LEVELb) -6 dB - +6 dB SB LEVELb) -10 dB - +10 dB SW LEVEL -6 dB - +6 dB AUDIO DRC DRC OFF DRC ON a) This setting appears when you set "SURR SP" to "SURR Y" in "SP SETUP." b) This setting appears when you set the corresponding speaker to "Y" in "SP SETUP." 90US
-
 1
1 -
2
-
3
-
4
-
5
-
6
-
7
-
8
-
9
-
10
-
11
-
12
-
13
-
14
-
15
-
16
-
17
-
18
-
19
-
20
-
21
-
22
-
23
-
24
-
25
-
26
-
27
-
28
-
29
-
30
-
31
-
32
-
33
-
34
-
35
-
36
-
37
-
38
-
39
-
40
-
41
-
42
-
43
-
44
-
45
-
46
-
47
-
48
-
49
-
50
-
51
-
52
-
53
-
54
-
55
-
56
-
57
-
58
-
59
-
60
-
61
-
62
-
63
-
64
-
65
-
66
-
67
-
68
-
69
-
70
-
71
-
72
-
73
-
74
-
75
-
76
-
77
-
78
-
79
-
80
-
81
-
82
-
83
-
84
-
 85
85 -
 86
86 -
 87
87 -
 88
88 -
 89
89 -
 90
90 -
 91
91 -
 92
92 -
 93
93 -
 94
94 -
 95
95 -
96
-
97
-
98
-
99
-
100
-
101
-
102
-
103
-
104
-
105
-
106
-
107
-
108
-
109
-
110
-
111
-
112
-
113
-
114
-
115
-
116
-
117
-
118
-
119
-
120
-
121
-
122
-
123
-
124
-
125
-
126
-
127
-
128
-
129
-
130
-
131
-
132
-
133
-
134
-
135
-
136
-
137
-
138
-
139
-
140
-
141
-
142
-
143
-
144
-
145
-
146
-
147
-
148
-
149
-
150
-
151
-
152
-
153
-
154
-
155
-
156
-
157
-
158
-
159
-
160
-
161
-
162
-
163
-
164
-
165
-
166
-
167
-
168
-
169
-
170
-
171
-
172
-
173
-
174
-
175
-
176
-
177
-
178
-
179
-
180
-
181
-
182
-
183
-
184
-
185
-
186
-
187
-
188
-
189
-
190
-
191
-
192
-
193
-
194
-
195
-
196
-
197
-
198
-
199
-
200
-
201
-
202
-
203
-
204
-
205
-
206
-
207
-
208
-
209
-
210
-
211
-
212
-
213
-
214
-
215
-
216
-
217
-
218
-
219
-
220
-
221
-
222
-
223
-
224
-
225
-
226
-
227
-
228
-
229
-
230
-
231
-
232
-
233
-
234
-
235
-
236
 |
 |
