Sony DHG-HDD250 Operation Manual - Page 11
Front Panel Indicators and Controls - tv guide
 |
UPC - 027242646216
View all Sony DHG-HDD250 manuals
Add to My Manuals
Save this manual to your list of manuals |
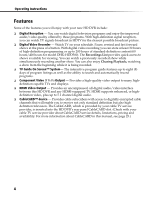
Page 11 highlights
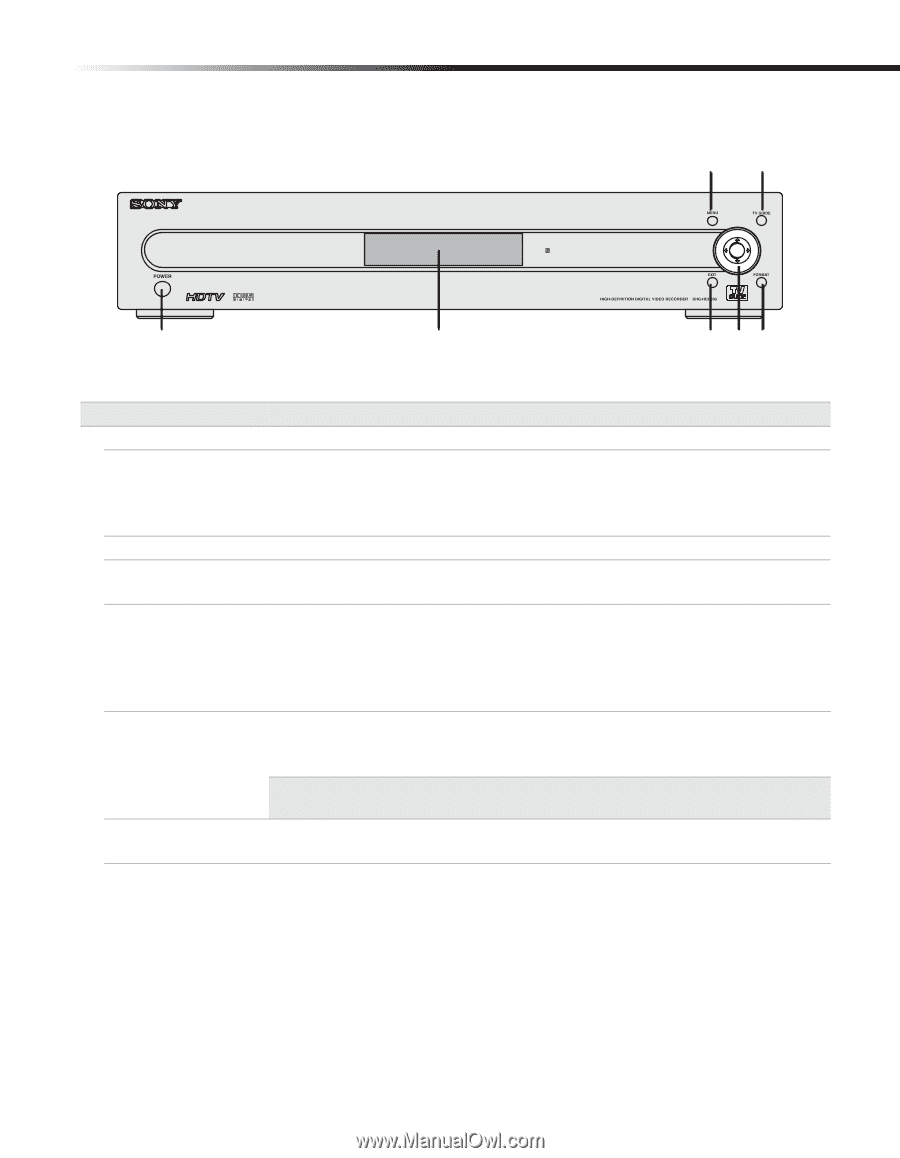
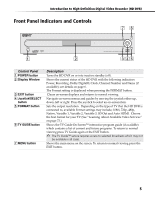
Introduction to High-Definition Digital Video Recorder (HD DVR) Front Panel Indicators and Controls 76 1 2 3 45 Control Panel 1 POWER button 2 Display Window 3 EXIT button 4 Joystick/SELECT button 5 FORMAT button 6 TV GUIDE button 7 MENU button Description Turns the HD DVR on or into inactive standby (off). Shows the current status of the HD DVR with the following indicators: Power, Recording, Dolby Digital®, Clock, Channel Number and Name (if available); see details on page 6. The Format setting is displayed when pressing the FORMAT button. Clears on-screen displays and returns to normal viewing. Navigate on-screen menus and guides by moving the joystick either up, down, left or right. Press the joystick to select an on-screen item. Sets the output resolution. Depending on the type of TV that the HD DVR is connected to, available Format settings may include; 1080i, 720p, 480p, Native, Variable 1, Variable 2, Variable 3, SD Out and Auto HDMI. Choose the best format for your TV (See "Learning About Available Video Services" on page 73.) Shows the TV Guide On Screen™ interactive program guide (if available) which contains a list of current and future programs. To return to normal viewing press TV Guide again or the EXIT button. ✍ The TV Guide™ service requires access to selected broadcasts which may not be available in all cases. Shows the main menu on the screen. To return to normal viewing press the EXIT button. 5
-
 1
1 -
2
-
3
-
4
-
5
-
 6
6 -
 7
7 -
 8
8 -
 9
9 -
 10
10 -
 11
11 -
 12
12 -
 13
13 -
 14
14 -
 15
15 -
 16
16 -
17
-
18
-
19
-
20
-
21
-
22
-
23
-
24
-
25
-
26
-
27
-
28
-
29
-
30
-
31
-
32
-
33
-
34
-
35
-
36
-
37
-
38
-
39
-
40
-
41
-
42
-
43
-
44
-
45
-
46
-
47
-
48
-
49
-
50
-
51
-
52
-
53
-
54
-
55
-
56
-
57
-
58
-
59
-
60
-
61
-
62
-
63
-
64
-
65
-
66
-
67
-
68
-
69
-
70
-
71
-
72
-
73
-
74
-
75
-
76
-
77
-
78
-
79
-
80
-
81
-
82
-
83
-
84
-
85
-
86
-
87
-
88
-
89
-
90
-
91
-
92
-
93
-
94
-
95
-
96
-
97
-
98
-
99
-
100
-
101
-
102
-
103
-
104
 |
 |