Sony DSCF717 Operating Instructions - Page 55
Shooting in the dark - infrared
 |
UPC - 027242592889
View all Sony DSCF717 manuals
Add to My Manuals
Save this manual to your list of manuals |
Page 55 highlights
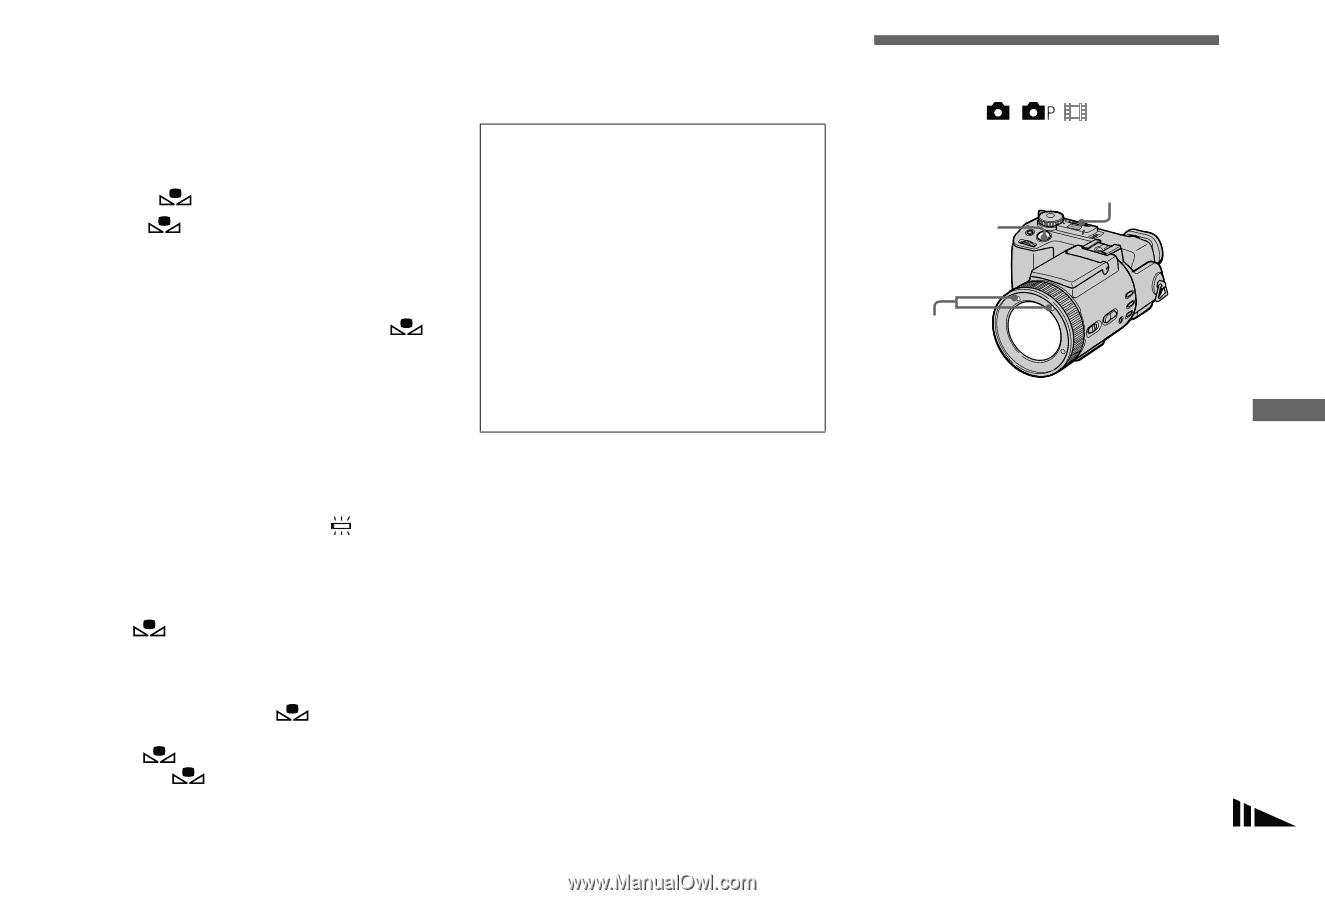
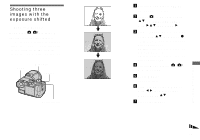
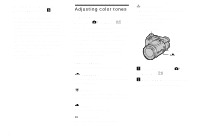
To shoot in one-push white balance mode 1 Frame a white object such as a piece of paper filling the screen under the same lighting conditions as you will shoot the subject. 2 Press . The indicator flashes quickly. When the white balance has been adjusted and stored in the memory, the indicator stops flashing. Do not move the camera while the indicator is flashing. To reactivate auto adjustment Select [AUTO] in step 2. • Under fluorescent lights that flicker, the white balance adjustment function may not work correctly even though you select (fluorescent). • When the flash strobes, the manual setting is canceled, and the image is recorded in [AUTO] mode. • The indicator means: Slow flashing: The white balance is not set or was not able to be set. Quick flashing: The white balance is being adjusted (after you press ). Lit steady: The white balance has been set. • If the indicator keeps flashing even when you press , record in automatic white balance mode. • When you select the one-push white balance mode, the screen momentarily turns blue. • You cannot adjust the white balance when using the NightShot and NightFraming functions. Shooting techniques The image is affected by the lighting conditions. For example, the entire image appears blue under sunlight in the summer, and white items gain a reddish tint under incandescent light bulbs, etc. The human eye can resolve these problems, but digital still cameras cannot recognize the correct colors without adjustments. Normally, the camera makes these adjustments automatically, but if recorded image colors appear unnatural, we recommend that you adjust the white balance. Shooting in the dark Mode dial: / / Shutter NIGHTSHOT/ NIGHTFRAMING switch Infrared ray emitter • Filters (not supplied) may block the infrared ray. • The recommended recording distance for the NightShot or NightFraming function is from approx. 0.3 m to 4.5 m (11 7/8 inches to 177 1/4 inches). • You cannot use the NightShot or NightFraming function when [CONVERSION LENS] is set to [ON] in the SET UP settings (page 110). 55 Advanced still image shooting
-
 1
1 -
2
-
3
-
4
-
5
-
6
-
7
-
8
-
9
-
10
-
11
-
12
-
13
-
14
-
15
-
16
-
17
-
18
-
19
-
20
-
21
-
22
-
23
-
24
-
25
-
26
-
27
-
28
-
29
-
30
-
31
-
32
-
33
-
34
-
35
-
36
-
37
-
38
-
39
-
40
-
41
-
42
-
43
-
44
-
45
-
46
-
47
-
48
-
49
-
 50
50 -
 51
51 -
 52
52 -
 53
53 -
 54
54 -
 55
55 -
 56
56 -
 57
57 -
 58
58 -
 59
59 -
 60
60 -
61
-
62
-
63
-
64
-
65
-
66
-
67
-
68
-
69
-
70
-
71
-
72
-
73
-
74
-
75
-
76
-
77
-
78
-
79
-
80
-
81
-
82
-
83
-
84
-
85
-
86
-
87
-
88
-
89
-
90
-
91
-
92
-
93
-
94
-
95
-
96
-
97
-
98
-
99
-
100
-
101
-
102
-
103
-
104
-
105
-
106
-
107
-
108
-
109
-
110
-
111
-
112
-
113
-
114
-
115
-
116
-
117
-
118
-
119
-
120
-
121
-
122
-
123
-
124
 |
 |