Sony DSCF717 Operating Instructions - Page 84
Installing ImageMixer, Connecting your camera to, your computer
 |
UPC - 027242592889
View all Sony DSCF717 manuals
Add to My Manuals
Save this manual to your list of manuals |
Page 84 highlights
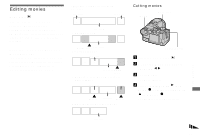
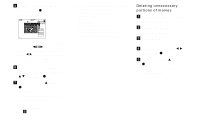
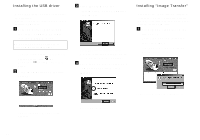
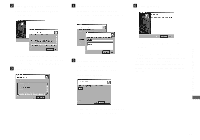
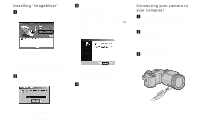
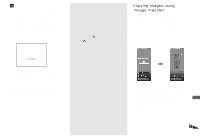
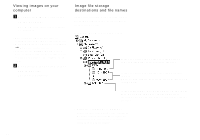
Installing "ImageMixer" a Click [PIXELA ImageMixer] on the title screen. The "Choose Setup Language" screen appears. • You can use the "PIXELA ImageMixer for Sony" software to copy, view and edit images. For details, see the software's help files. b Select the desired language, then click [OK]. c Follow instructions on each succeeding screen. When installation is complete, the "Read Me" text appears. Read the text, then close the window by clicking in the upper right corner of the screen. After that, click [Finish] on the install screen to close the install screen. • If DirectX8.0a or a later version is not installed in your computer, the "Information" screen appears. Follow the procedure on the screen. d Remove the CD-ROM. Connecting your camera to your computer a Insert the "Memory Stick" with the images you want to copy into the camera. b Turn on your camera and computer. Set [USB CONNECT] to [NORMAL] in the SET UP settings. The factory setting is [NORMAL]. c Open the jack cover, and connect the supplied USB cable to your camera. The "Welcome to the InstallShield Wizard" screen appears. • This section describes the English screen. 84
-
 1
1 -
2
-
3
-
4
-
5
-
6
-
7
-
8
-
9
-
10
-
11
-
12
-
13
-
14
-
15
-
16
-
17
-
18
-
19
-
20
-
21
-
22
-
23
-
24
-
25
-
26
-
27
-
28
-
29
-
30
-
31
-
32
-
33
-
34
-
35
-
36
-
37
-
38
-
39
-
40
-
41
-
42
-
43
-
44
-
45
-
46
-
47
-
48
-
49
-
50
-
51
-
52
-
53
-
54
-
55
-
56
-
57
-
58
-
59
-
60
-
61
-
62
-
63
-
64
-
65
-
66
-
67
-
68
-
69
-
70
-
71
-
72
-
73
-
74
-
75
-
76
-
77
-
78
-
 79
79 -
 80
80 -
 81
81 -
 82
82 -
 83
83 -
 84
84 -
 85
85 -
 86
86 -
 87
87 -
 88
88 -
 89
89 -
90
-
91
-
92
-
93
-
94
-
95
-
96
-
97
-
98
-
99
-
100
-
101
-
102
-
103
-
104
-
105
-
106
-
107
-
108
-
109
-
110
-
111
-
112
-
113
-
114
-
115
-
116
-
117
-
118
-
119
-
120
-
121
-
122
-
123
-
124
 |
 |
