Sony DSCF717 Operating Instructions - Page 85
Disconnecting the USB cable, from your computer, removing, the Memory Stick from your, camera or
 |
UPC - 027242592889
View all Sony DSCF717 manuals
Add to My Manuals
Save this manual to your list of manuals |
Page 85 highlights
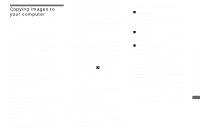
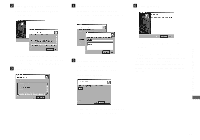
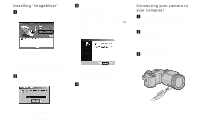
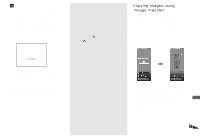
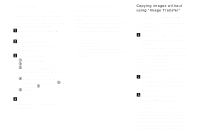
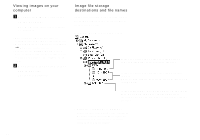
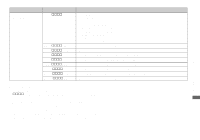
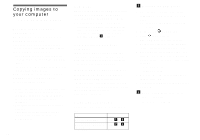
Enjoying images on your computer d Connect the other end of the USB cable to your computer. "USB MODE NORMAL" appears on the screen. When a USB connection is established for the first time, your computer automatically runs the used program to recognize your camera. Wait for a while, and "Image Transfer" launches. USB MODE NORMAL a a a a • When using a desktop computer, connect the USB cable to the USB connector on the rear panel. • When using Windows XP, the copy wizard automatically appears on the desktop (page 87). When you copy images using "Image Transfer", change the settings on page 86. Disconnecting the USB cable from your computer, removing the "Memory Stick" from your camera or turning off the power during USB connection For Windows 2000, Me, or XP users 1 Double-click on the tasktray. 2 Click (Sony DSC), then click [Stop]. 3 Confirm the device on the confirmation screen, then click [OK]. 4 Click [OK]. This step is unnecessary for Windows XP users. 5 Disconnect the USB cable, remove the "Memory Stick" or turn off the power. For Windows 98 or 98SE users Perform only step 5 above. Copying images using "Image Transfer" - Windows 98/98SE/2000/Me When you connect the camera to your computer, "Image Transfer" launches and the images are automatically copied to the computer. When copying is complete, "ImageMixer" automatically launches and images appears. • Normally "Image Transfer" and "Date" folders are created inside the "My Documents" folder, and all of the image files recorded with your camera are copied into these folders. • You can change the "Image Transfer" settings (page 86). • When you use Windows XP, you need to change the settings (page 86). 85
-
 1
1 -
2
-
3
-
4
-
5
-
6
-
7
-
8
-
9
-
10
-
11
-
12
-
13
-
14
-
15
-
16
-
17
-
18
-
19
-
20
-
21
-
22
-
23
-
24
-
25
-
26
-
27
-
28
-
29
-
30
-
31
-
32
-
33
-
34
-
35
-
36
-
37
-
38
-
39
-
40
-
41
-
42
-
43
-
44
-
45
-
46
-
47
-
48
-
49
-
50
-
51
-
52
-
53
-
54
-
55
-
56
-
57
-
58
-
59
-
60
-
61
-
62
-
63
-
64
-
65
-
66
-
67
-
68
-
69
-
70
-
71
-
72
-
73
-
74
-
75
-
76
-
77
-
78
-
79
-
 80
80 -
 81
81 -
 82
82 -
 83
83 -
 84
84 -
 85
85 -
 86
86 -
 87
87 -
 88
88 -
 89
89 -
 90
90 -
91
-
92
-
93
-
94
-
95
-
96
-
97
-
98
-
99
-
100
-
101
-
102
-
103
-
104
-
105
-
106
-
107
-
108
-
109
-
110
-
111
-
112
-
113
-
114
-
115
-
116
-
117
-
118
-
119
-
120
-
121
-
122
-
123
-
124
 |
 |