Sony DSLR-A200W Instruction Manual - Page 32
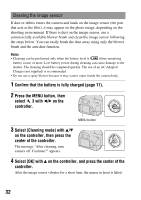
Select [OK] with, Select [Cleaning mode]
 |
UPC - 027242714212
View all Sony DSLR-A200W manuals
Add to My Manuals
Save this manual to your list of manuals |
Page 32 highlights
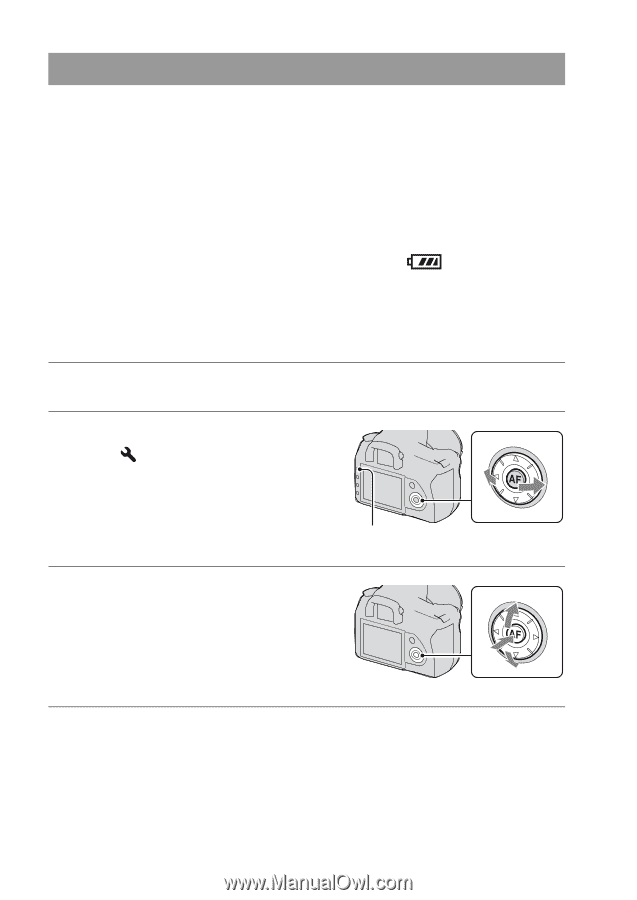
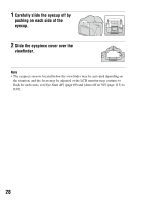
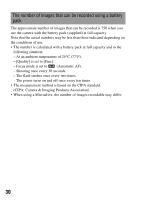
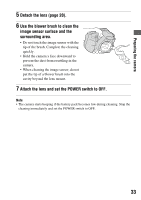
Cleaning the image sensor If dust or debris enters the camera and lands on the image sensor (the part that acts as the film), it may appear on the photo image, depending on the shooting environment. If there is dust on the image sensor, use a commercially available blower brush and clean the image sensor following the steps below. You can easily brush the dust away using only the blower brush and the anti-dust function. Notes • Cleaning can be performed only when the battery level is (three remaining battery icons) or more. Low battery power during cleaning can cause damage to the shutter. The cleaning should be completed quickly. The use of an AC Adaptor/ Charger (not supplied) is recommended. • Do not use a spray blower because it may scatter vapor inside the camera body. 1 Confirm that the battery is fully charged (page 17). 2 Press the MENU button, then select 3 with b/B on the controller. MENU button 3 Select [Cleaning mode] with v/V on the controller, then press the center of the controller. The message "After cleaning, turn camera off. Continue?" appears. 4 Select [OK] with v on the controller, and press the center of the controller. After the image sensor vibrates for a short time, the mirror in front is lifted. 32
-
 1
1 -
2
-
3
-
4
-
5
-
6
-
7
-
8
-
9
-
10
-
11
-
12
-
13
-
14
-
15
-
16
-
17
-
18
-
19
-
20
-
21
-
22
-
23
-
24
-
25
-
26
-
 27
27 -
 28
28 -
 29
29 -
 30
30 -
 31
31 -
 32
32 -
 33
33 -
 34
34 -
 35
35 -
 36
36 -
 37
37 -
38
-
39
-
40
-
41
-
42
-
43
-
44
-
45
-
46
-
47
-
48
-
49
-
50
-
51
-
52
-
53
-
54
-
55
-
56
-
57
-
58
-
59
-
60
-
61
-
62
-
63
-
64
-
65
-
66
-
67
-
68
-
69
-
70
-
71
-
72
-
73
-
74
-
75
-
76
-
77
-
78
-
79
-
80
-
81
-
82
-
83
-
84
-
85
-
86
-
87
-
88
-
89
-
90
-
91
-
92
-
93
-
94
-
95
-
96
-
97
-
98
-
99
-
100
-
101
-
102
-
103
-
104
-
105
-
106
-
107
-
108
-
109
-
110
-
111
-
112
-
113
-
114
-
115
-
116
-
117
-
118
-
119
-
120
-
121
-
122
-
123
-
124
-
125
-
126
-
127
-
128
-
129
-
130
-
131
-
132
-
133
-
134
-
135
-
136
-
137
-
138
-
139
-
140
-
141
-
142
-
143
-
144
-
145
-
146
-
147
-
148
-
149
-
150
-
151
-
152
-
153
-
154
-
155
-
156
-
157
-
158
 |
 |