Sony FWD-50PX3 Operating Instructions - Page 83
Other Information, Troubleshooting
 |
UPC - 027242722484
View all Sony FWD-50PX3 manuals
Add to My Manuals
Save this manual to your list of manuals |
Page 83 highlights
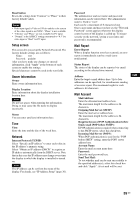
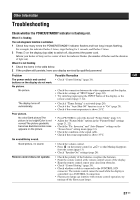
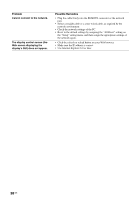
Other Information Troubleshooting Check whether the POWER/STANDBY indicator is flashing red. When it is flashing The self-diagnosis function is activated. 1 Check how many times the POWER/STANDBY indicator flashes and how long it stops flashing. For example, the indicator flashes 2 times, stops flashing for 3 seconds, and flashes 2 times. 2 Press 1 on the display (top side) to switch off, disconnect the power cord. Inform your dealer or Sony service center of how the indicator flashes (the number of flashes and the duration of light out). When it is not flashing 1 Check the items in the table below. 2 If the problem still persists, have your display serviced by qualified personnel Problem The power switch and control buttons on the display do not work. No picture. No picture. Possible Remedies • Check "Control Setting" (page 29). • Check the connection between the video equipment and the display. • Check the settings of "HD15 Signal" (page 30). • Try switching input using the INPUT button of the display, or the remote control (page 7, 12). The display turns off automatically. • Check if "Timer Setting" is activated (page 28). • Check if the "Auto Shut Off" function is set to "On" (page 29). • Check if the room temperature is above 35°C. Poor picture. No color/Dark picture/The picture is too bright/Color is not correct/The picture gradually becomes dark/Horizontal noise appears on the picture • Press PICTURE to select the desired "Picture Mode" (page 12). • Adjust the "Picture Mode" options in the "Picture/Sound" settings (page 21, 22). • Check the "Pic. Inversion" and "Auto Dimmer" settings on the "Screen Saver" setting menu (page 31). • Check the condition of the signal cable. • Check if the room temperature is above 35°C. No sound/Noisy sound. Good picture, no sound. • Check the volume control. • Press on the remote control or + so that Muting disappears from the screen (page 13). • Check "Speaker Out" settings (page 28). Remote control does not operate. • Check the polarity of the batteries or replace the batteries. • Point the remote control at the remote control sensor of the display. • Keep the remote control sensor area clear from obstacles. • Check "Control Setting" (page 29). • Check whether a cable is connected to the CONTROL S IN connector. The remote control cannot be used while the display is controlled via a CONTROL S connection. • Fluorescent lamps can interfere with remote control operation; try turning off the fluorescent lamps. GB 37 GB
-
 1
1 -
2
-
3
-
4
-
5
-
6
-
7
-
8
-
9
-
10
-
11
-
12
-
13
-
14
-
15
-
16
-
17
-
18
-
19
-
20
-
21
-
22
-
23
-
24
-
25
-
26
-
27
-
28
-
29
-
30
-
31
-
32
-
33
-
34
-
35
-
36
-
37
-
38
-
39
-
40
-
41
-
42
-
43
-
44
-
45
-
46
-
47
-
48
-
49
-
50
-
51
-
52
-
53
-
54
-
55
-
56
-
57
-
58
-
59
-
60
-
61
-
62
-
63
-
64
-
65
-
66
-
67
-
68
-
69
-
70
-
71
-
72
-
73
-
74
-
75
-
76
-
77
-
 78
78 -
 79
79 -
 80
80 -
 81
81 -
 82
82 -
 83
83 -
 84
84 -
 85
85 -
 86
86 -
 87
87 -
 88
88 -
89
-
90
-
91
-
92
-
93
-
94
-
95
-
96
-
97
-
98
-
99
-
100
-
101
-
102
-
103
-
104
-
105
-
106
-
107
-
108
-
109
-
110
-
111
-
112
-
113
-
114
-
115
-
116
-
117
-
118
-
119
-
120
-
121
-
122
-
123
-
124
-
125
-
126
-
127
-
128
-
129
-
130
-
131
-
132
-
133
-
134
-
135
-
136
-
137
-
138
-
139
-
140
-
141
-
142
-
143
-
144
-
145
-
146
-
147
-
148
-
149
-
150
-
151
-
152
-
153
-
154
-
155
-
156
-
157
-
158
-
159
-
160
-
161
-
162
-
163
-
164
-
165
-
166
-
167
-
168
-
169
-
170
-
171
-
172
-
173
-
174
-
175
-
176
-
177
-
178
-
179
-
180
-
181
-
182
-
183
-
184
-
185
-
186
-
187
-
188
-
189
-
190
-
191
-
192
-
193
-
194
-
195
-
196
-
197
-
198
-
199
-
200
-
201
-
202
-
203
-
204
-
205
-
206
-
207
-
208
-
209
-
210
-
211
-
212
-
213
-
214
-
215
-
216
-
217
-
218
-
219
-
220
-
221
-
222
-
223
-
224
-
225
-
226
-
227
-
228
-
229
-
230
-
231
-
232
-
233
-
234
-
235
-
236
-
237
-
238
-
239
-
240
-
241
-
242
-
243
-
244
-
245
-
246
-
247
-
248
-
249
-
250
-
251
-
252
-
253
-
254
-
255
-
256
-
257
-
258
-
259
-
260
-
261
-
262
-
263
-
264
-
265
-
266
-
267
-
268
-
269
-
270
-
271
-
272
-
273
-
274
-
275
-
276
-
277
-
278
-
279
-
280
-
281
-
282
-
283
-
284
-
285
-
286
-
287
-
288
-
289
-
290
-
291
-
292
-
293
-
294
-
295
-
296
-
297
-
298
-
299
-
300
-
301
-
302
-
303
-
304
-
305
-
306
-
307
-
308
 |
 |