Sony GDM-400PS Operating Instructions (primary manual) - Page 10
Using, CENTER, screen, Display
 |
View all Sony GDM-400PS manuals
Add to My Manuals
Save this manual to your list of manuals |
Page 10 highlights
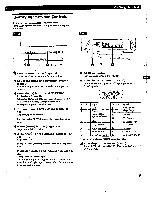
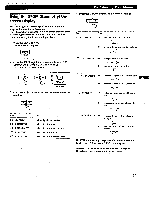
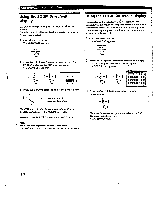
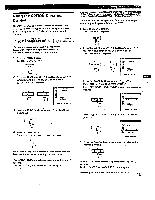
Customizing Your Monitor Using the CENTER On-screen Display The CENTER settings allow you to adjust the centering of the picture. Once the setting is adjusted, it will be stored in memory for the current input signal. Press the MENU button. The MENU OSD appears. MENU 2 Press the -04/f and 0.4.-•/.0. buttons to select " [211 CENTER," and press the MENU button again. The CENTER OSD appears. 0 fri Ia 73 a im== 0 26 3 For horizontal adjustment Press the C011.../s4. buttons. o. O ••40 . . . to move the picture right 4.• . to move the picture left For vertical adjustment Press. the I. buttons. 4tE Wan t .. . to move the picture up ♦ . .. to move the picture dawn The OSD automatically disappears after about 30 seconds. To close the OSD, press the MENU button again. To reset, press the RESET button while the OSD is on. The horizontal and vertical centerings are both reset to the factory settings. Using the SIZE On-screen Display The SIZE settings allow you to adjust the size of the picture. Once the setting is adjusted, it will be stored in memory for the current input signal. Press the MENU button. The MENU OSD appears. MENU 2 Press the *-3/1' and Cloil-/-6. buttons to select " SIZE," and press the MENU button again. The SIZE OSD appears. 0 iu 3 For horizontal adjustment Press the buttons. 0 I O ...* . . . to increase picture size F . . . to decrease picture size For vertical adjustment Press the -3:4/* buttons. MOM ♦ . to increase picture size ♦ ... to decrease picture size The OSD automatically disappears after about 30 seconds. To close the OSD, press the MENU button again. To reset, press the RESET button while the OSD is on. The horizontal and vertical sizes are both reset to the factory settings. 10
-
 1
1 -
2
-
3
-
4
-
 5
5 -
 6
6 -
 7
7 -
 8
8 -
 9
9 -
 10
10 -
 11
11 -
 12
12 -
 13
13 -
 14
14 -
 15
15 -
16
-
17
-
18
-
19
-
20
-
21
-
22
 |
 |
