Sony GDM-400PS Operating Instructions (primary manual) - Page 14
shift, shadows, select, corner, screen, adjust, reduce, irregularities, LANDING, ADJUST, color,
 |
View all Sony GDM-400PS manuals
Add to My Manuals
Save this manual to your list of manuals |
Page 14 highlights
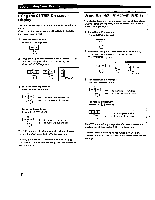
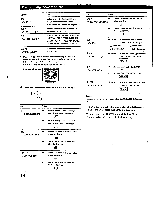
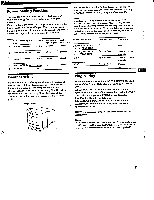
Customizing Your Monitor Select LANDING ADJ LANDING ADJUST CANCEL MOIRE • To select one of the four corns that needs color correction due to influence from the earth's magnetism correct the color at one of the four cornets of the screen turn the moire cancellation function "ON" or "OFF." CANCEL MOIRE must be "ON" for " gag AI (MOIRE ADJUST'}" to appear on the screen. ADJ MOIRE ADJUST adjust the degree of moire cancellation • Moire is a type of natural interference which producessoft or wavy lines on your screen. It may appear due to interference between the regulated pattern of the picture from the input signal and the phosphor pitch pattern of the CRT. Example of moire: 4 Press the 04.•/•40 buttons to adjust the settings. For Press a-l BOT ▪ . .. to shift red shadows up and blue V CONVER BOTTOM shadows down CI-D" • . . . to shift red shadows down and blue shadows up O LANDING ▪ or 4+ ... to select the corner of the screen you want to adjust u : top left u : top right : bottom lett : bottom right CI ADJ ♦ or 4+ ... to reduce any irregularities in LANDING ADJUST the color to a minimum CANCEL MOIRE oig ADJ MOIRE ADJUST . . . to turn CANCEL MOIRE "ON" •OPF .Of4 I • . to turn CANCEL MOIRE "OFF" -cm I +4i. or 4+ . . . to adjust the screen until the moire is at a minimum inr=S1 DU CP For Press iF H CONVERGENCE .. . to shift red shadows to the right and blue shadows to the left - . to shift red shadows to the left and blue shadows to the right Note The picture may become fuzzy when CANCEL. MOIRE is set to "ON." The OSD automatically disappears after about 3C) seconds. To dose the OSD, press the MENU button again. To reset, press the RESET button while the OSD is on. The selected item is reset to the factory setting. 0 VCONVERGENCE ... to shift red shadows up.and blue shadows down 0 TOP V CONVER TOP .. . to shift red shadows down and blue shadows up _L_ ... to shift red shadows up and blue shadows down 0- 9 . to shift red shadows down and blue shadows up El:3- 14
-
 1
1 -
2
-
3
-
4
-
5
-
6
-
7
-
8
-
 9
9 -
 10
10 -
 11
11 -
 12
12 -
 13
13 -
 14
14 -
 15
15 -
 16
16 -
 17
17 -
 18
18 -
 19
19 -
20
-
21
-
22
 |
 |
