Sony GDM-400PS Operating Instructions (primary manual) - Page 9
Customizing, Monitor
 |
View all Sony GDM-400PS manuals
Add to My Manuals
Save this manual to your list of manuals |
Page 9 highlights
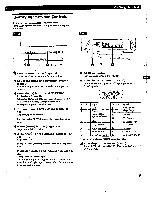
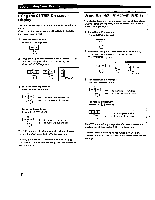
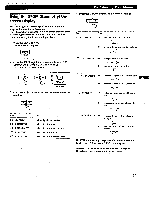
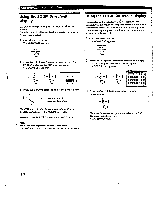
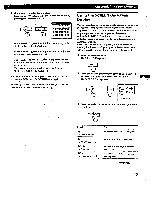
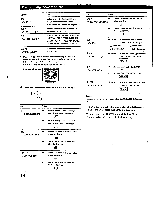
Customizing Your Monitor Before adjusting e • Connect the monitor and the computer, and turn them on. • Select " LANG" in the MENU OSD, then select "ENGLISH" (see page 17). Adjusting the Picture and Contrast Brightness Once the setting is adjusted, it will be stored in memory for all input signals received. 1 Press the -O (brightness) */* or CI (contrast) buttons. The BRIGHTNESS/CONTRAST OSD appears. 17/11 COT EISEMBIESEUMMI ono ono 90.0kHz/ 7SH: Introducing the On - screen Display System Most adjustments are made using the MENU OSD. MENU OSD Press the MENU button to display the MENU OSD. This MENU OSD contains links to the other OSDs described below. 1 2 3 MENU 9 8 T as 4 fZE N Horizontal Vertical Frequency* Frequency* 2 For brightness adjustment Press the **it buttons. * . for more brightness ♦ . for less brightness For contrast adjustment Press the O.4='/4. buttons. ▪ for more contrast • . for less contrast , The OSD automatically disappears after about 3 seconds. To reset, press the RESET button while the OSD is on. The brightness and contrast arc both reset to the factory settings. • The horizontal and vertical frequencies for the received input signal appear in the BRIGHTNESS/CONTRAST O5D. 7 6 5 ID fa COLOR Displays the COLOR O3D for adjusting the color temperature. • Q CENTER . Displays the CENTER OSD for adjusting the centering of the picture. E SCREEN Displays the SCREEN OSD for adjusting the vertical and horizontal convergence, etc. F41 En ZOOM Displays the ZOOM OSD for enlarging and reducing the picture. • n OPTION Displays the OPTION OSD for adjusting the OSD position and degaussing the screen, etc. 6 SIZE Displays the SIZE OSD for adjusting the picture size. [7] 8 LANG Displays the LANGUAGE OSD for selecting the language. • GEOM Displays the GEOMETRY OSD for adjusting the picture rotation and pincushion, etc. [D] EXIT Closes the MENU OSD. 9
-
 1
1 -
2
-
3
-
 4
4 -
 5
5 -
 6
6 -
 7
7 -
 8
8 -
 9
9 -
 10
10 -
 11
11 -
 12
12 -
 13
13 -
 14
14 -
15
-
16
-
17
-
18
-
19
-
20
-
21
-
22
 |
 |
