Sony HVR1500A Product Manual (HVE-1500A Operating Manuals) - Page 92
When the menu item you want to assign is on, level 1, To cancel saving the changed setting
 |
View all Sony HVR1500A manuals
Add to My Manuals
Save this manual to your list of manuals |
Page 92 highlights
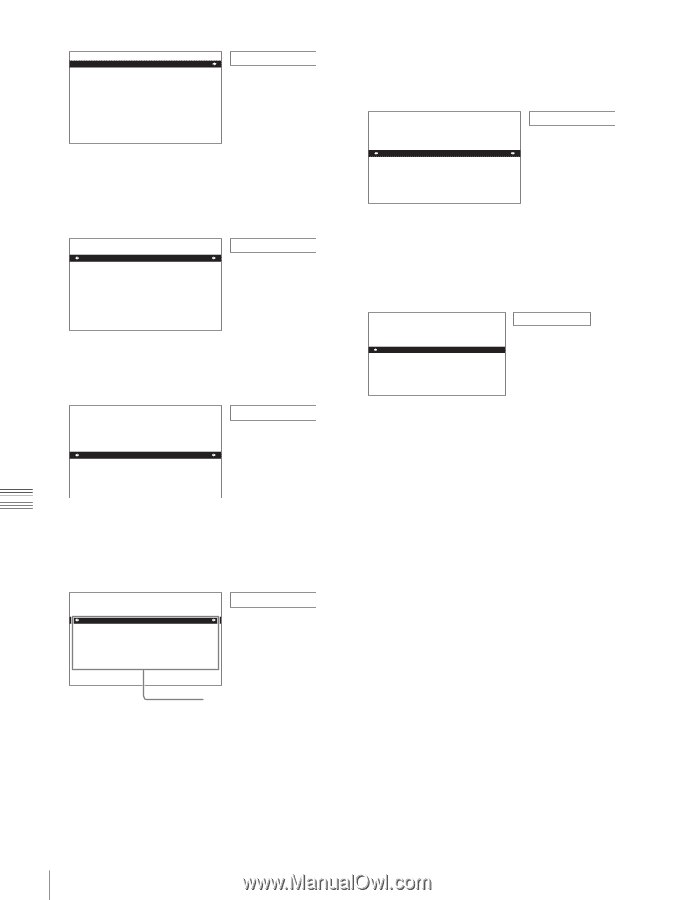
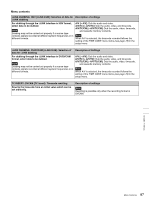
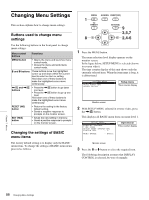
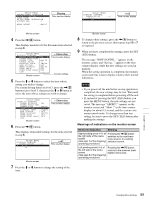
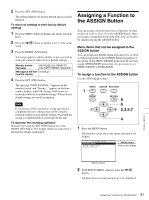
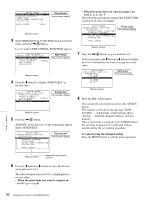
SETUP MENU OPERATIONAL FUNCTION DISPLAY CONTROL TIME CODE SETUP BANK OPERATION SYSTEM SEL : J MENU GRADE : BASIC Operational Time counter display Monitor screen 3 With OPERATIONAL FUNCTION shown in reverse video, press the ,/B button. Level 2 under OPERATIONAL FUNCTION appears. SETUP MENU OPERATIONAL FUNCTION REPEAT FUNCTION AUTO EE SELECT LOCAL ENABLE : STP&EJ REC FORMAT ASSIGN KEY REP FUNC Time counter display Monitor screen 4 Press the m button, to display ASSIGN KEY in reverse video. SETUP MENU OPERATIONAL FUNCTION REPEAT FUNCTION AUTO EE SELECT LOCAL ENABLE : STP&EJ REC FORMAT ASSIGN KEY Assign key Time counter display Monitor screen 5 Press the ,/B button. All BASIC items on level 1 of the setup menu appear under ASSIGN KEY. SETUP MENU OPERATIONAL FUNCTION ASSIGN KEY OPERATIONAL FUNCTIO DISPLAY CONTROL TIME CODE SETUP BANK OPERATION SYSTEM SEL MENU GRADE Operational Time counter display • When the menu item you want to assign is on level 2: go to step 7 The following description assumes that TIME CODE is selected, by way of example. SETUP MENU OPERATIONAL FUNCTION ASSIGN KEY OPERATIONAL FUNCTION DISPLAY CONTROL TIME CODE SETUP BANK OPERATION SYSTEM SEL MENU GRADE >Time code Time counter display Monitor screen 7 Press the ,/B button, to go to menu level 2. Next you can press the M button or m button to display the level 2 menu item you want to assign in reverse video. SETUP MENU OPERATIONAL FUNCTION ASSIGN KEY TIME CODE TC MODE RUN MODE DF MODE TC MODE VITC RUN mode Time counter display Monitor screen 8 Press the SET (YES) button. This assigns the selected menu item to the ASSIGN button. The monitor screen shows the message "NOW SAVING...", and the time counter display shows "Saving...", while the changed setting is saved in memory. Once a menu item is assigned to the ASSIGN button, the currently assigned item is indicated with an asterisk during the next setting procedure. To cancel saving the changed setting Press the MENU button to end the menu operation. Monitor screen Assignable menu items (level 1) 6 Press the M button or m button to select the desired menu item on level 1. The selected menu item on level 1 is highlighted in reverse video. • When the menu item you want to assign is on level 1: go to step 8 Chapter 7 Menus 92 Assigning a Function to the ASSIGN Button
-
 1
1 -
2
-
3
-
4
-
5
-
6
-
7
-
8
-
9
-
10
-
11
-
12
-
13
-
14
-
15
-
16
-
17
-
18
-
19
-
20
-
21
-
22
-
23
-
24
-
25
-
26
-
27
-
28
-
29
-
30
-
31
-
32
-
33
-
34
-
35
-
36
-
37
-
38
-
39
-
40
-
41
-
42
-
43
-
44
-
45
-
46
-
47
-
48
-
49
-
50
-
51
-
52
-
53
-
54
-
55
-
56
-
57
-
58
-
59
-
60
-
61
-
62
-
63
-
64
-
65
-
66
-
67
-
68
-
69
-
70
-
71
-
72
-
73
-
74
-
75
-
76
-
77
-
78
-
79
-
80
-
81
-
82
-
83
-
84
-
85
-
86
-
 87
87 -
 88
88 -
 89
89 -
 90
90 -
 91
91 -
 92
92 -
 93
93 -
 94
94 -
 95
95 -
 96
96 -
 97
97 -
98
-
99
-
100
-
101
-
102
-
103
-
104
-
105
-
106
-
107
-
108
-
109
-
110
-
111
 |
 |