Sony NEX-VG20 Handycam® Handbook - Page 46
Adjusting manually, Controlling the image settings manually with the MANUAL dial, Adjusting the IRIS
 |
View all Sony NEX-VG20 manuals
Add to My Manuals
Save this manual to your list of manuals |
Page 46 highlights
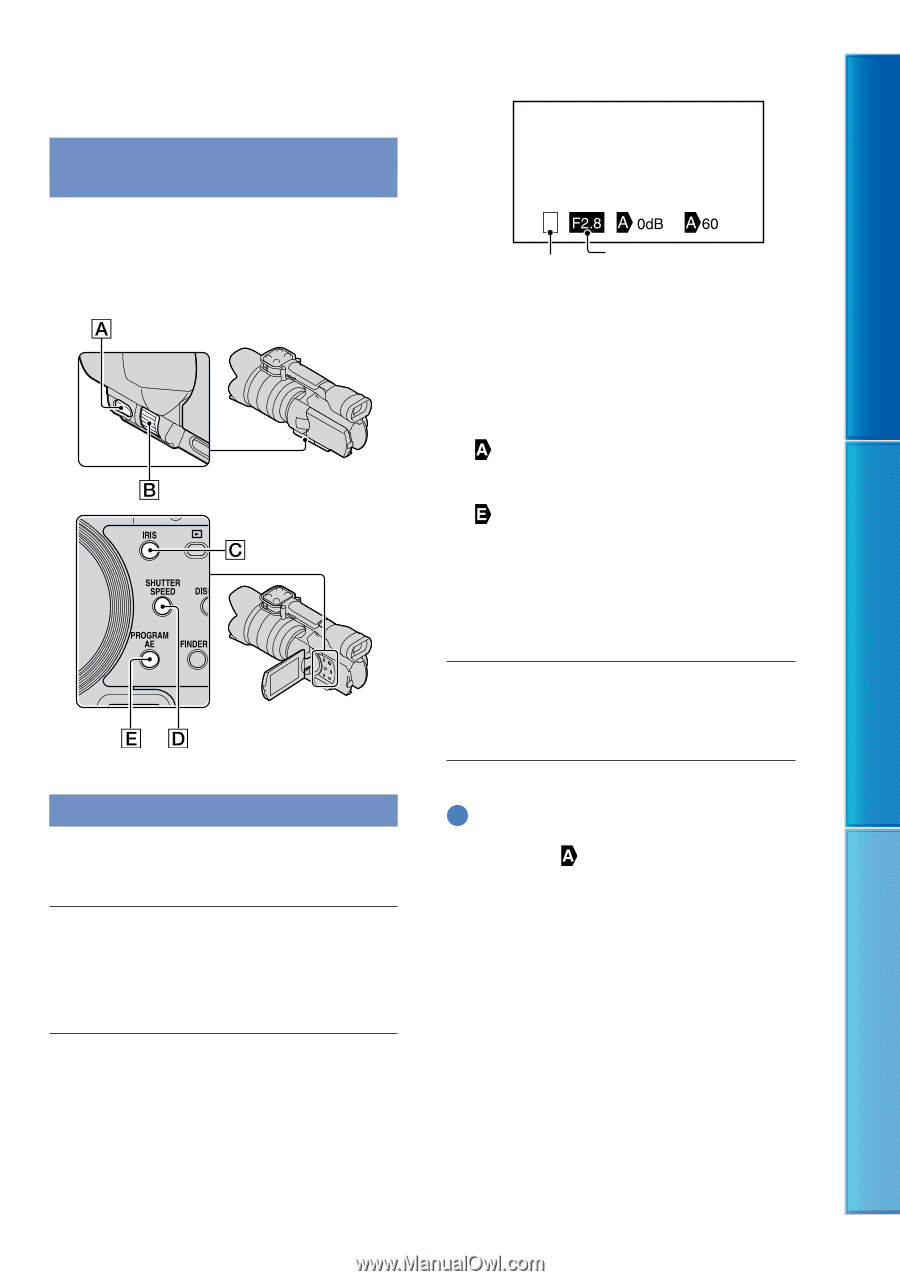
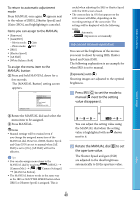
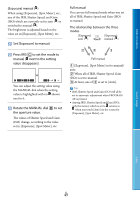
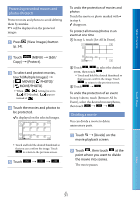
Table of Contents Adjusting manually Controlling the image settings manually with the MANUAL dial Use the MANUAL dial on the camcorder for a variety of manual adjustments. Pressing IRIS switches the setting mode between automatic and manual. Aperture value Switching operation icon Switching operation icon Blank Operates manually. Operates automatically. Operates [Exposure] manually (p. 48). Aperture value When a setting value is highlighted, it can be adjusted by the MANUAL dial. Rotate the MANUAL dial to adjust the IRIS. Search image Index Adjusting the IRIS Steps to configure IRIS priority exposure are described here. Press PROGRAM AE to set the IRIS, Gain (ISO), Shutter Speed and Exposure to [Auto]. Press IRIS to set the mode to manual. Tips Press IRIS again to adjust the IRIS automatically. appears next to the aperture value. The aperture value adjustment range you can set will vary depending on the lens you use. With some lenses, the aperture value may change when you zoom from wide angle to telephoto. The range of focus, an important effect of the aperture, is called the depth of field. The depth of field gets shallower as the aperture is opened, and deeper as the aperture is closed. Use the aperture creatively to obtain the desired effect in your photography. This is handy for making the background blurred or sharp. US 46
-
 1
1 -
2
-
3
-
4
-
5
-
6
-
7
-
8
-
9
-
10
-
11
-
12
-
13
-
14
-
15
-
16
-
17
-
18
-
19
-
20
-
21
-
22
-
23
-
24
-
25
-
26
-
27
-
28
-
29
-
30
-
31
-
32
-
33
-
34
-
35
-
36
-
37
-
38
-
39
-
40
-
 41
41 -
 42
42 -
 43
43 -
 44
44 -
 45
45 -
 46
46 -
 47
47 -
 48
48 -
 49
49 -
 50
50 -
 51
51 -
52
-
53
-
54
-
55
-
56
-
57
-
58
-
59
-
60
-
61
-
62
-
63
-
64
-
65
-
66
-
67
-
68
-
69
-
70
-
71
-
72
-
73
-
74
-
75
-
76
-
77
-
78
-
79
-
80
-
81
-
82
-
83
-
84
-
85
-
86
-
87
-
88
-
89
-
90
-
91
-
92
-
93
-
94
-
95
-
96
-
97
-
98
-
99
-
100
-
101
-
102
-
103
-
104
-
105
-
106
-
107
-
108
-
109
-
110
-
111
-
112
-
113
-
114
-
115
-
116
-
117
 |
 |