Sony PEG-S320 Read This First Operating Instructions - Page 53
Wait for the Beam dialog box to indicate that the, transfer is complete before you continue working - clie pda
 |
View all Sony PEG-S320 manuals
Add to My Manuals
Save this manual to your list of manuals |
Page 53 highlights
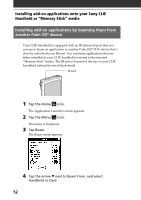
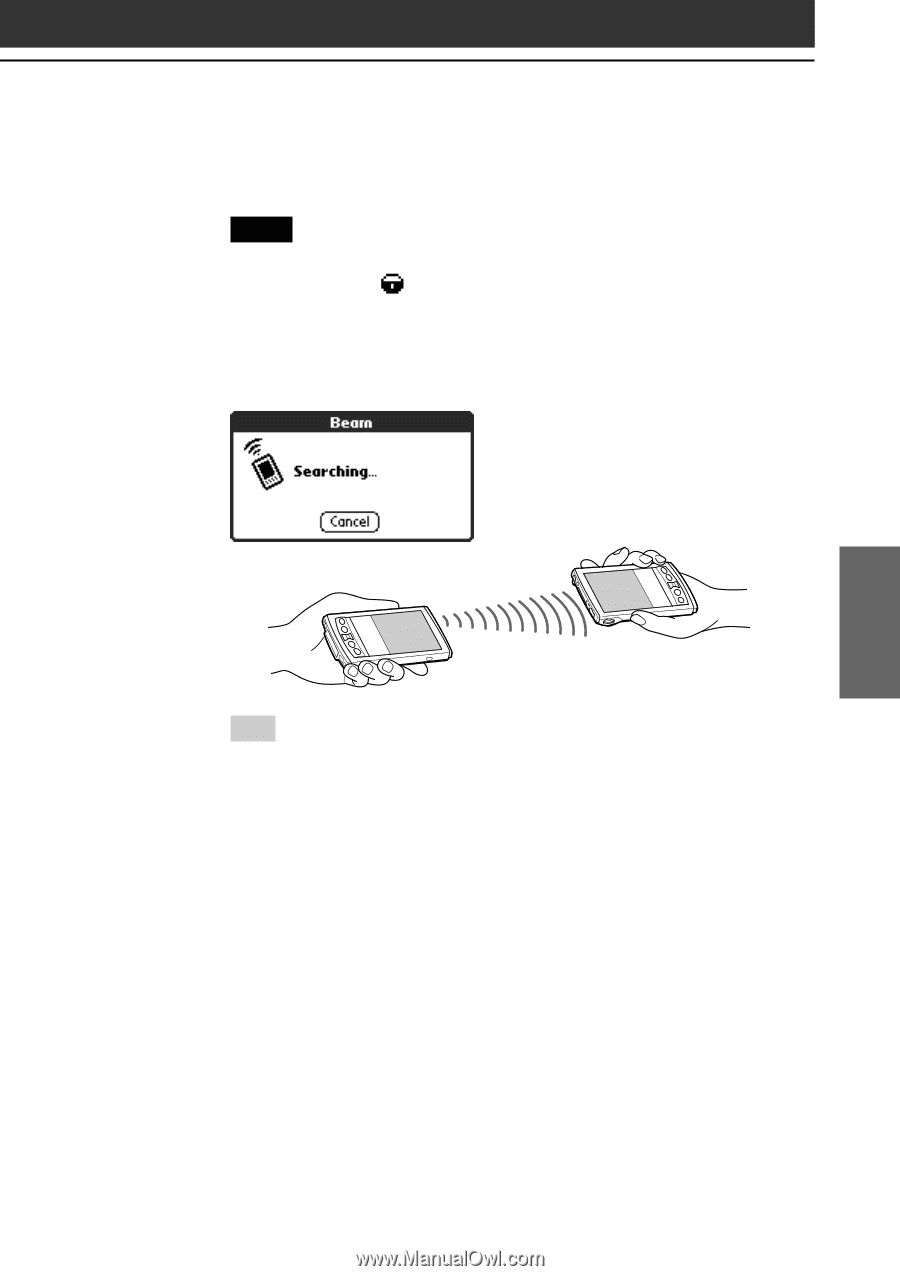
Chapter 3 Setting up your Sony CLIE Handheld - Advanced 5 Tap the application you want to transfer. Note Some applications are copy-protected and cannot be beamed. These are listed with the lock icon next to them. 6 Tap Beam. 7 When the Beam dialog box appears, point the IR port directly at the IR port of the receiving handheld. Tip For best results, the handhelds should be 4 to 8 inches (approximately 10 to 20 centimeters) apart, and the path between the two handhelds must be clear of obstacles. Beaming distance to other Palm OS PDA devices may be different. 8 Wait for the Beam dialog box to indicate that the transfer is complete before you continue working on your CLIE handheld. 53
-
 1
1 -
2
-
3
-
4
-
5
-
6
-
7
-
8
-
9
-
10
-
11
-
12
-
13
-
14
-
15
-
16
-
17
-
18
-
19
-
20
-
21
-
22
-
23
-
24
-
25
-
26
-
27
-
28
-
29
-
30
-
31
-
32
-
33
-
34
-
35
-
36
-
37
-
38
-
39
-
40
-
41
-
42
-
43
-
44
-
45
-
46
-
47
-
 48
48 -
 49
49 -
 50
50 -
 51
51 -
 52
52 -
 53
53 -
 54
54 -
 55
55 -
 56
56 -
 57
57
 |
 |
53
Setting up your Sony CLIE Handheld – Advanced
Chapter 3
5
Tap the application you want to transfer.
Note
Some applications are copy-protected and cannot be beamed. These are
listed with the lock
icon next to them.
6
Tap Beam.
7
When the Beam dialog box appears, point the IR port
directly at the IR port of the receiving handheld.
Tip
For best results, the handhelds should be 4 to 8 inches (approximately 10 to
20 centimeters) apart, and the path between the two handhelds must be clear
of obstacles. Beaming distance to other Palm OS PDA devices may be
different.
8
Wait for the Beam dialog box to indicate that the
transfer is complete before you continue working on
your CLIE handheld.