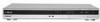
Sony RDR-GX330 Operating Instructions - Page 25
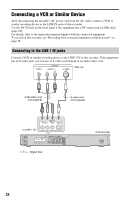
Connecting to the LINE 2 IN jacks on the front panel
 |
UPC - 027242692510
View all Sony RDR-GX330 manuals
Add to My Manuals
Save this manual to your list of manuals |
Page 25 highlights
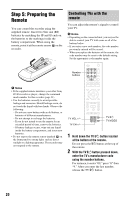
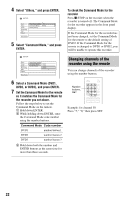
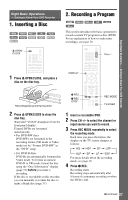
Hookups and Settings b Notes • Pictures containing copy protection signals that prohibit any copying cannot be recorded. • If you pass the recorder signals through a VCR, you may not receive a clear image on your TV screen. DVD recorder VCR TV Be sure to connect your VCR to the DVD recorder and to your TV in the order shown below. To watch video tapes, watch the tapes through a second line input on your TV. Line input 1 VCR DVD recorder TV Line input 2 • If you disconnect the recorder's AC power cord, you will not be able to view the signals from the connected VCR. Connecting to the LINE 2 IN jacks on the front panel Connect a VCR or similar recording device to the LINE 2 IN jacks of this recorder. If the equipment has an S-video jack, you can use an S-video cord instead of an audio/video cord. S VIDEO OUTPUT VIDEO AUDIO L R VCR, etc. S-video cord (not supplied) to LINE 2 IN Audio/video cord (not supplied) : Signal flow DVD recorder z Hint When the connected equipment outputs only monaural sound, connect to just the L(MONO) and VIDEO input jacks on the front of the recorder. Do not connect the R input jack. b Notes • Do not connect the yellow LINE IN (VIDEO) jack when using an S-video cord. • Do not connect the output jack of this recorder to another equipment's input jack with the other equipment's output jack connected to the input jack of this recorder. This may cause noise (feedback). • Do not connect more than one type of video cord between the recorder and your TV at the same time. 25
-
 1
1 -
2
-
3
-
4
-
5
-
6
-
7
-
8
-
9
-
10
-
11
-
12
-
13
-
14
-
15
-
16
-
17
-
18
-
19
-
 20
20 -
 21
21 -
 22
22 -
 23
23 -
 24
24 -
 25
25 -
 26
26 -
 27
27 -
 28
28 -
 29
29 -
 30
30 -
31
-
32
-
33
-
34
-
35
-
36
-
37
-
38
-
39
-
40
-
41
-
42
-
43
-
44
-
45
-
46
-
47
-
48
-
49
-
50
-
51
-
52
-
53
-
54
-
55
-
56
-
57
-
58
-
59
-
60
-
61
-
62
-
63
-
64
-
65
-
66
-
67
-
68
-
69
-
70
-
71
-
72
-
73
-
74
-
75
-
76
-
77
-
78
-
79
-
80
-
81
-
82
-
83
-
84
-
85
-
86
-
87
-
88
-
89
-
90
-
91
-
92
-
93
-
94
-
95
-
96
-
97
-
98
-
99
-
100
 |
 |
