Sony RDR-GX330 Operating Instructions - Page 75
Line Input, Pause Mode DVDs only, Auto Display, Screen Saver, Progressive Mode
 |
UPC - 027242692510
View all Sony RDR-GX330 manuals
Add to My Manuals
Save this manual to your list of manuals |
Page 75 highlights
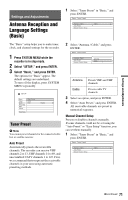
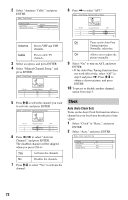
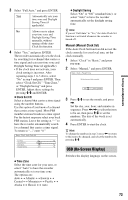
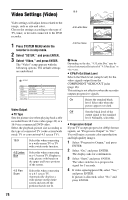
Settings and Adjustments Progressive Mode DVD software can be divided into two types: film based software and video based software. Video based software is derived from TV and displays images at 30 frames/60 fields per second. Film based software is derived from film and displays images at 24 frames per second. Some DVD software contains both Video and Film. In order for these images to appear natural on your screen when output in progressive mode, the progressive video signal needs to be converted to match the type of DVD software that you are watching. You can fine-tune the progressive 480p video signal that is output when you set "Progressive Output" to "On." Note that you must connect to a progressive format TV using the COMPONENT VIDEO OUT jacks (page 16). Auto Video Automatically detects the software type (Film-based or Video-based) and selects the appropriate conversion mode. Normally select this position. Fixes the conversion mode to the mode for Video-based software. b Note When picture noise appears after you set the recorder to progressive format, hold down x STOP, and press CHANNEL - (minus) on the unit. Line Input Sets the method of inputting video signals from the LINE IN jacks on the rear panel of the recorder. Select an option for each of the items below according to the combination of jacks and methods that you are going to use. Line1 Input Selects a method of inputting video signals for the LINE 1 IN jack on the rear panel of the recorder. Video Inputs video signals. S Video Inputs S video signals. Pause Mode (DVDs only) Selects the picture quality in pause mode. Auto The picture, including subjects that move dynamically, is output with no jitter. Normally select this position. Frame The picture, including subjects that do not move dynamically, is output in high resolution. Auto Display On Automatically displays information on the screen when the recorder is turned on, etc. Off Displays information only when DISPLAY is pressed. Screen Saver The screen saver image appears when you do not use the recorder for more than 10 minutes while an on-screen display, such as the System Menu, is displayed on your TV screen. The screen saver image helps prevent your display device from becoming damaged (ghosting). On Turns on the screen saver function. Off Turns off the function. 75
-
 1
1 -
2
-
3
-
4
-
5
-
6
-
7
-
8
-
9
-
10
-
11
-
12
-
13
-
14
-
15
-
16
-
17
-
18
-
19
-
20
-
21
-
22
-
23
-
24
-
25
-
26
-
27
-
28
-
29
-
30
-
31
-
32
-
33
-
34
-
35
-
36
-
37
-
38
-
39
-
40
-
41
-
42
-
43
-
44
-
45
-
46
-
47
-
48
-
49
-
50
-
51
-
52
-
53
-
54
-
55
-
56
-
57
-
58
-
59
-
60
-
61
-
62
-
63
-
64
-
65
-
66
-
67
-
68
-
69
-
 70
70 -
 71
71 -
 72
72 -
 73
73 -
 74
74 -
 75
75 -
 76
76 -
 77
77 -
 78
78 -
 79
79 -
 80
80 -
81
-
82
-
83
-
84
-
85
-
86
-
87
-
88
-
89
-
90
-
91
-
92
-
93
-
94
-
95
-
96
-
97
-
98
-
99
-
100
 |
 |
