Sony RDR-GX330 Operating Instructions - Page 83
Additional Information, Troubleshooting, Power, Picture - problem
 |
UPC - 027242692510
View all Sony RDR-GX330 manuals
Add to My Manuals
Save this manual to your list of manuals |
Page 83 highlights
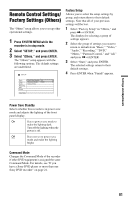
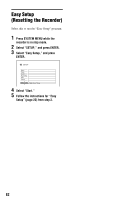
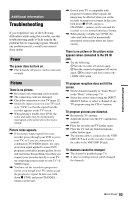
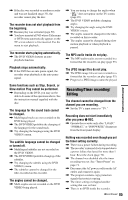
Additional Information Additional Information Troubleshooting If you experience any of the following difficulties while using the recorder, use this troubleshooting guide to help remedy the problem before requesting repairs. Should any problem persist, consult your nearest Sony dealer. Power The power does not turn on. , Check that the AC power cord is connected securely. , Even if your TV is compatible with progressive format (480p) signals, the image may be affected when you set the recorder to progressive format. In this case, hold down x STOP, and press CHANNEL - (minus) on the unit and the recorder is set to normal (interlace) format. , When playing a double-layer DVD, the video and audio may be momentarily interrupted at the point where the layers switch. There is no picture or the picture noise appears when connected to the DV IN jack. , Try the following: 1Turn the recorder off and on again. 2Turn the connected equipment off and on again. 3Disconnect and then connect the i.LINK cable again. Picture There is no picture. , Re-connect all connecting cords securely. , The connecting cords are damaged. , Check the connection to your TV (page 12). , Switch the input selector on your TV (such as to "VCR") so that the signal from the recorder appears on the TV screen. , When playing a double-layer DVD, the video and audio may be momentarily interrupted at the point where the layers switch. Picture noise appears. , If the picture output signal from your recorder passes through your VCR to get to your TV, or if you are connected to a combination TV/VIDEO player, the copyprotection signal applied to some DVD programs could affect picture quality. If you still experience this problem even when you connect your recorder directly to your TV, try connecting your recorder to your TV's S VIDEO input. , You have set the recorder to progressive format even though your TV cannot accept the progressive signal. In this case, hold down x STOP, and press CHANNEL - (minus) on the unit. TV program reception does not fill the screen. , Set the channel manually in "Tuner Preset" in the "Basic" setup (page 71). , Select the correct source using the INPUT SELECT button, or select a channel of any TV program using the CH +/- buttons. TV program pictures are distorted. , Reorient the TV antenna. , Adjust the picture (see the TV's instruction manual). , Place the recorder and TV farther apart. , Place the TV and any bunched antenna cables farther apart. , The antenna cable is connected to the VHF/ UHF OUT jack on the recorder. Connect the cable to the VHF/UHF IN jack. TV channels cannot be changed. , The channel is disabled (page 71). , A timer recording started, which changed the channels. ,continued 83
-
 1
1 -
2
-
3
-
4
-
5
-
6
-
7
-
8
-
9
-
10
-
11
-
12
-
13
-
14
-
15
-
16
-
17
-
18
-
19
-
20
-
21
-
22
-
23
-
24
-
25
-
26
-
27
-
28
-
29
-
30
-
31
-
32
-
33
-
34
-
35
-
36
-
37
-
38
-
39
-
40
-
41
-
42
-
43
-
44
-
45
-
46
-
47
-
48
-
49
-
50
-
51
-
52
-
53
-
54
-
55
-
56
-
57
-
58
-
59
-
60
-
61
-
62
-
63
-
64
-
65
-
66
-
67
-
68
-
69
-
70
-
71
-
72
-
73
-
74
-
75
-
76
-
77
-
 78
78 -
 79
79 -
 80
80 -
 81
81 -
 82
82 -
 83
83 -
 84
84 -
 85
85 -
 86
86 -
 87
87 -
 88
88 -
89
-
90
-
91
-
92
-
93
-
94
-
95
-
96
-
97
-
98
-
99
-
100
 |
 |