Sony SLV-M11HF Operating Instructions - Page 38
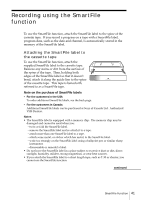
Operation when recording on this VCR, Before you start editing, To stop editing
 |
View all Sony SLV-M11HF manuals
Add to My Manuals
Save this manual to your list of manuals |
Page 38 highlights
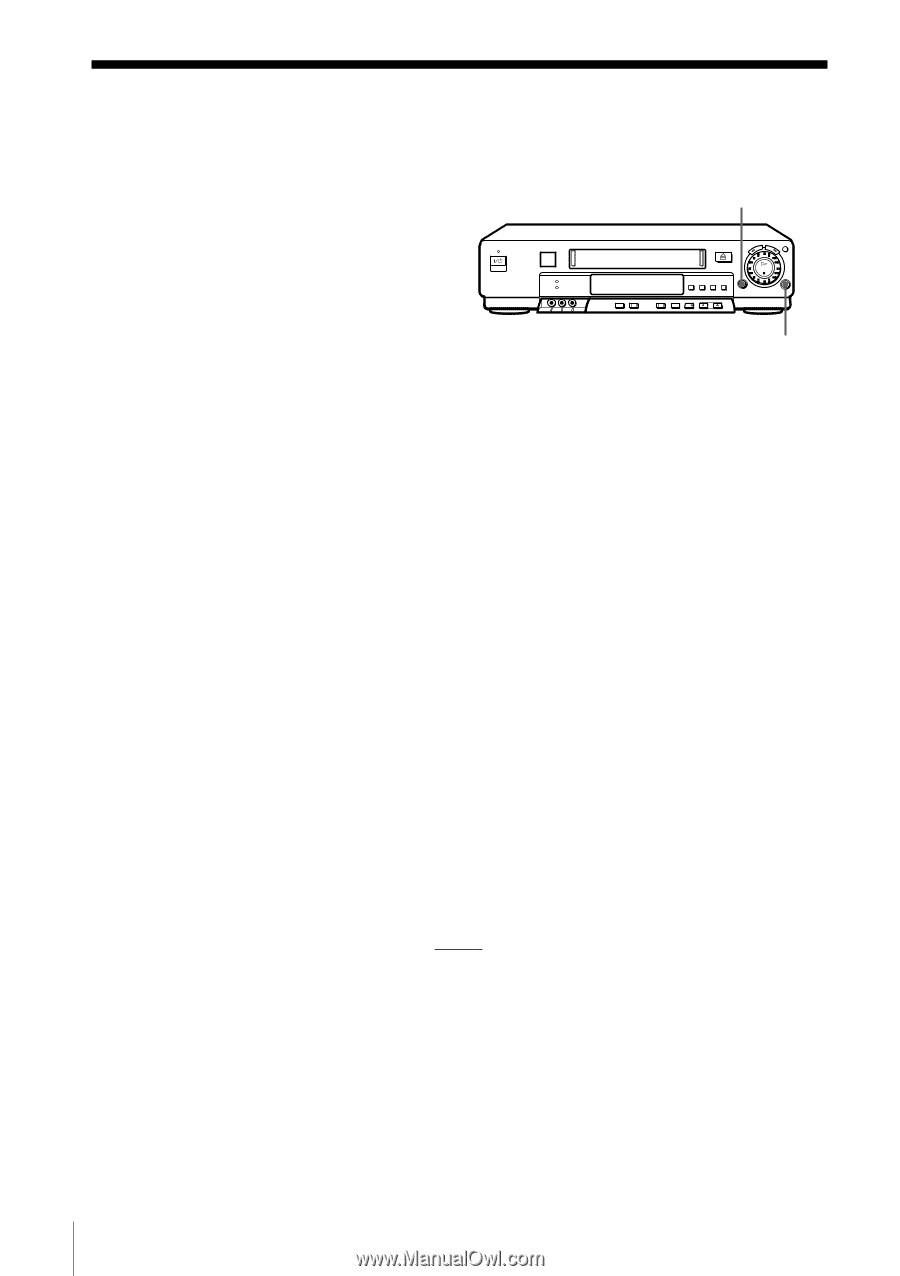
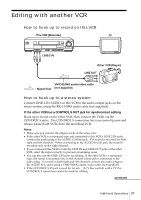
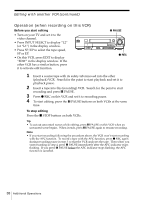
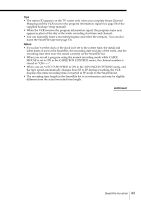
Editing with another VCR (continued) Operation (when recording on this VCR) Before you start editing • Turn on your TV and set it to the video channel. • Press INPUT SELECT to display "L2" (or "L1") in the display window. • Press SP/EP to select the tape speed, SP or EP. • On this VCR, press EDIT to display "EDIT" in the display window. If the other VCR has a similar button, press it to activate edit function. X PAUSE z REC 1 Insert a source tape with its safety tab removed into the other (playback) VCR. Search for the point to start playback and set it to playback pause. 2 Insert a tape into this (recording) VCR. Search for the point to start recording and press X PAUSE. 3 Press z REC on this VCR and set it to recording pause. 4 To start editing, press the X PAUSE buttons on both VCRs at the same time. To stop editing Press the x STOP buttons on both VCRs. Tip • To cut out unwanted scenes while editing, press X PAUSE on this VCR when an unwanted scene begins. When it ends, press X PAUSE again to resume recording. Note • If you start recording following the procedure above, the VCR won't start recording with the APC function. To record a tape with the APC function, press z REC again during recording pause in step 3 so that the VCR analyzes the tape. Then when you start recording in step 4, press X PAUSE immediately after the APC indicator stops flashing. If you press X PAUSE before the APC indicator stops flashing, the APC function is canceled. 38 Additional Operations
-
 1
1 -
2
-
3
-
4
-
5
-
6
-
7
-
8
-
9
-
10
-
11
-
12
-
13
-
14
-
15
-
16
-
17
-
18
-
19
-
20
-
21
-
22
-
23
-
24
-
25
-
26
-
27
-
28
-
29
-
30
-
31
-
32
-
 33
33 -
 34
34 -
 35
35 -
 36
36 -
 37
37 -
 38
38 -
 39
39 -
 40
40 -
 41
41 -
 42
42 -
 43
43 -
44
-
45
-
46
-
47
-
48
-
49
-
50
-
51
-
52
-
53
-
54
-
55
-
56
-
57
-
58
-
59
-
60
-
61
-
62
-
63
-
64
-
65
-
66
-
67
-
68
-
69
-
70
-
71
-
72
-
73
-
74
-
75
-
76
 |
 |