Sony SLV-N99 Operating Instructions - Page 17
Getting Started
 |
View all Sony SLV-N99 manuals
Add to My Manuals
Save this manual to your list of manuals |
Page 17 highlights
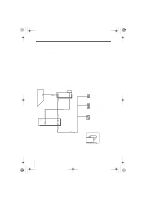
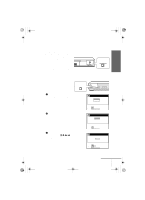
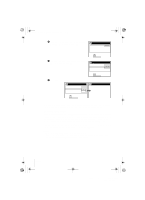
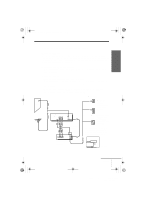
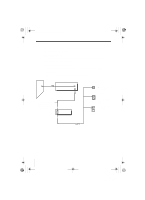
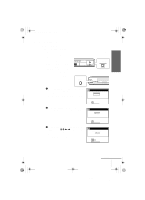
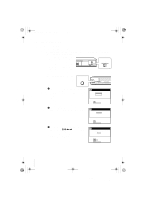
010GET.fm Page 17 Friday, November 30, 2001 1:47 PM Getting Started 4 The CABLE BOX CONTROL menu appears. Select ON. For details, see page 36. SET UP CABLE BOX CONTROL CABLE MOUSE BOX CODE NO. BOX OUTPUT CH ON OFF 5 Enter your digital satellite receiver code number and press OK. For details, see page 36. SELECT : NEXT : OK CANCEL : EASY SET UP SET UP CABLE BOX CONTROL CABLE MOUSE BOX CODE NO. BOX OUTPUT CH ON --- CH3 USE : 0-9 NEXT : OK CANCEL : EASY SET UP 6 Set your digital satellite receiver output channel (BOX OUTPUT CH) to LINE and press OK. SET UP CABLE BOX CONTROL CABLE MOUSE BOX CODE NO. BOX OUTPUT CH ON CH2 CH3 CH4 LINE SET UP SET UP IS DONE SELECT : NEXT : OK CANCEL : EASY SET UP You have now completed hookup. Automatic clock setting Once you've set up the VCR, it automatically sets the clock the first time you turn off the VCR. "ACS" (Auto Clock Set) will flash in the display window and search for a time signal provided by some TV channels. After that, whenever you turn off the VCR, it checks the time and adjusts the clock, even for Daylight Saving Time. If you want to use the timer to record right away, or if the channels in your area do not carry time signals, set the clock manually. For details, see page 33. Notes • If the clock is not set, "ACS" will flash in the display window whenever the VCR is turned off. During this time, the VCR will search for a time signal. • To successfully record a program from the digital satellite receiver, proceed as follows: - Leave the digital satellite receiver on all the time. - Turn off the display (menu screen, channel number, etc.) of the digital satellite receiver. - To record or receive locked channels, unlock the channel before the VCR starts recording. - To set pay-per-view programs in the timer setting, order the pay-per-view program before the VCR starts recording. - Some programs are copy protected. You cannot record these programs. Hookups 17 filename[010GET.fm] model name1[SLV-N99] [3-071-065-11(1)]
-
 1
1 -
2
-
3
-
4
-
5
-
6
-
7
-
8
-
9
-
10
-
11
-
 12
12 -
 13
13 -
 14
14 -
 15
15 -
 16
16 -
 17
17 -
 18
18 -
 19
19 -
 20
20 -
 21
21 -
 22
22 -
23
-
24
-
25
-
26
-
27
-
28
-
29
-
30
-
31
-
32
-
33
-
34
-
35
-
36
-
37
-
38
-
39
-
40
-
41
-
42
-
43
-
44
-
45
-
46
-
47
-
48
-
49
-
50
-
51
-
52
-
53
-
54
-
55
-
56
-
57
-
58
-
59
-
60
-
61
-
62
-
63
-
64
-
65
-
66
-
67
-
68
-
69
-
70
-
71
-
72
-
73
-
74
-
75
-
76
-
77
-
78
-
79
-
80
-
81
-
82
-
83
-
84
-
85
-
86
-
87
-
88
-
89
-
90
-
91
-
92
-
93
-
94
-
95
-
96
-
97
-
98
-
99
-
100
-
101
-
102
-
103
 |
 |
