Sony SLV-N99 Operating Instructions - Page 90
Editing with another VCR
 |
View all Sony SLV-N99 manuals
Add to My Manuals
Save this manual to your list of manuals |
Page 90 highlights
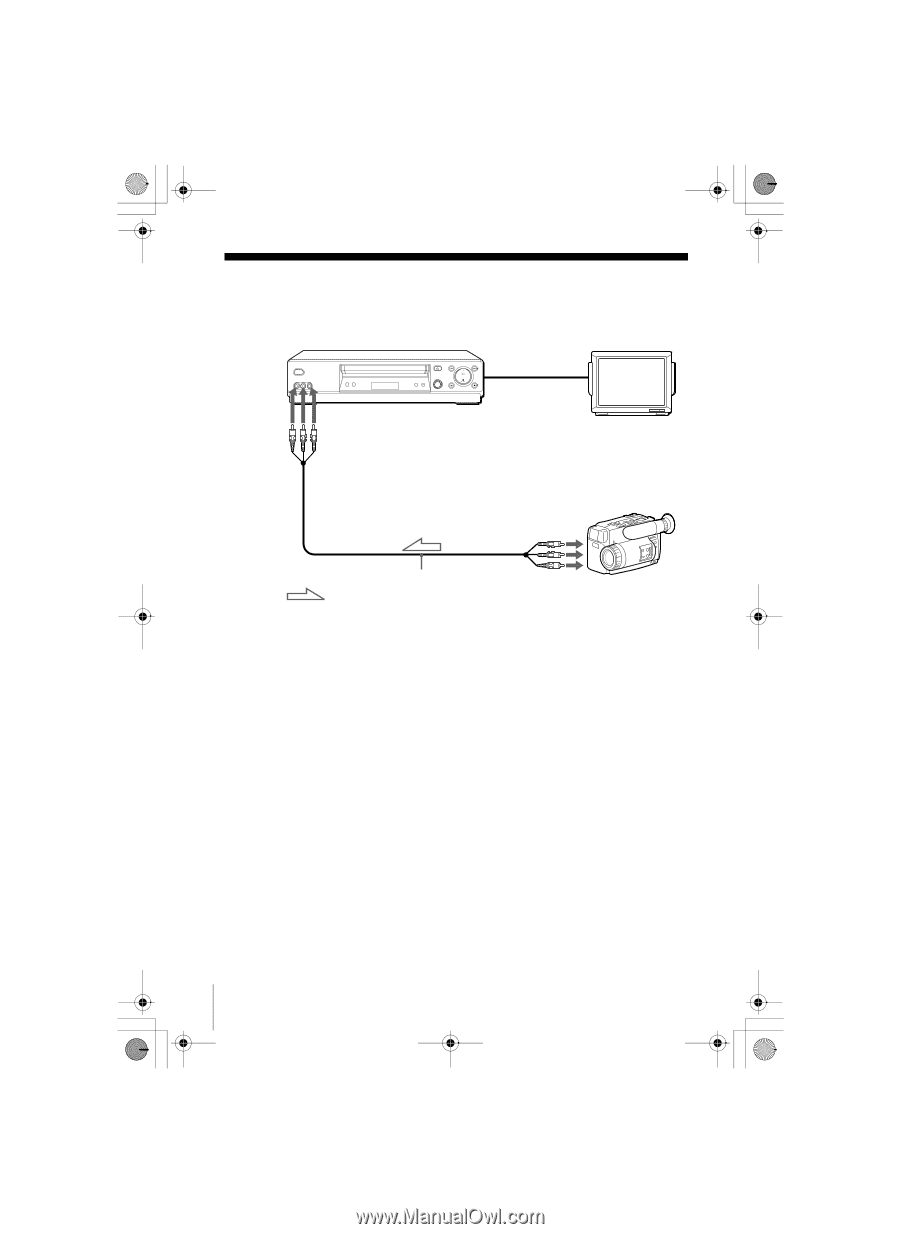
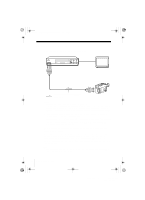
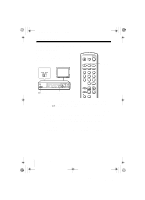
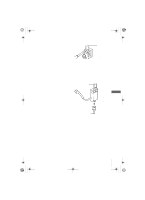
010ADDO.fm Page 90 Friday, November 30, 2001 1:54 PM Editing with another VCR How to connect to record on this VCR This VCR (Recorder) TV LINE-2 IN Other VCR (Player) LINE OUT Audio/video cable (not supplied) : Signal flow Notes • Make sure you connect the plugs to jacks of the same color. • If the other VCR is a monaural type and connected to this VCR's LINE-2 IN jacks, connect the audio plug to the AUDIO L (white) jack. The sound is recorded on both right and left channels. If you connect to the AUDIO R (red) jack, the sound is recorded only on the right channel. • If you connected this VCR to both the LINE IN and LINE OUT jacks of the other VCR, select the input correctly to prevent a humming noise. • You can use the LINE-1 IN jacks for editing. If the other VCR is a monaural type, the sound is recorded only on the channel whose jack is connected to the audio plug. To record on both right and left channels, connect the audio plugs to the AUDIO R/L jacks using a VMC910HG audio/video cable (not supplied). How to record on another VCR that has a CONTROL S OUT jack for synchronized editing Connect to record on the other VCR using the audio/video cable, then connect the VCRs via the CONTROL S jacks using a Control S cable. The CONTROL S connection lets you control (pause and release pause) both VCRs from the other VCR. Connect the CONTROL S OUT jack of the other VCR to the CONTROL S IN jack on this VCR. Note • If the CONTROL S IN jack is used for Control S connection with a TV, the CONTROL S connection cannot be used for editing. 90 Editing with another VCR filename[010ADDO.fm] model name1[SLV-N99] [3-071-065-11(1)]
-
 1
1 -
2
-
3
-
4
-
5
-
6
-
7
-
8
-
9
-
10
-
11
-
12
-
13
-
14
-
15
-
16
-
17
-
18
-
19
-
20
-
21
-
22
-
23
-
24
-
25
-
26
-
27
-
28
-
29
-
30
-
31
-
32
-
33
-
34
-
35
-
36
-
37
-
38
-
39
-
40
-
41
-
42
-
43
-
44
-
45
-
46
-
47
-
48
-
49
-
50
-
51
-
52
-
53
-
54
-
55
-
56
-
57
-
58
-
59
-
60
-
61
-
62
-
63
-
64
-
65
-
66
-
67
-
68
-
69
-
70
-
71
-
72
-
73
-
74
-
75
-
76
-
77
-
78
-
79
-
80
-
81
-
82
-
83
-
84
-
 85
85 -
 86
86 -
 87
87 -
 88
88 -
 89
89 -
 90
90 -
 91
91 -
 92
92 -
 93
93 -
 94
94 -
 95
95 -
96
-
97
-
98
-
99
-
100
-
101
-
102
-
103
 |
 |